
Menu settings on iCHEF backend will be updated to GrabFood ordering page after integrated. There are 3 parts of GrabFood menu settings available on iCHEF backend: menu hours, products, and modifiers.

Customers on GrabFood are able to place orders depends on your opening hours. If you offer different menus throughout the day (e.g. breakfast, lunch, dinner), you can divide your opening hours into maximum 3 menu hours.
- Go to Integration Settings > GrabFood integration > Menu hour setting
- Click [+ Add menu hour]
- Enter [Menu Name]
- Click [+ Add menu hour] and create a time period
- Click [Save] to complete

| Column | Description |
|---|---|
| Menu Name | Give the menu a recognizable name. (e.g. Lunch, Weekend) |
| Open 24 hours | Customers can place orders on GrabFood for 24H. |
| Start / End Time | The available time period for this menu hour. |
| Service Day | The available day for this menu hour. |
You can add 2 rules to cover your overnight opening hours. Here’s an example of opening for 23:00-02:00
- Menu Hours 1: 23:00-23:59
- Menu Hours 2: 00:00-02:00

Product Settings
By importing existing items, you are able to create a GrabFood menu easily on iCHEF backend.
Create Category
- Go to Integration Settings > GrabFood Integration > Product Settings
- Click [+ Add product category]
- Enter a category name
- Select the menu hours serving this category

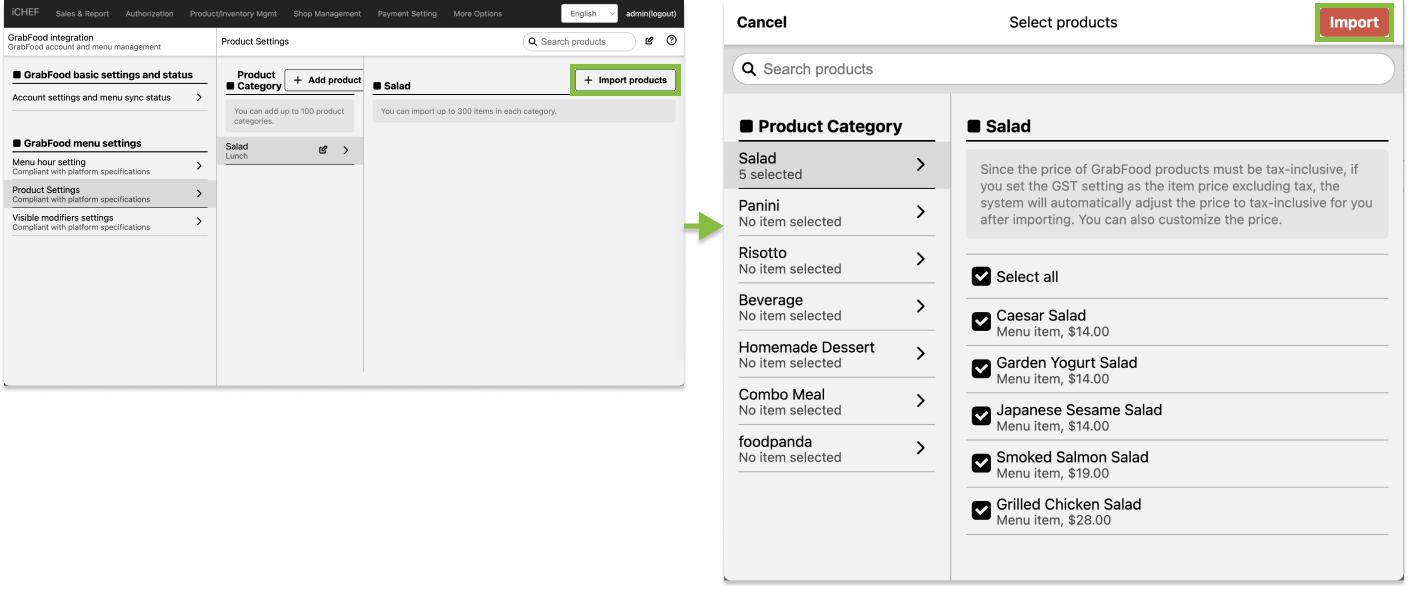
Import Items
- Go to Integration Settings > GrabFood Integration > Product Settings
- Select a category to import items
- Click [+ Import products] and select items from existing menu
- Repeat the steps to complete your menu on GrabFood
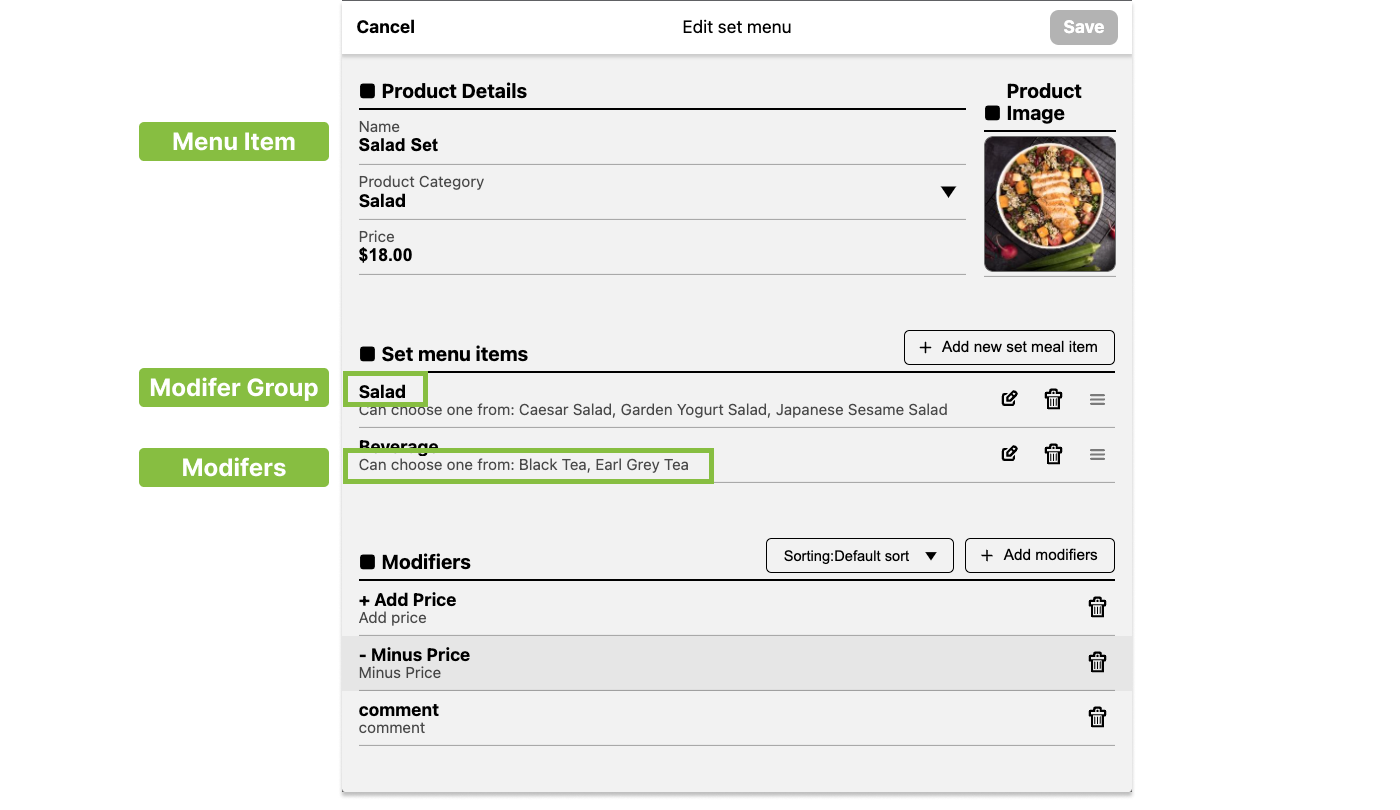
A set menu was created in a 3-layer structure on iCHEF backend. However, GrabFood only supports a menu of 2-layer structure. Therefore, importing a set menu requires changing the item format.

- Set Menu → Menu Item
- Set Menu Item Options → Modifiers
- Set Menu Item Category → Modifier Group
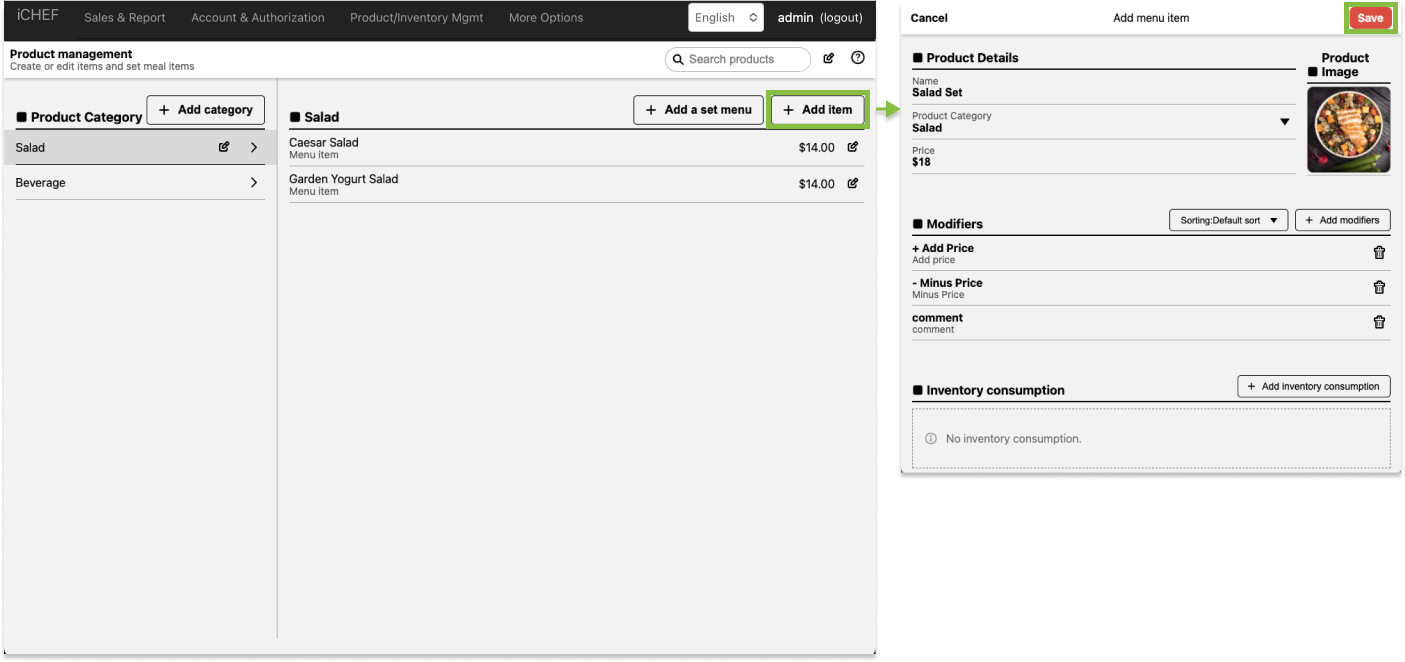
- Go to Product Management
- Select the set menu and note down set menu details
- Click [+ Add Item] to create a set menu for GrabFood
- Go to Item Modifiers
- Click [+ Add Modifier] to create item options

- Switch to Modifier Group and click [+ Add Group]
- Name the group as your option category
- Select the item options and assign this group to the set menu created
- Toggle on [Must be selected]

Manage Items
Click on the pen icon ![]() to edit the listing, category, or items.
to edit the listing, category, or items.

| Action | Description | |
|---|---|---|
| A | Reorder products | Change the item listing order displayed on GrabFood menu. |
| A | Delete multiple products | Select to remove multiple items / categories from GrabFood menu. |
| B | Edit category | Rename the category or change serving hours |
| B | Delete category | Remove all items in this category from GrabFood menu. |
| C | Edit product | Customize the name, description, and item image displayed on GrabFood. |
| C | Delete product | Remove this item from GrabFood menu. |
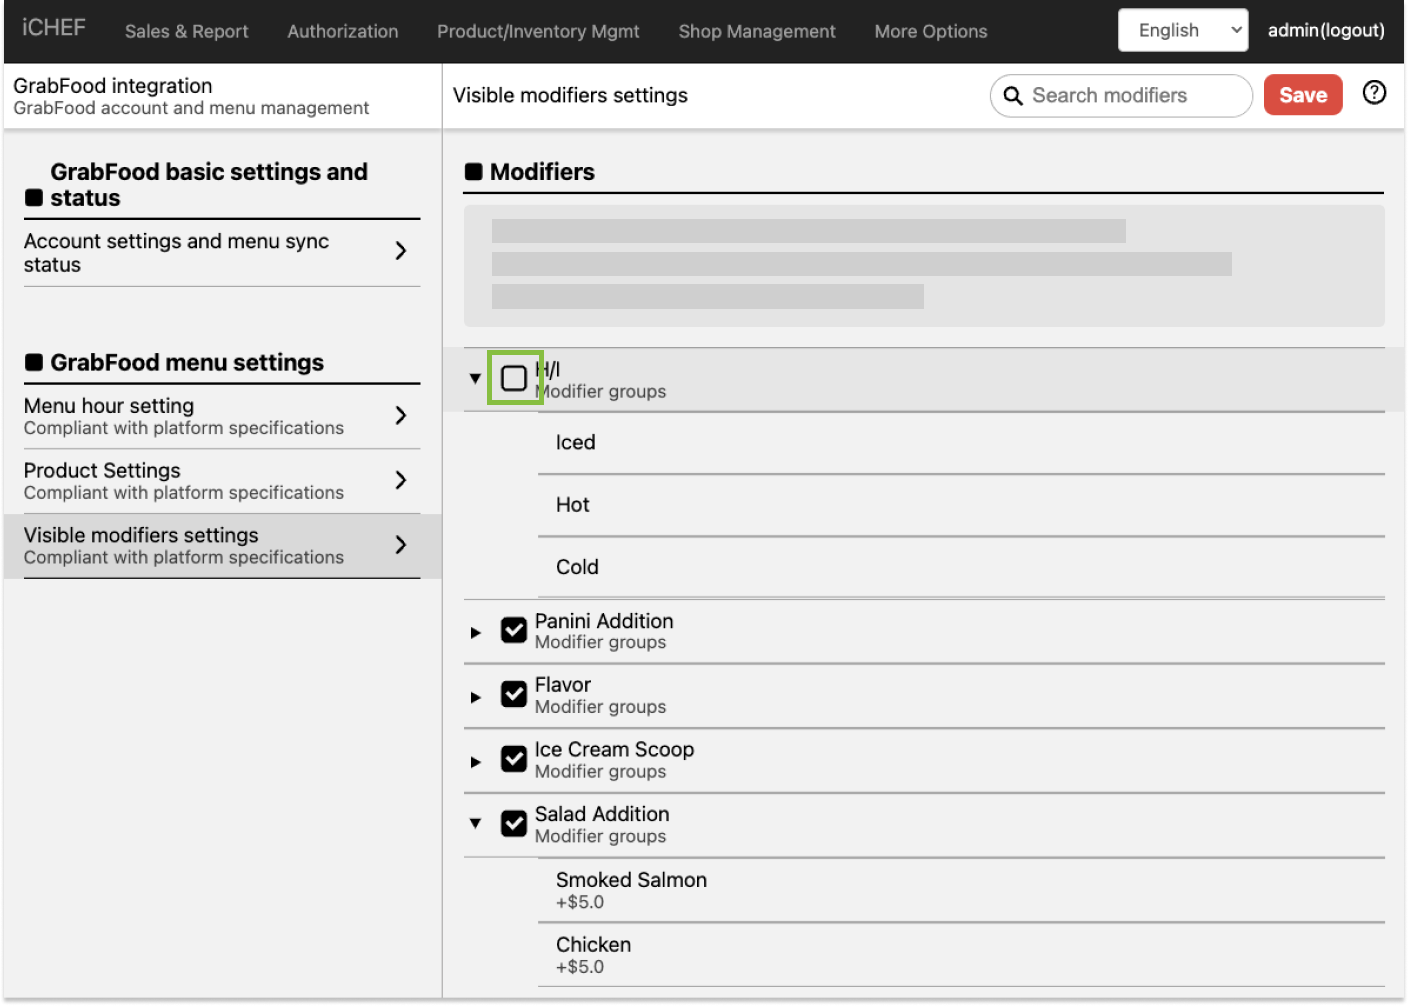
Visible Modifiers Settings
All the modifiers will be imported and enabled by default. You can disable the modifier that you don’t want to display on GrabFood by clicking to uncheck.
To save menu changes and update your GrabFood menu, please [Update Menu] in iCHEF POS app. You can check the menu status on Integration Settings > GrabFood integration > Account settings and menu sync status.

If you are in the process of integrating with GrabFood, after completing all menu settings on iCHEF backend, please inform iCHEF team to continue the integration process.