
This article details all of the settings regarding the rules for pre-cut sticker one by one, clearly illustrating how the tickets will look like after these settings are applied.
If you are unsure which printer to set up printing rules for, we suggest you refer to [Printer Settings] Guide to Printer Settings first.
Print Types
Pre-cut sticker
To facilitate the process of serving meals, iCHEF POS will automatically distribute the tickets of meal preparation to different areas of meal preparation according to your settings.
Create Pre-cut Sticker Rule
- Go to Shop Management > Printer Settings
- Select a pre-cut sticker printer
- Click [New Rule] and select [Adhesive Label]

Settings of Rules
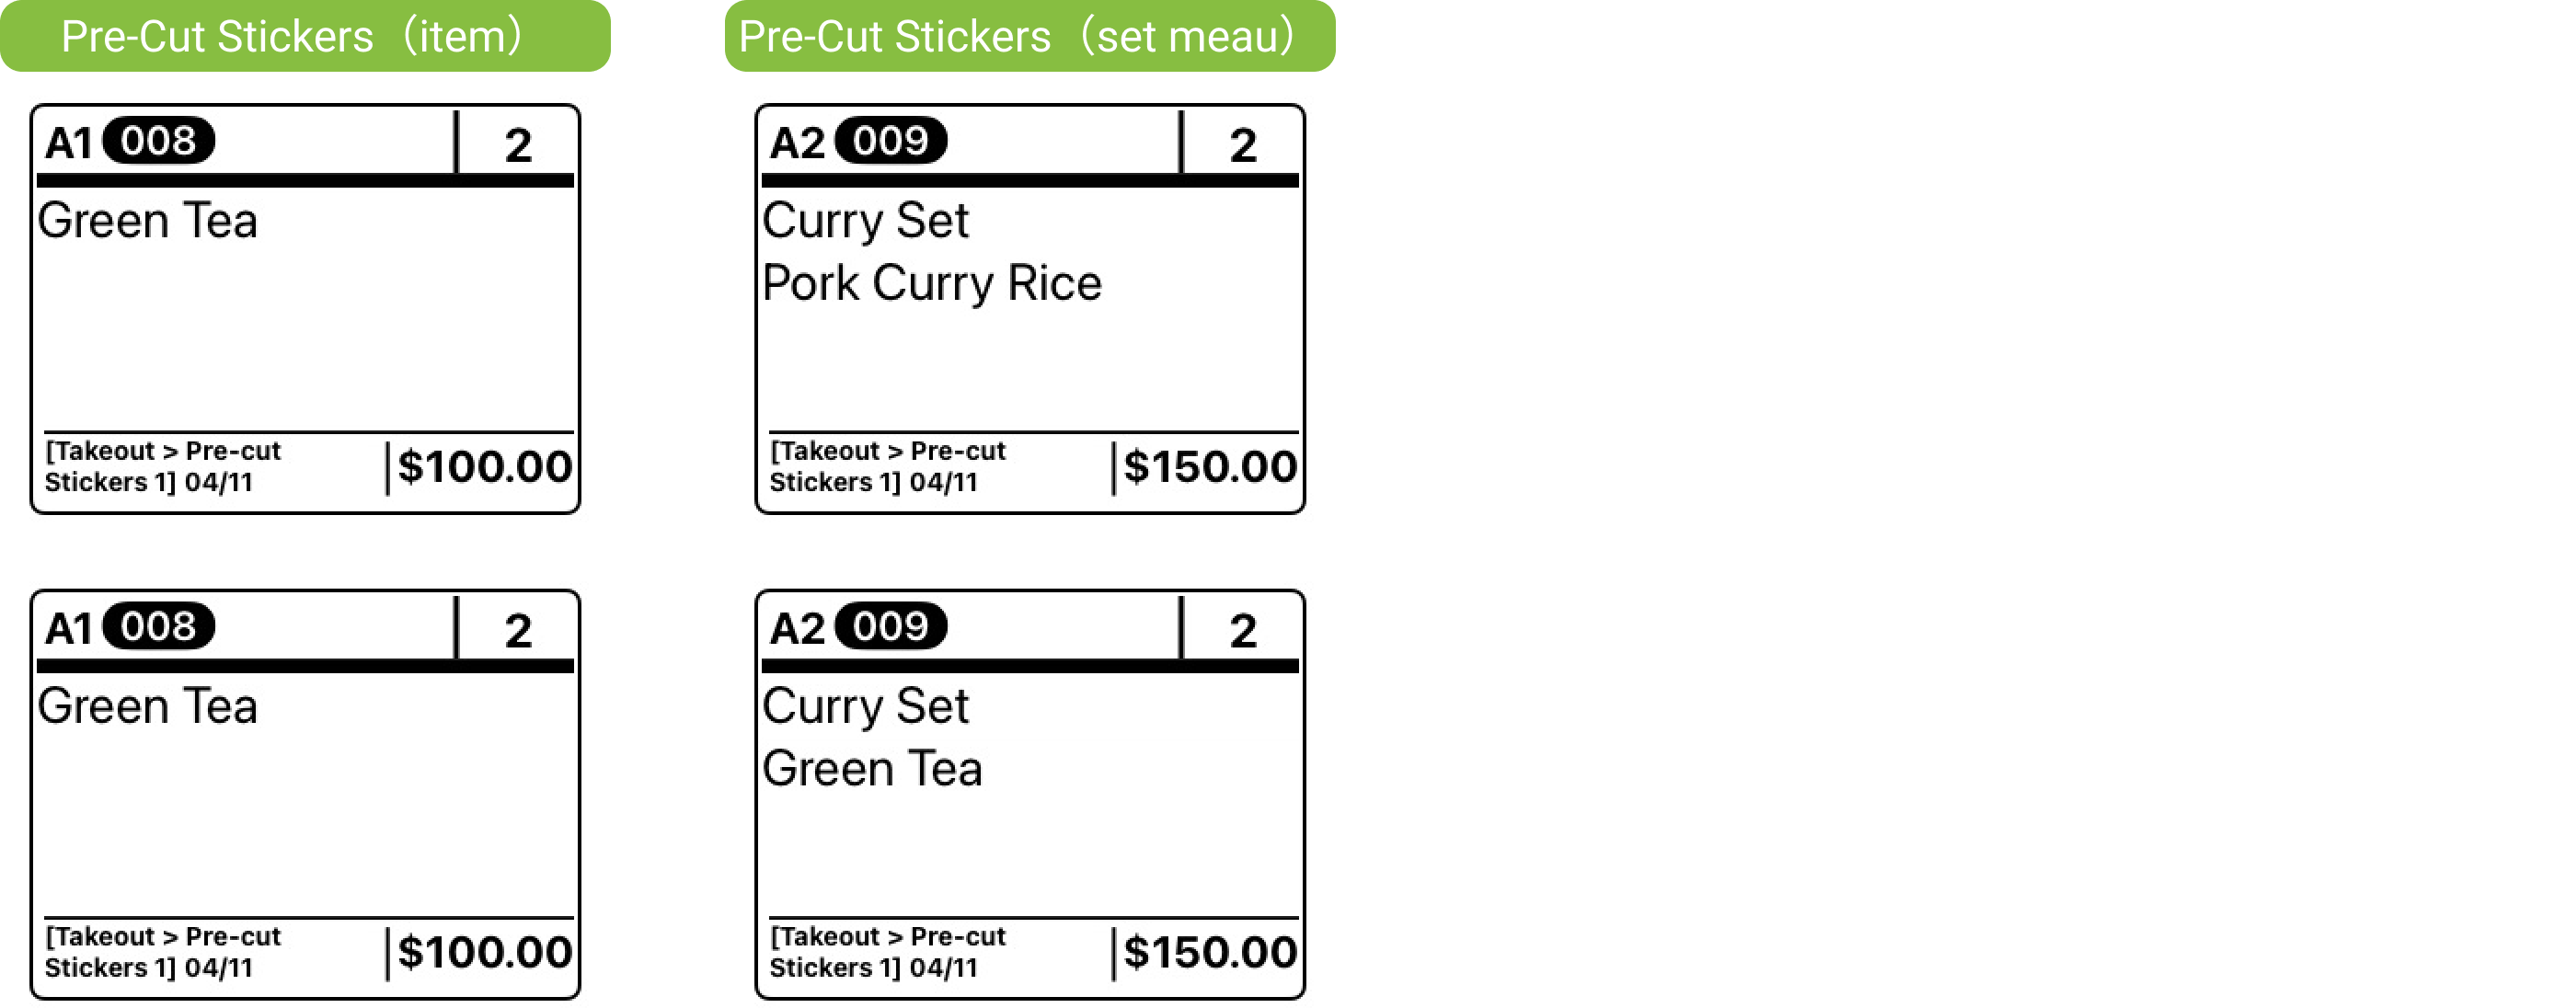
The system will print one pre-cut sticker for each item. It can be plastered on containers for customers to identify the items easily.
Basic Information
Ticket Name

Print Timing

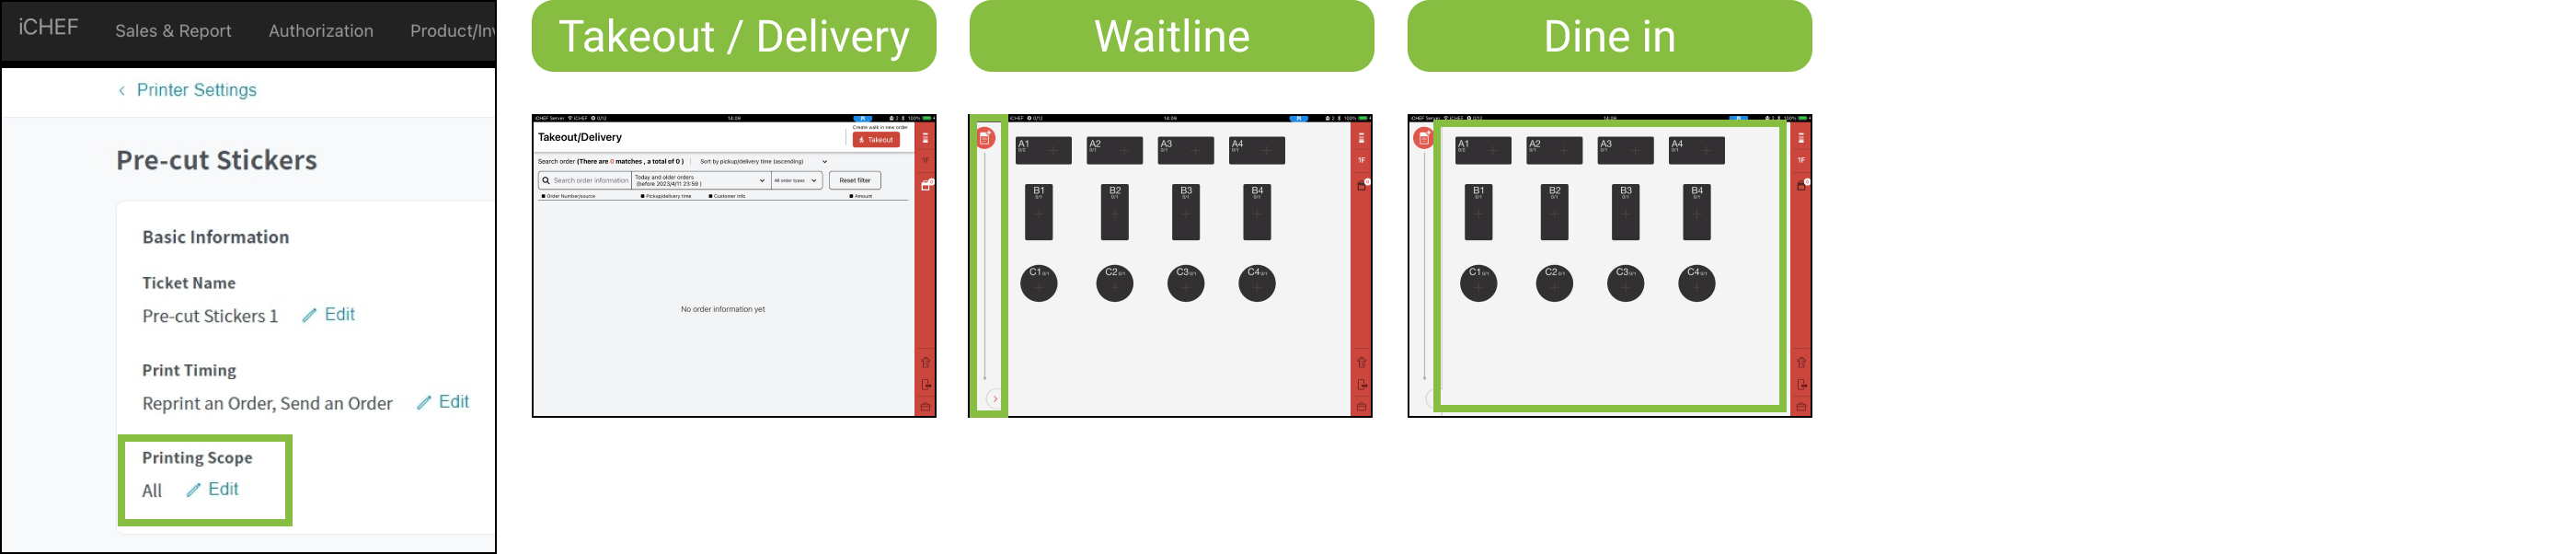
Printing Scope
Uncounted Items
If you have selected some uncounted items, such as bags, the quantity of those items will not be counted in the total quantity.

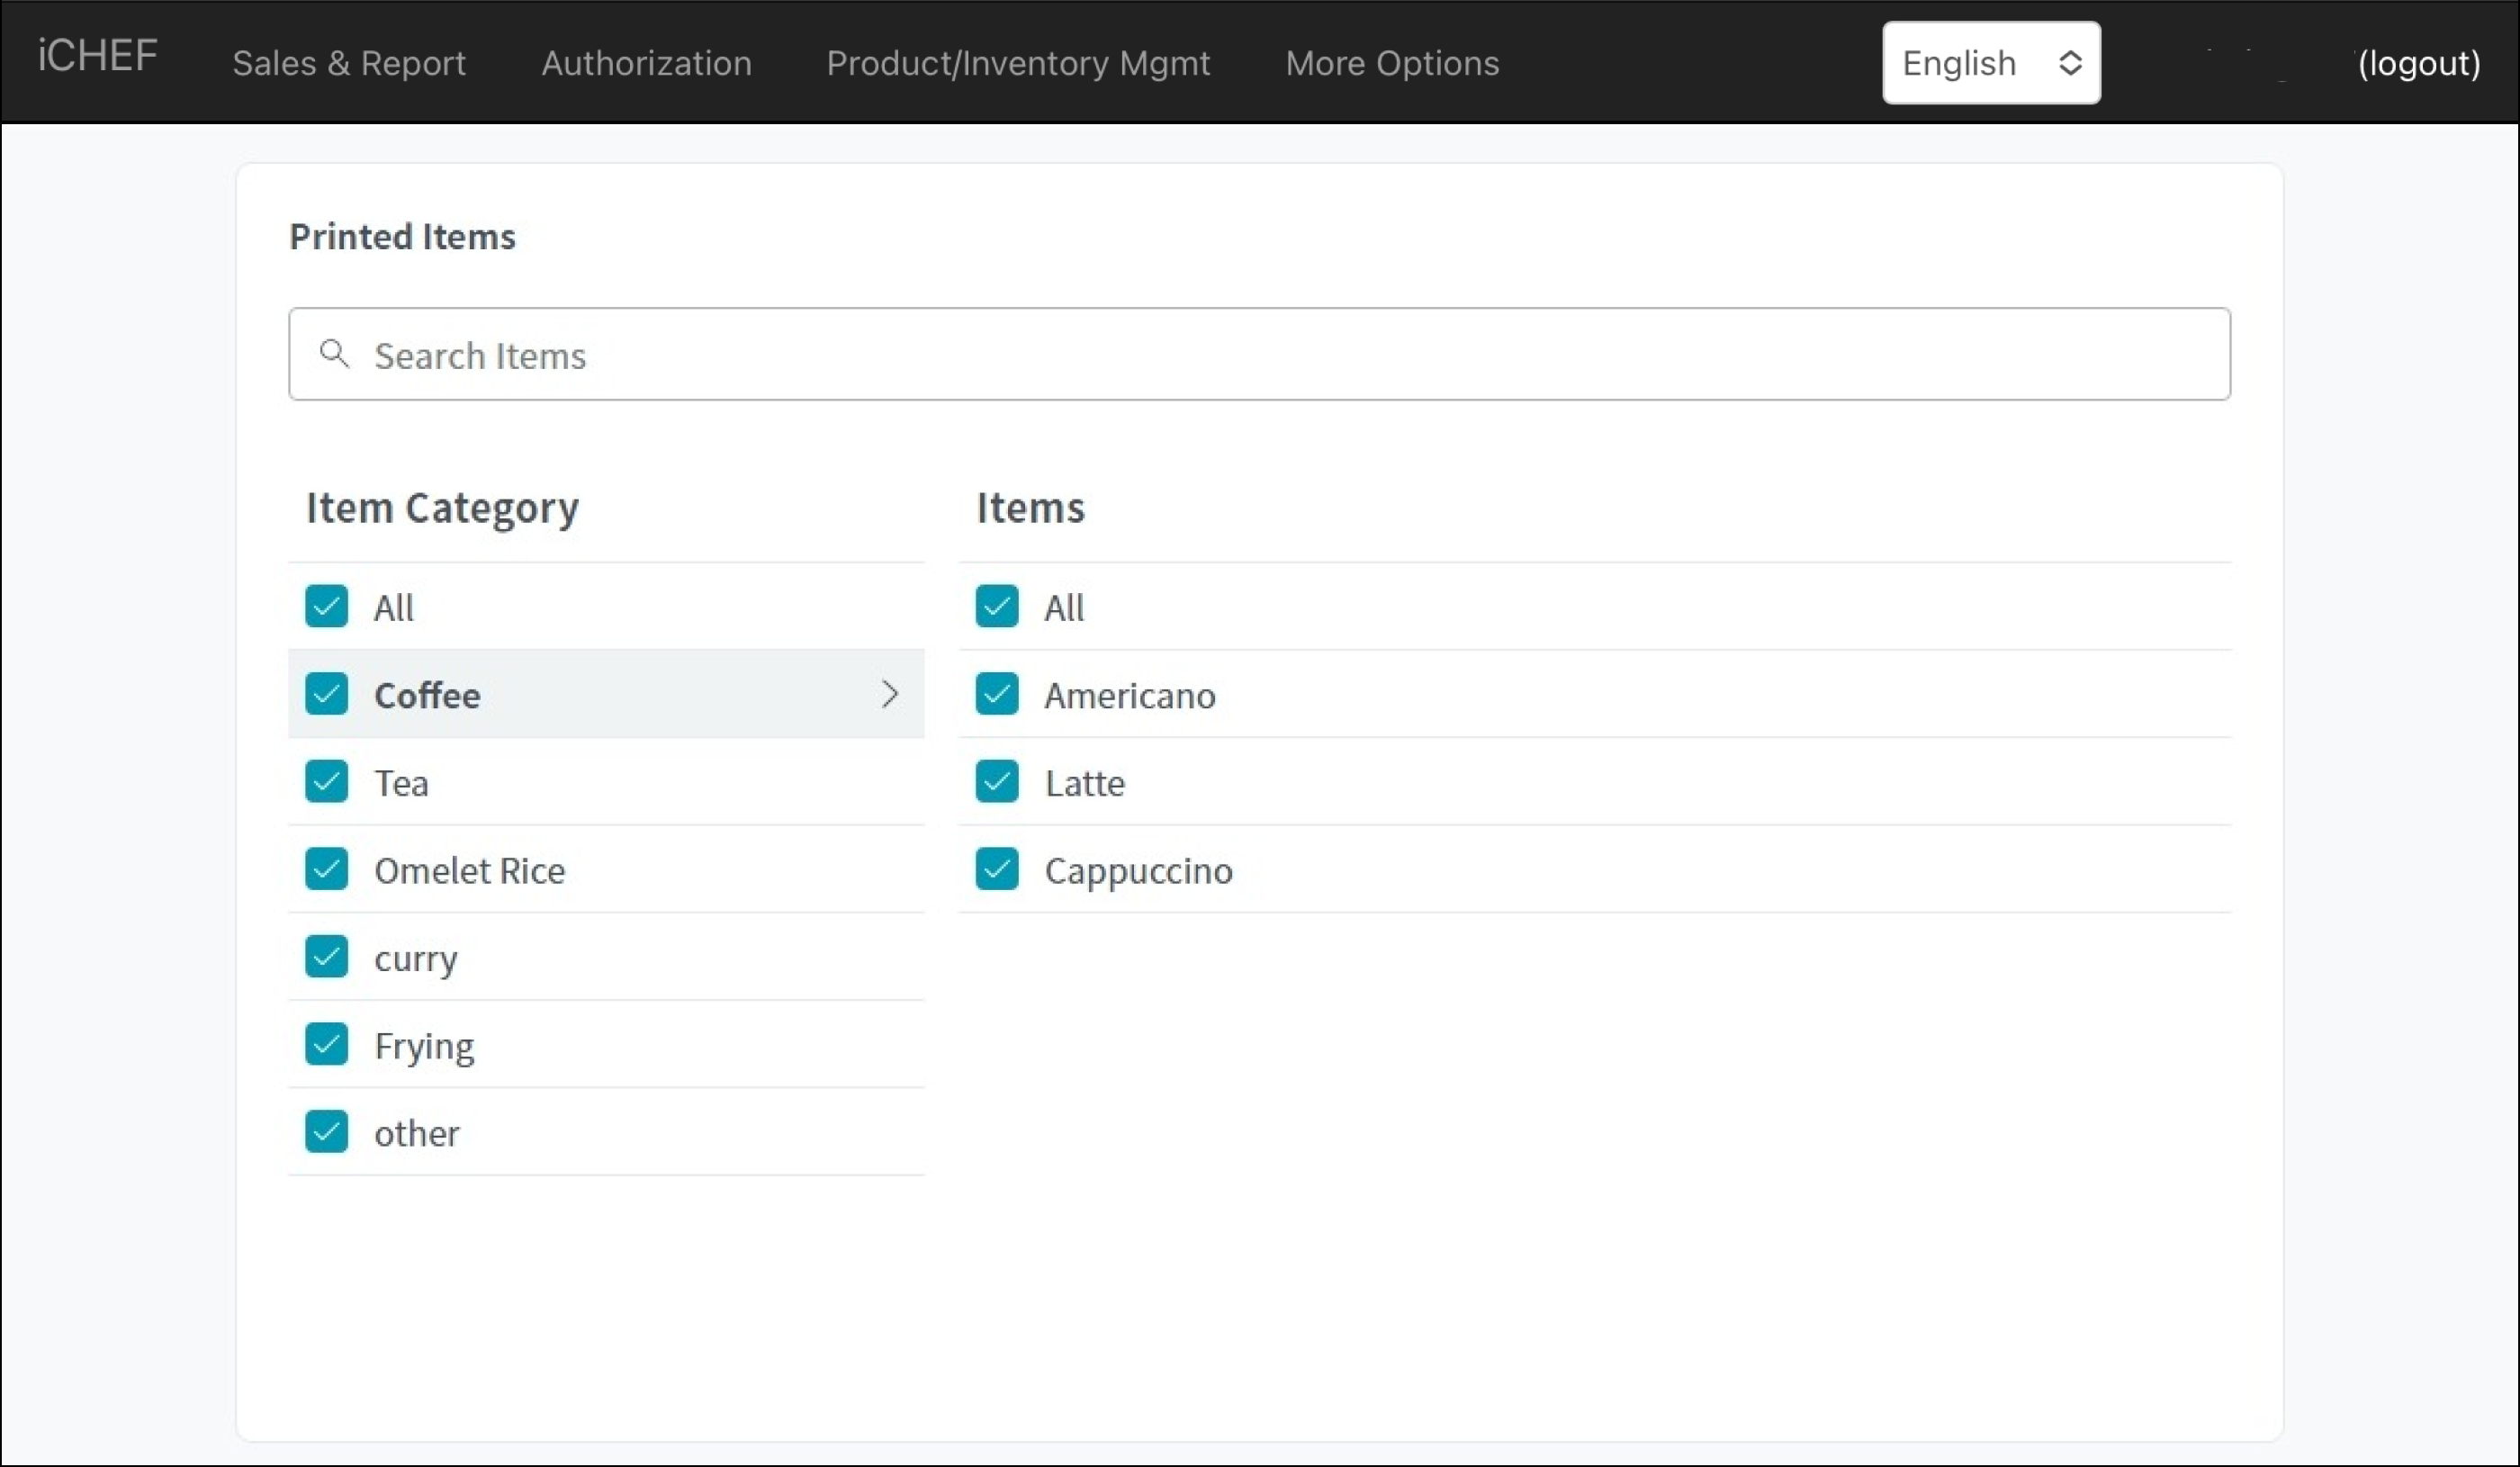
Printed Items
Select items
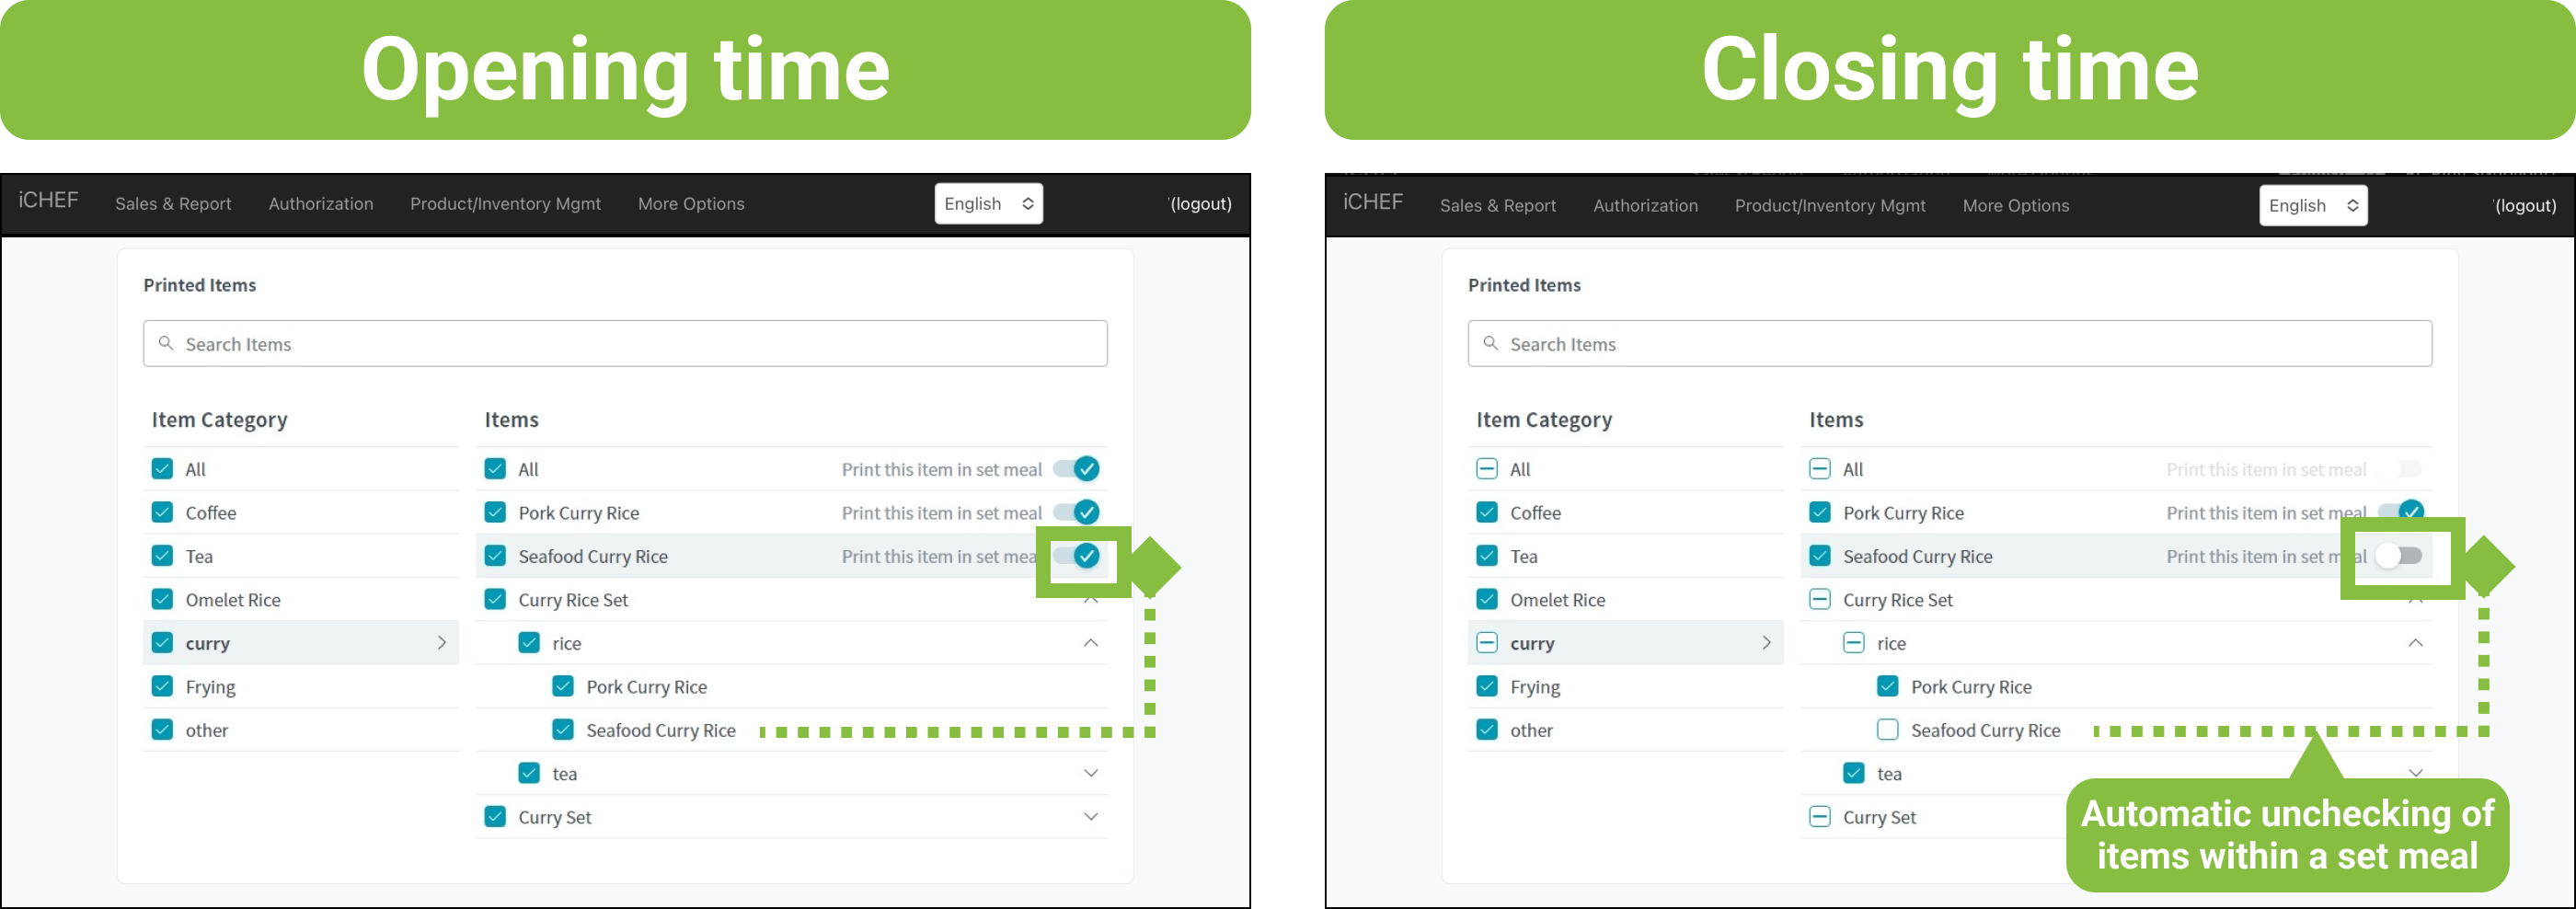
In the settings of printed items, only the selected items will be shown on the ticket.
As illustrated in the image above, when there are Curry Set and Seafood Curry Rice in the submitted order, the system will only print “Curry Set” pre-cut sticker.
How to Edit
To adjust the existing printing rules, you can simply manage it through the editing function according to your needs without deleting the old one.
- Go to Shop Management > Printer Settings
- Select the printer for pre-cut sticker rule
- Click the rule or the
 icon
icon
