This article details all of the settings regarding the rules for guest check one by one, clearly illustrating how the tickets will look like after these settings are applied.
If you are unsure which printer to set up printing rules for, we suggest you refer to [Printer Settings] Guide to Printer Settings first.
Print Types
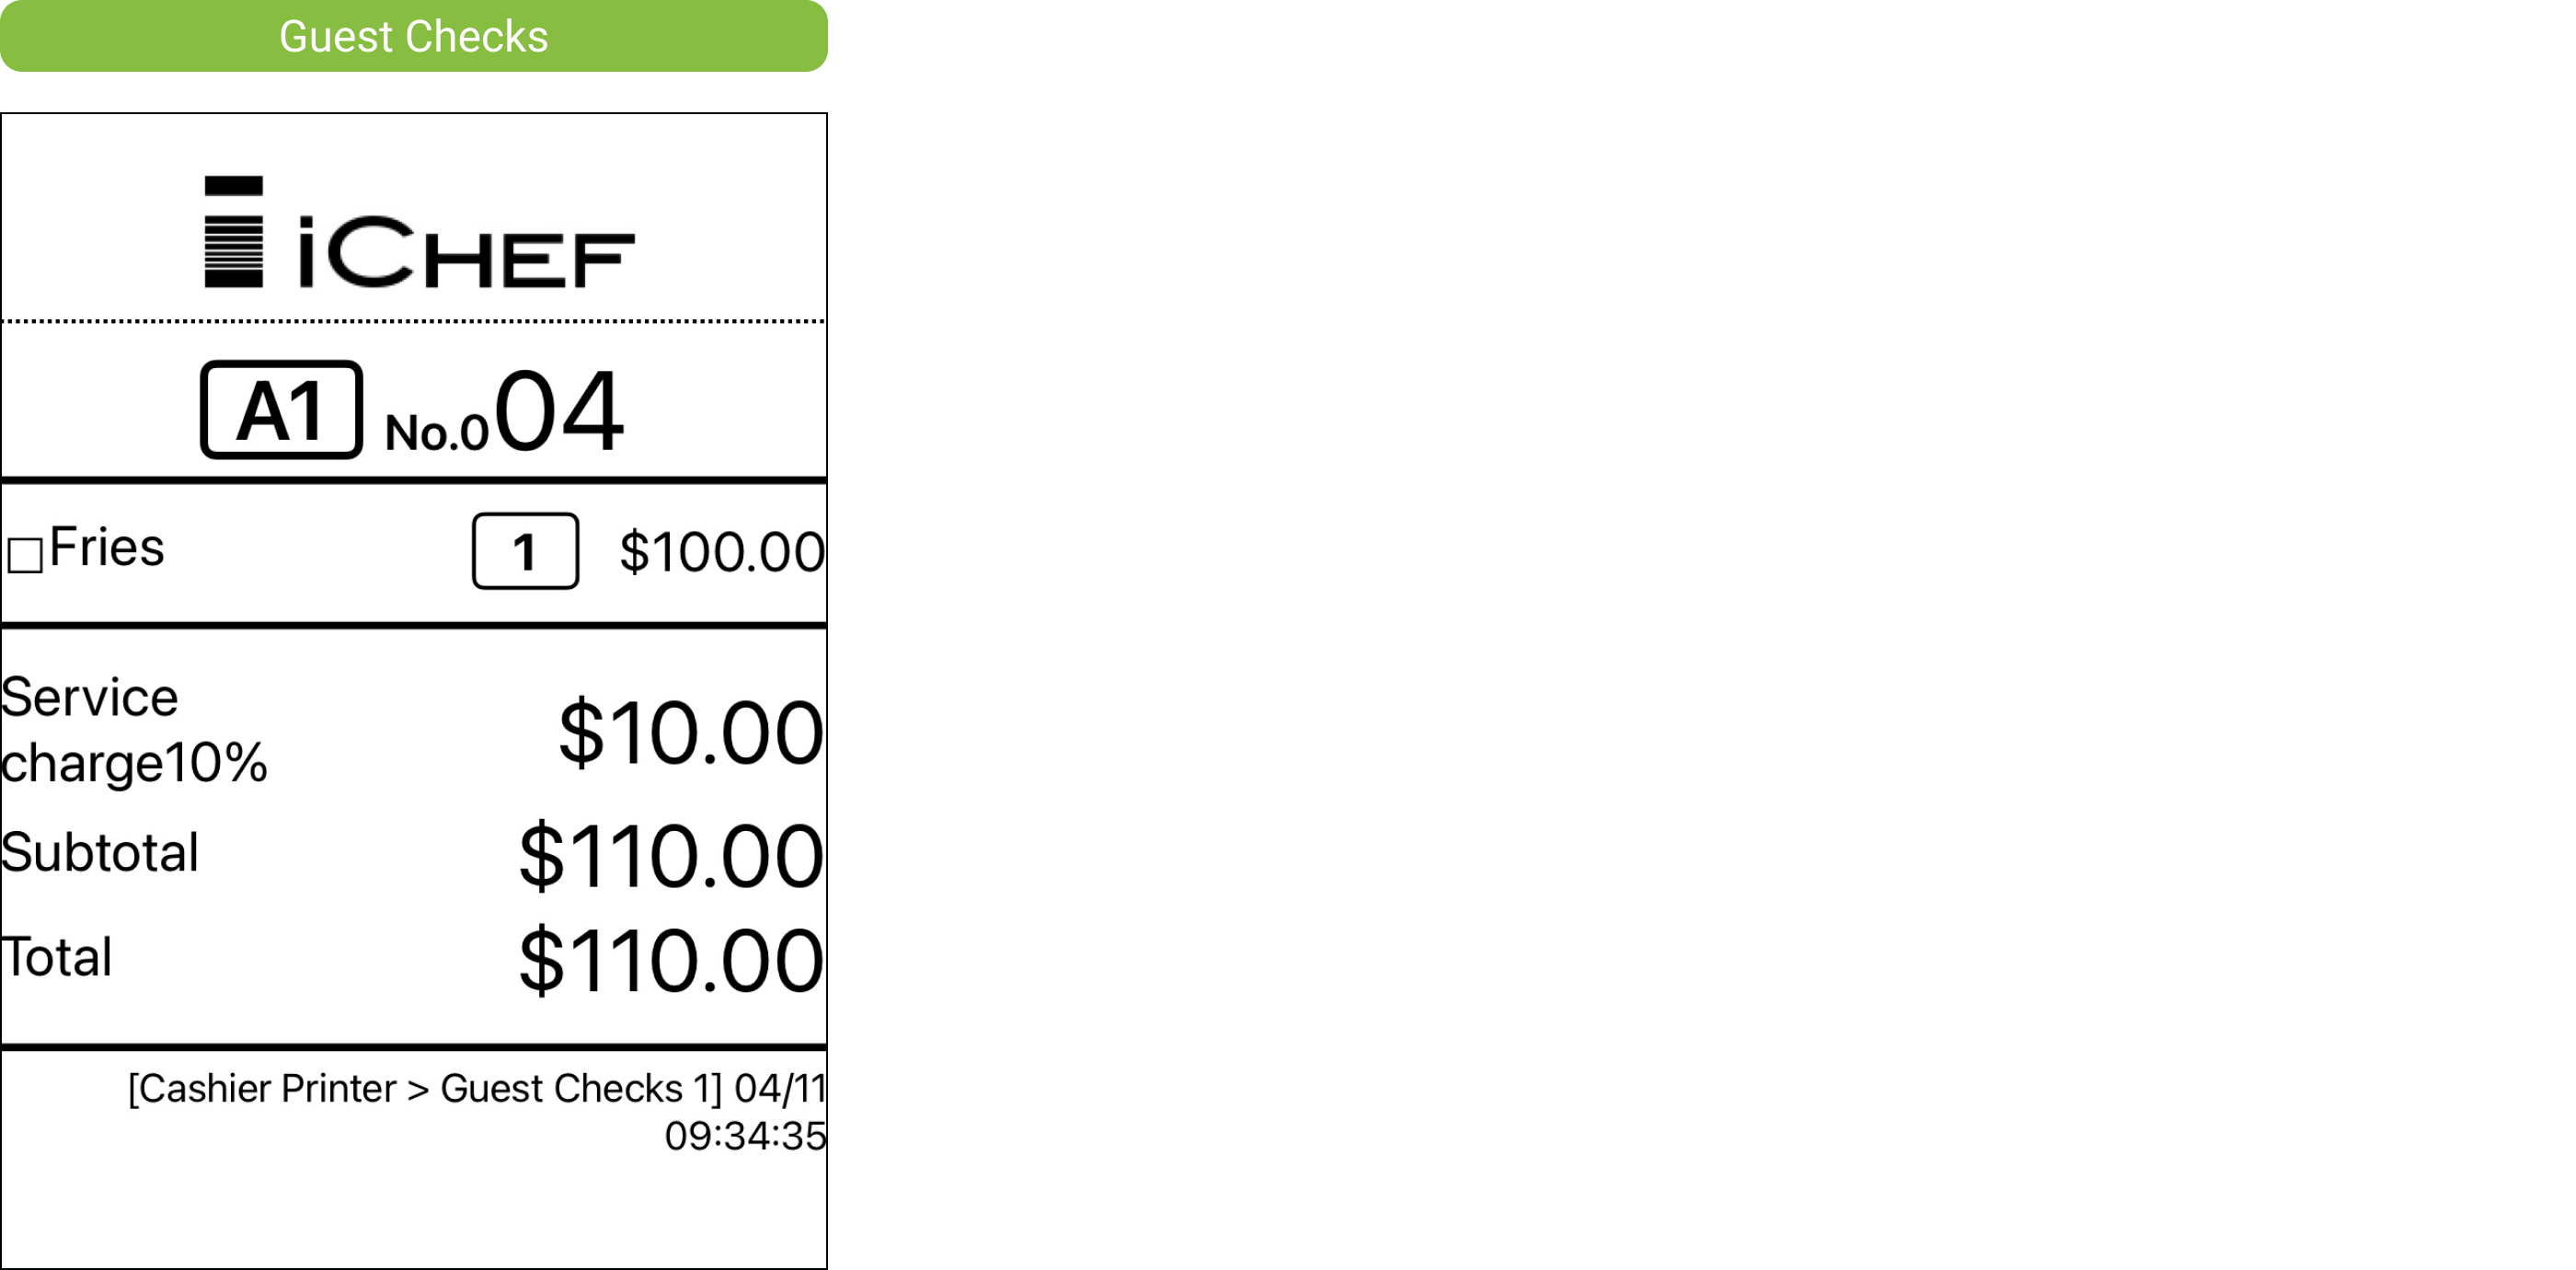
Guest Check
It helps on-site staff and customers confirm the status of meals being served. Customers can also use it to view order details and the total amount, which includes service charges (discounts not included).
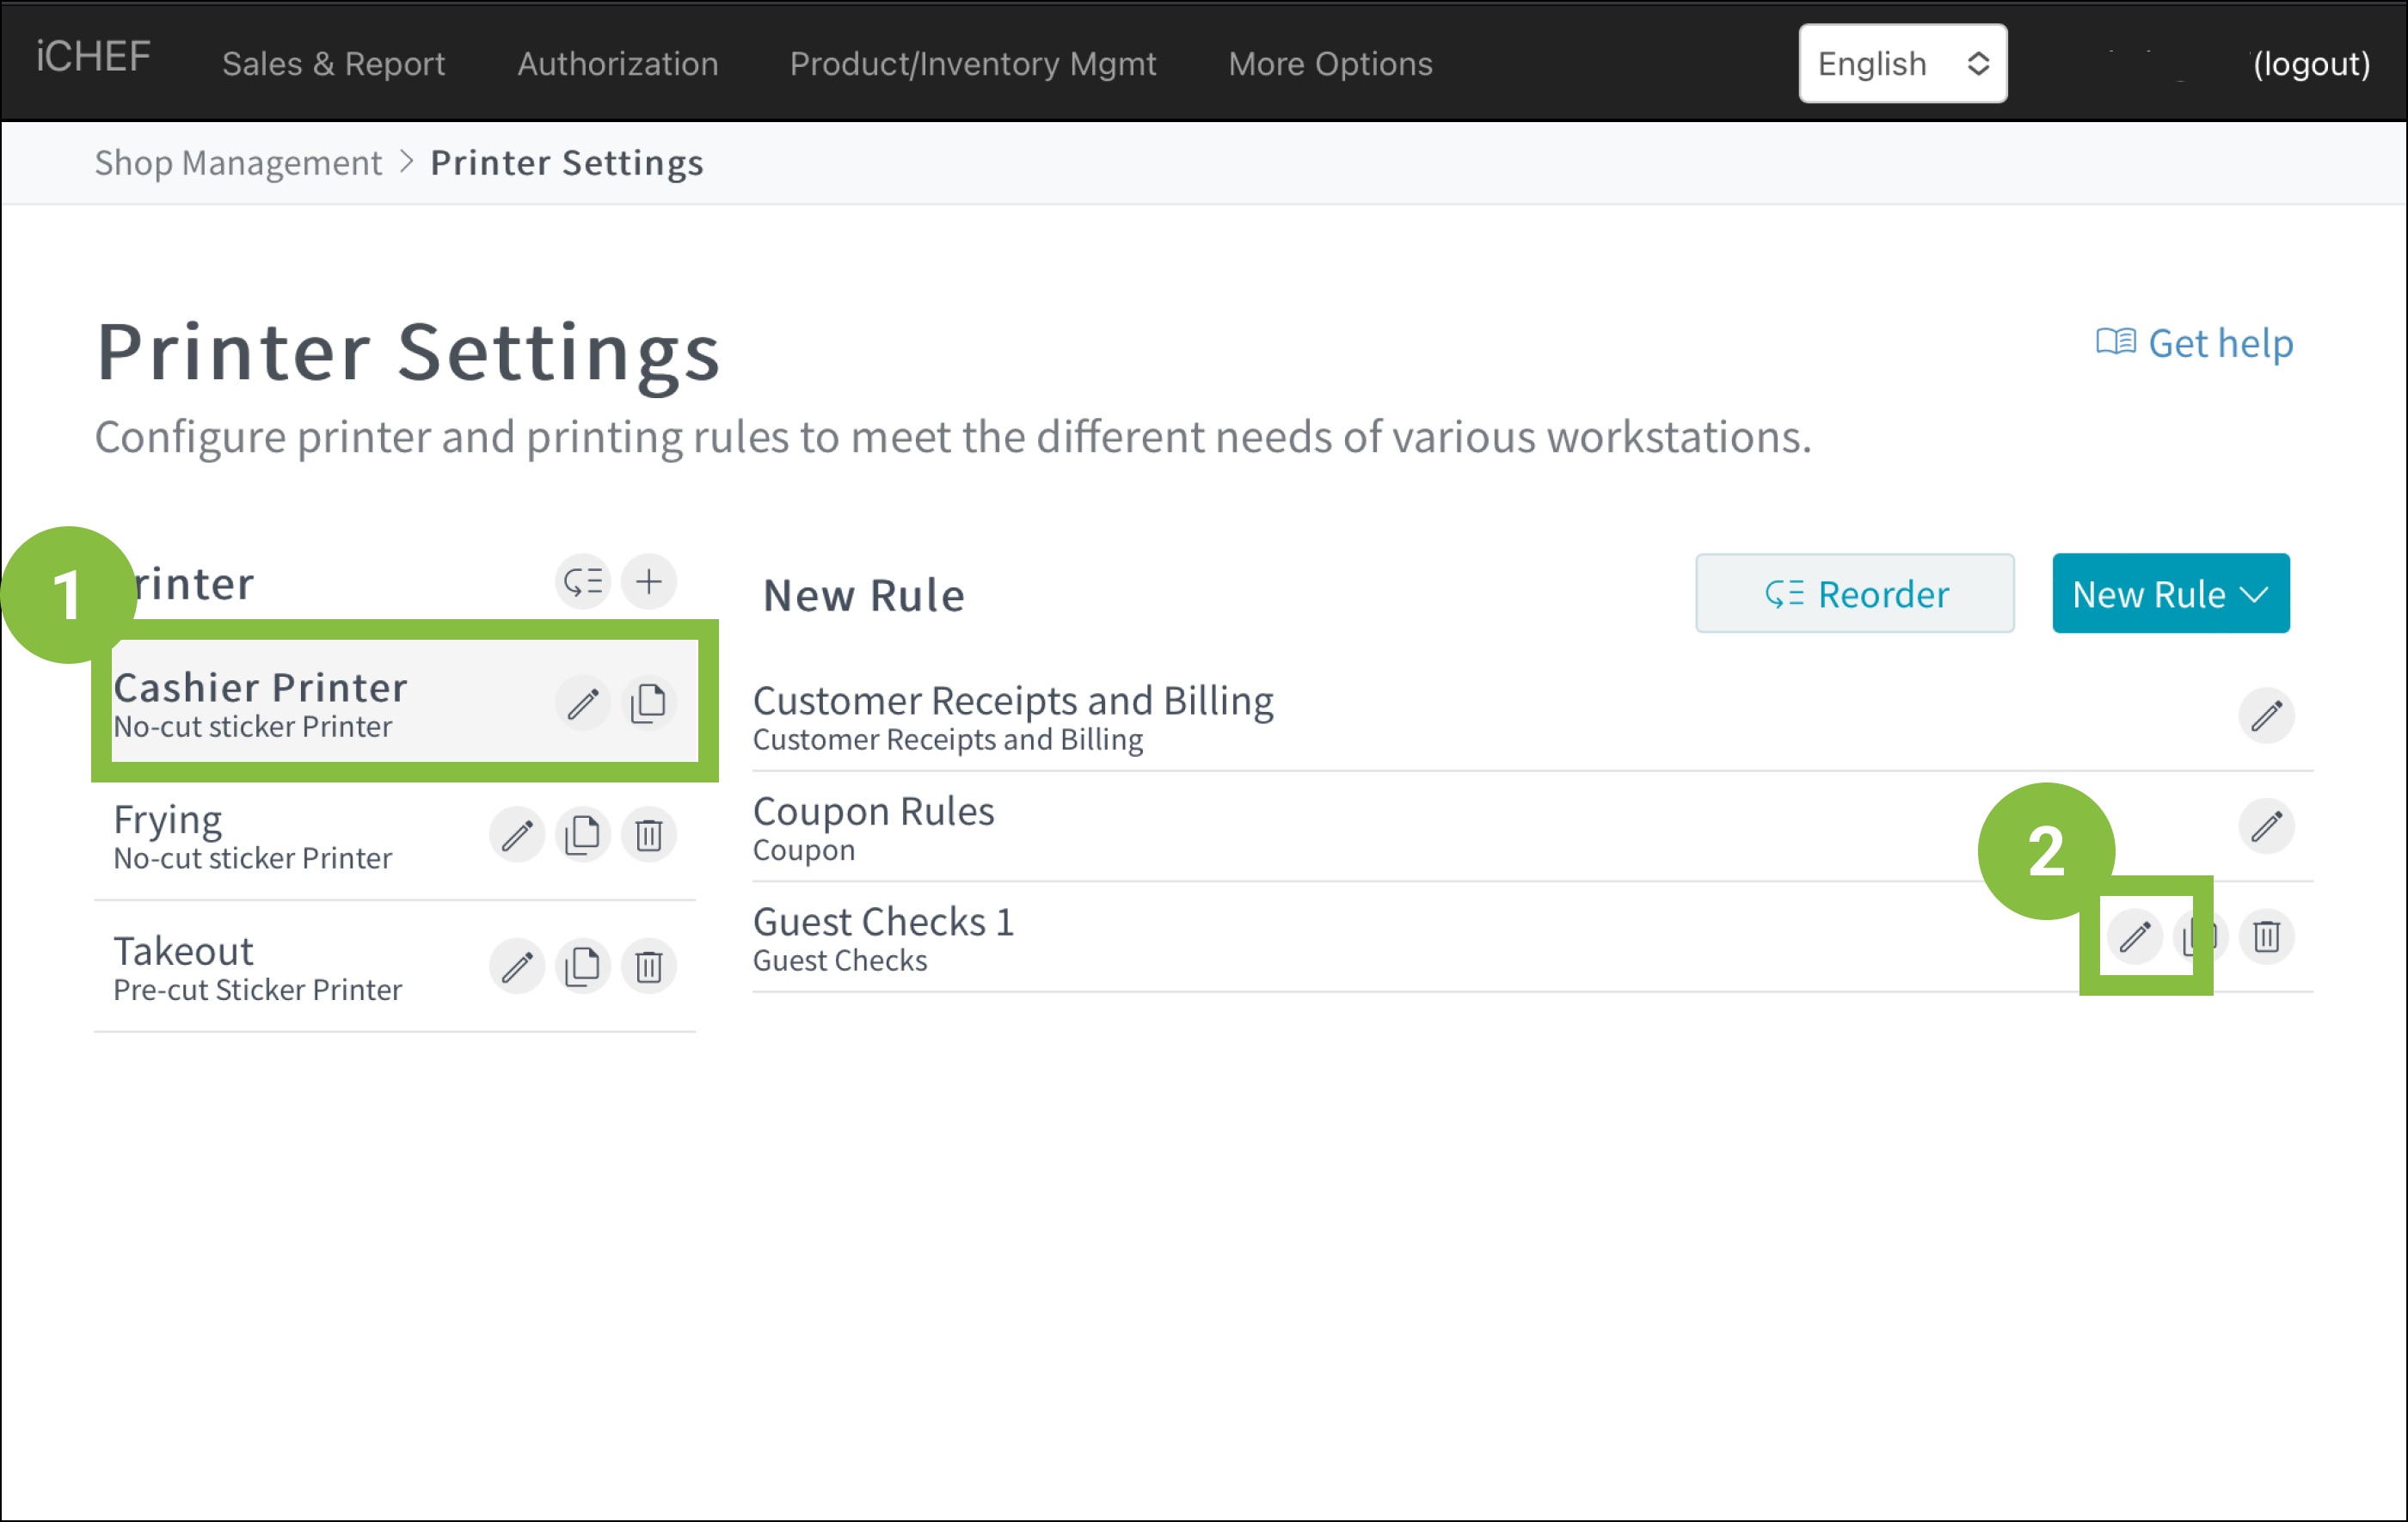
Create Guest Check Rule
- Go to Shop Management > Printer Settings
- Select a no-cut sticker printer
- Click [New Rule] and select [Guest Checks]

Settings of Rules
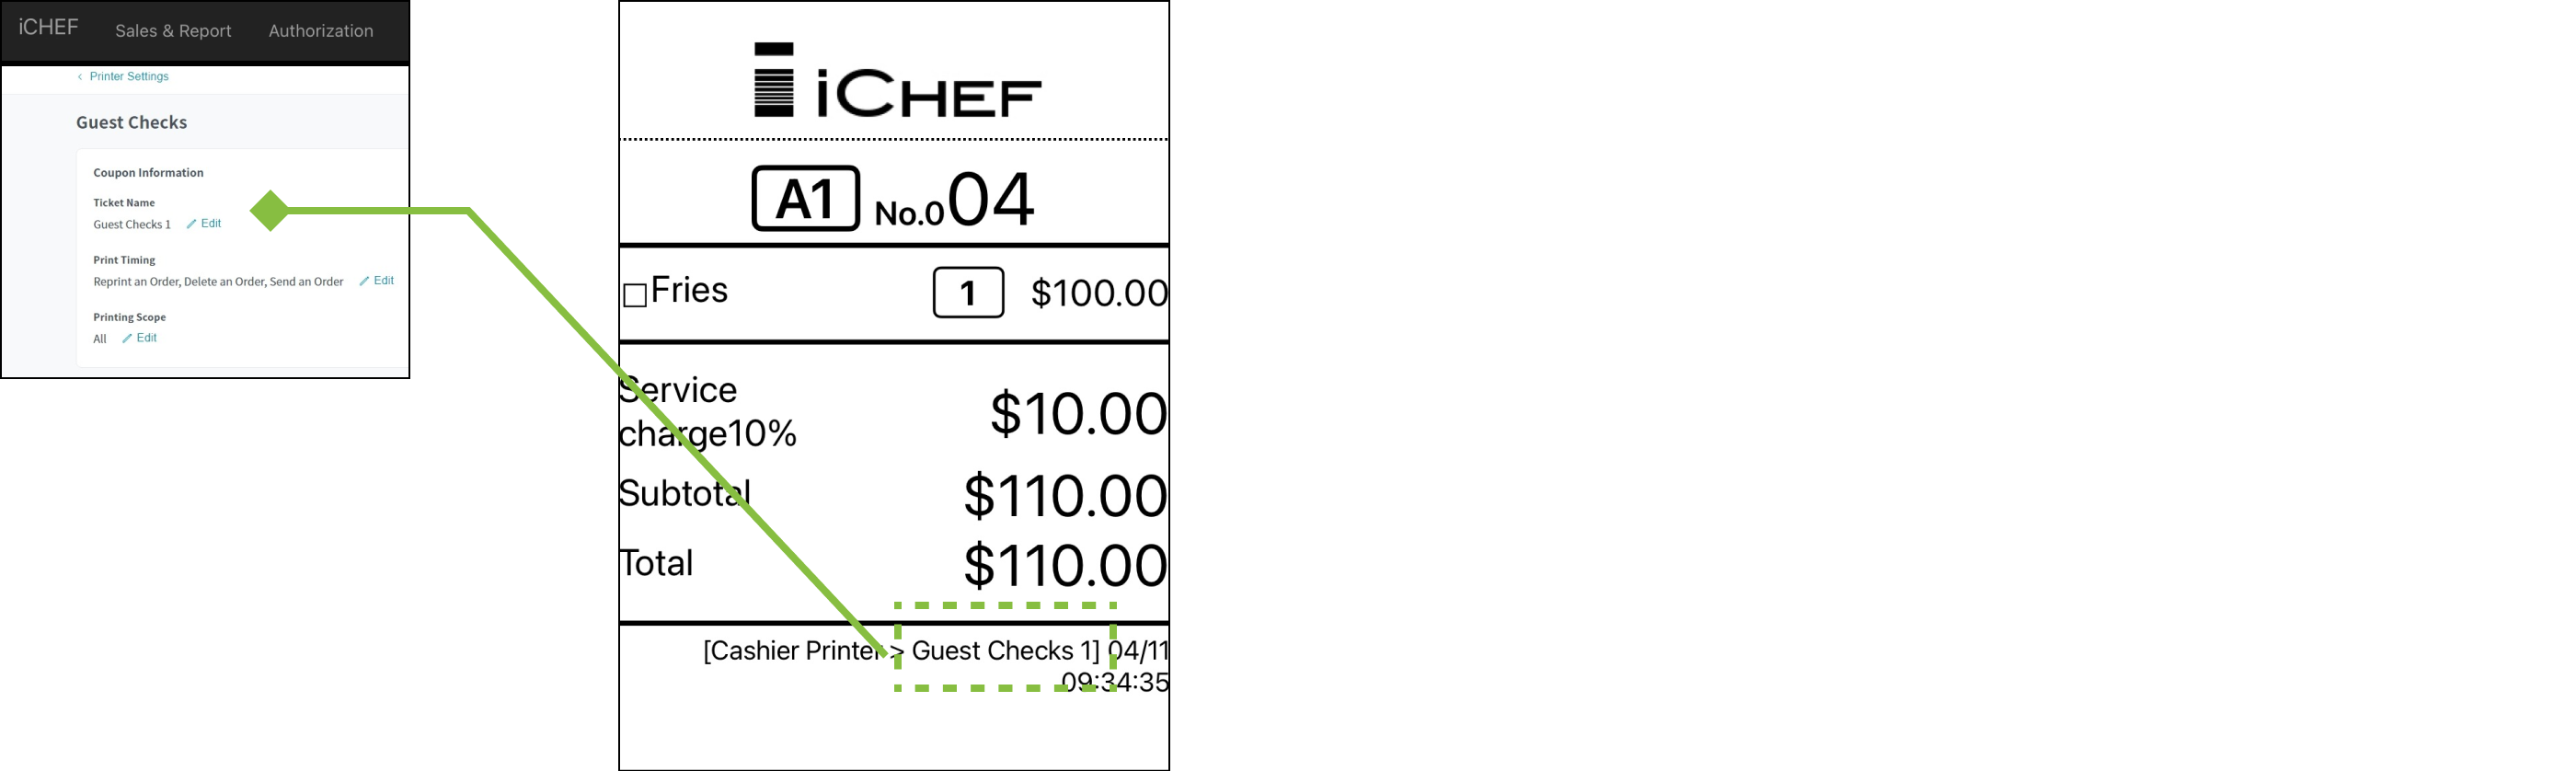
Basic Information
Ticket Name
Print Timing

Printing Scope

Logo Image
Image size and format
- Size: 408 x 60 px or above
- Format: PNG and JPG only
- Color: Black and white
Easy design of logo
- Open MS Paint on your computer.
- Click [File] > [Image Properties], and adjust the image size to 408 x 60 px.
- Select the [Text] tool, enter your restaurant’s name and place the text box in the center.
- Click [File] > [Save As] to save the image to your computer.
- Download a blank image with a white background.
- Open the downloaded file and enable the image preview function on MAC.
- Click the pencil icon.
- Click the [Text] tool, enter your restaurant’s name in the center and adjust the font size properly.
- Close the window for image editing, and the image you just edited will replace the original one and be saved to the computer.
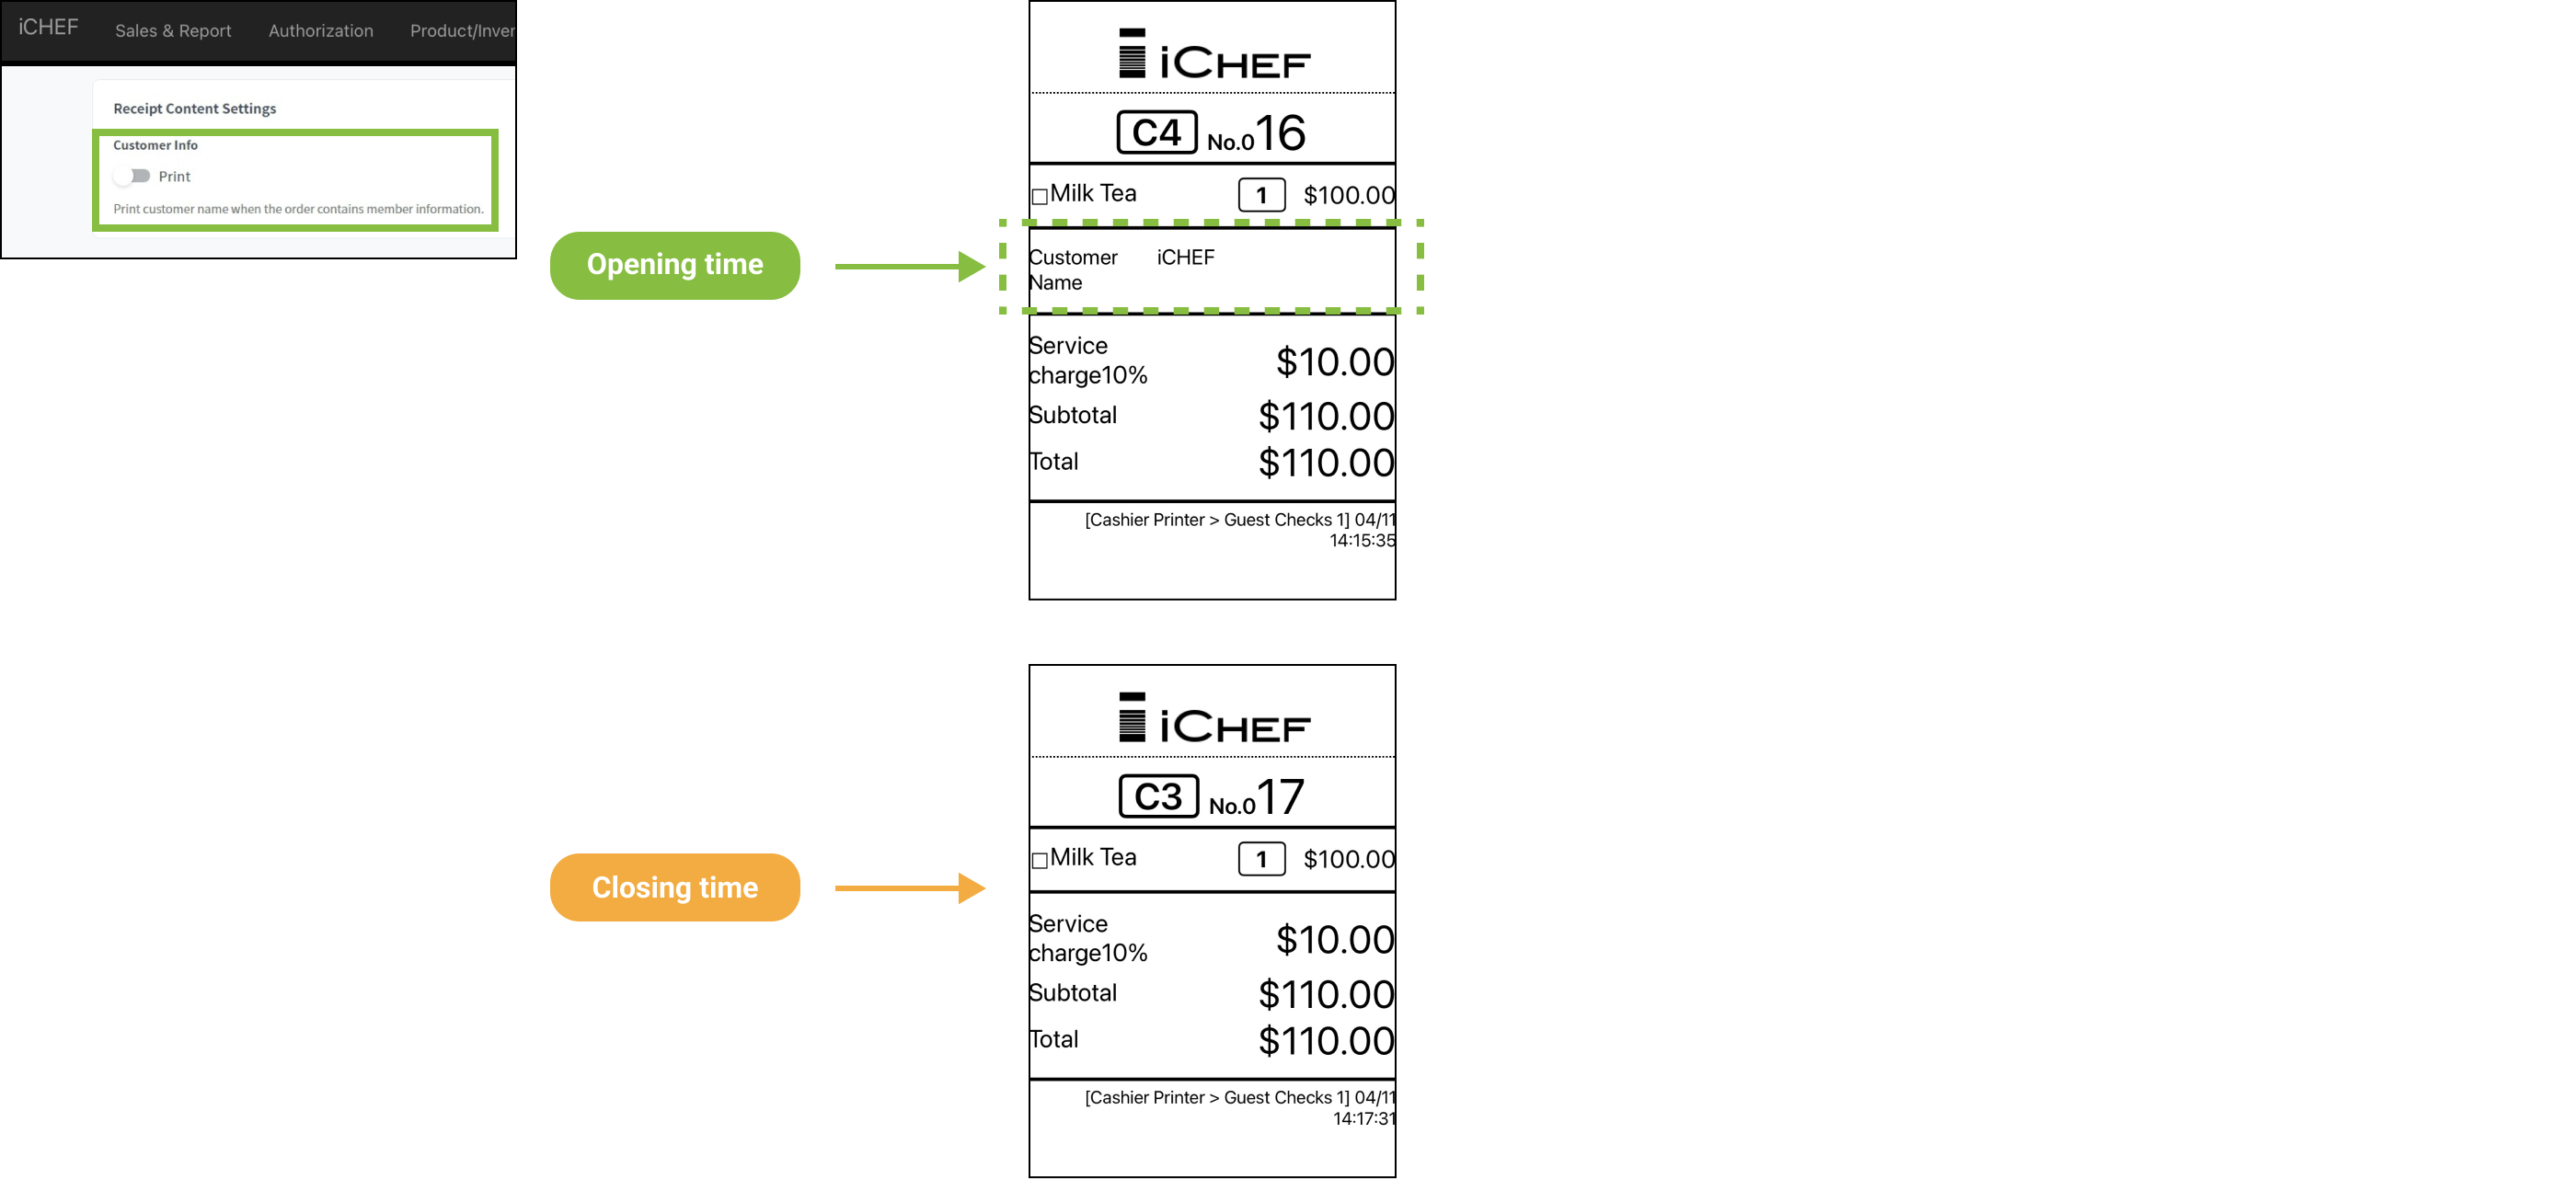
Receipt Content
Customer Info
How to Edit
To adjust the existing printing rules, you can simply manage it through the editing function according to your needs without deleting the old one.
- Go to Shop Management > Printer Settings
- Select the printer for guest check rule
- Click the rule or the
 icon
icon