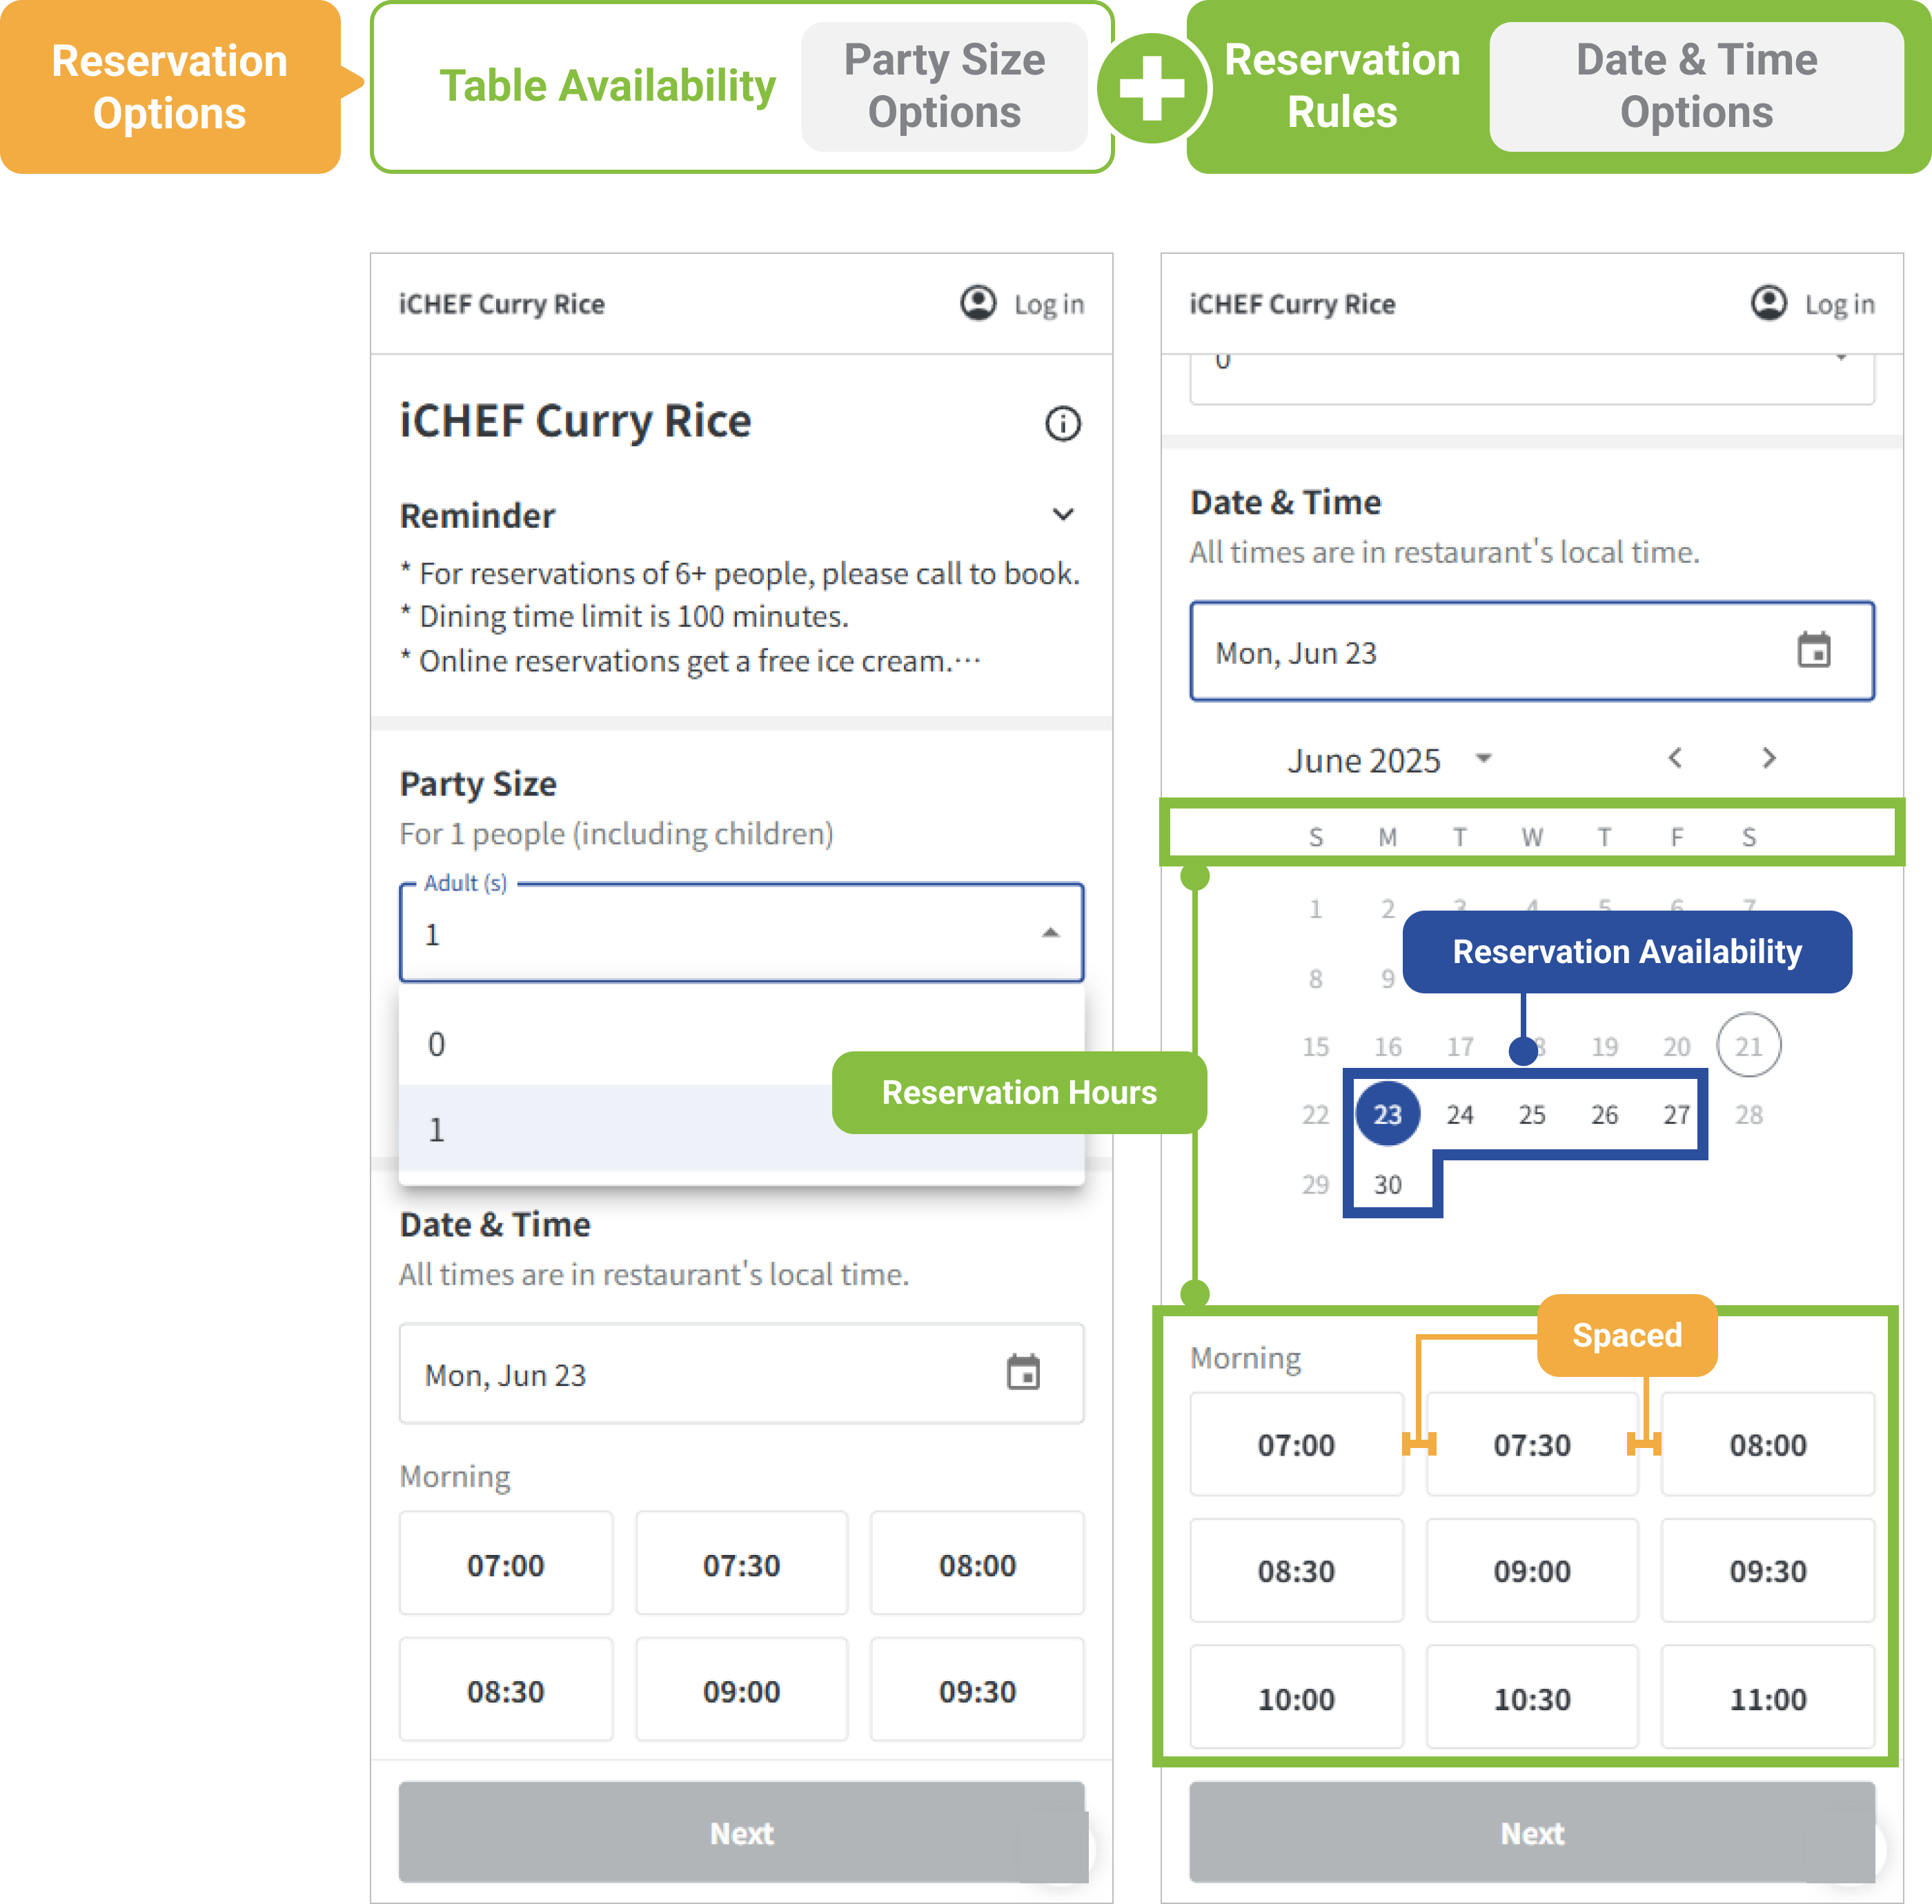
To allow customers to make a reservation for the right time and a right number of people with online reservation by themselves, simply configure the settings of [Table Availability] and [Reservation Rules] in iCHEF backend, and the system will present the options to your customers accordingly.
This article will show you how to set up [Table Availability] to provide the range of available seats for customers to choose from. The system can also help you arrange the reserved tables according to these rules to avoid overbooking.
➤ Backend Path: Online Store > Reservation > Table Availability
1. Basic Settings
The configuration regarding the table availability consist of three settings:

❶ Tables and number of seats
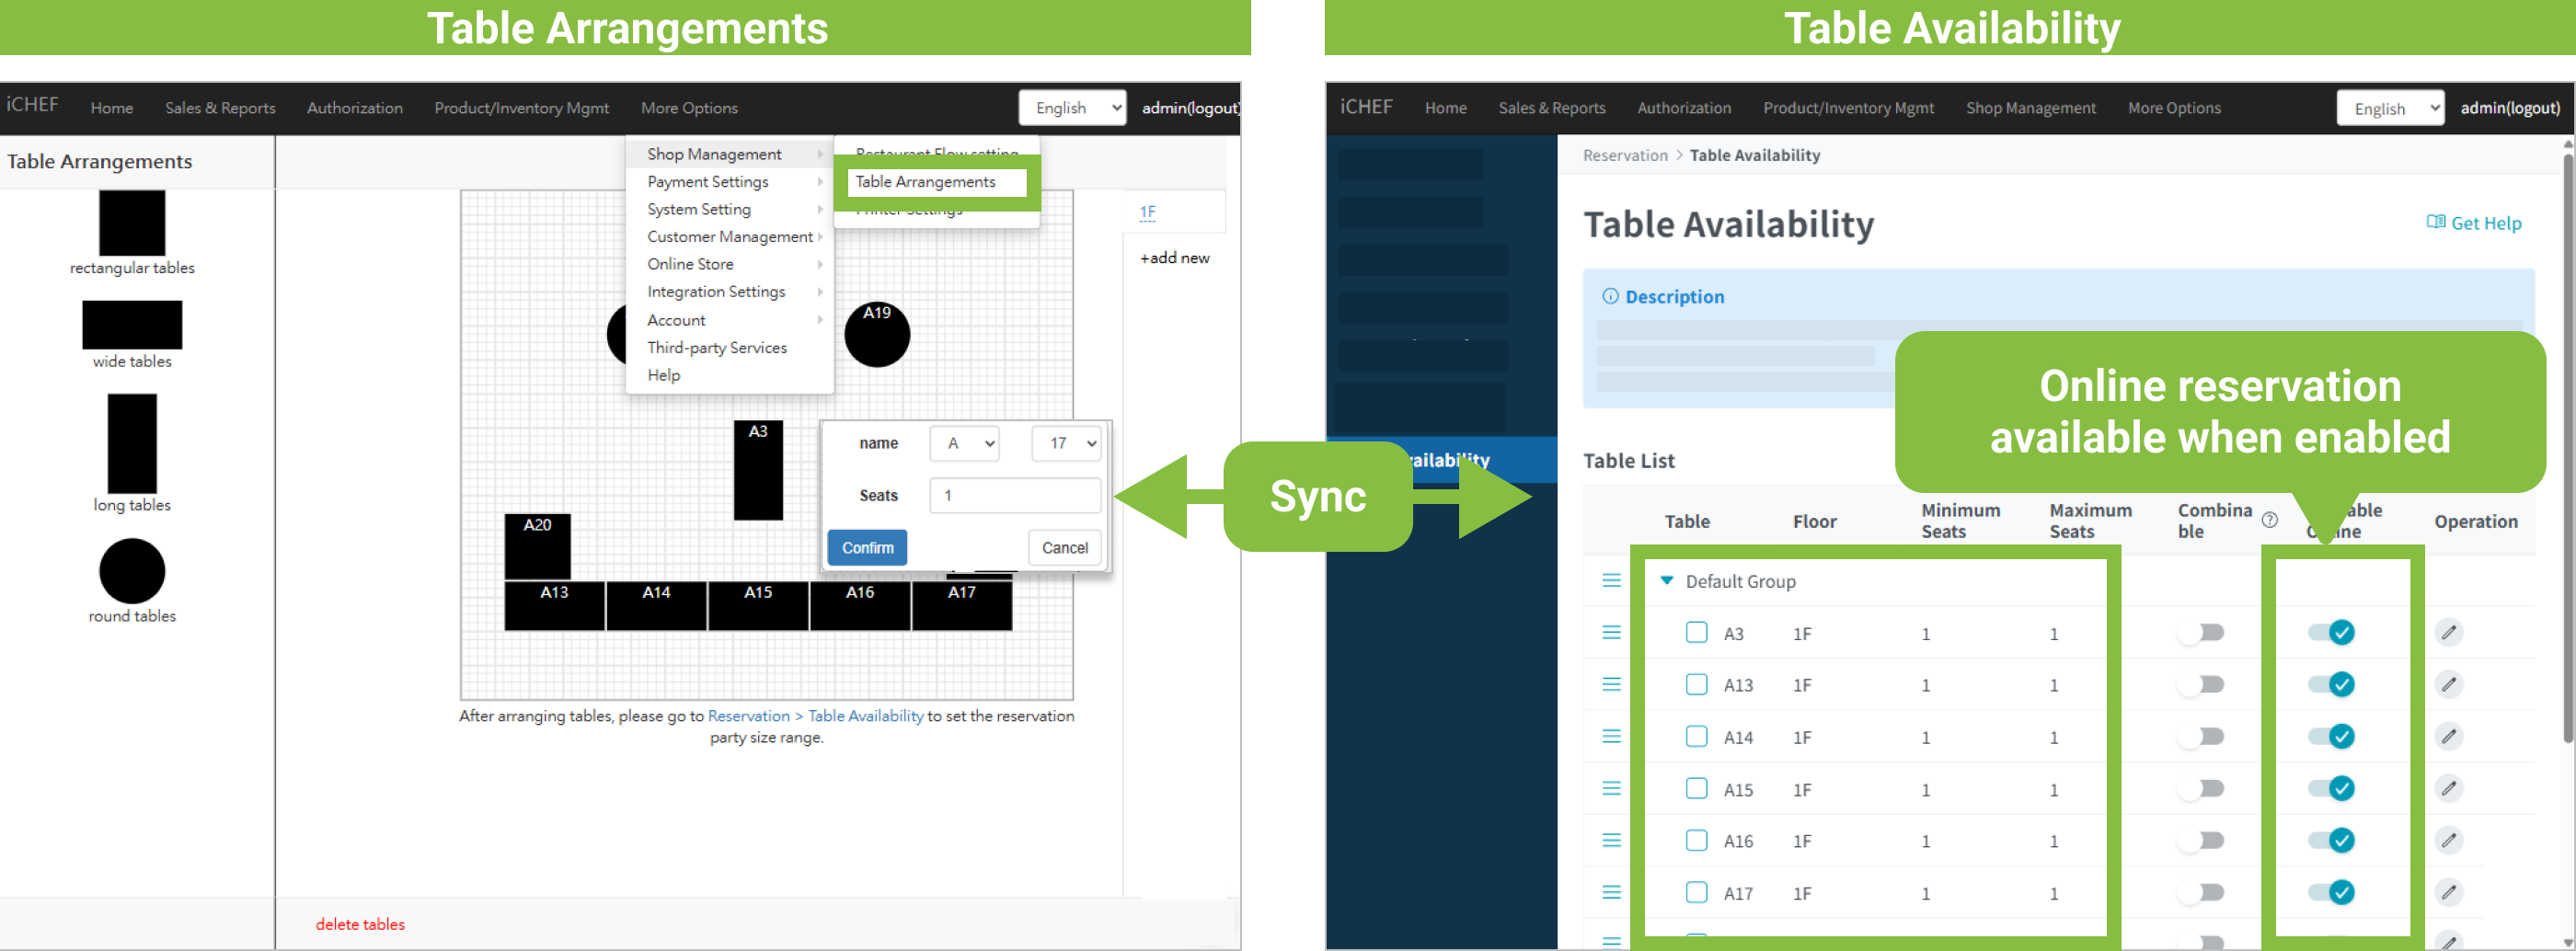
The table number, floor and number of seats will be synced with your settings in [Store Management] > [Table Arrangements]. All of the tables are set as [Unavailable] for online reservation by default and will be available only when you enable [Available Online].
If you intend to reserve part of the tables for customers on-site, you can disable [Available Online] for certain tables.
After you complete the settings:
– Reservation website: It is updated automatically to allow customers to reserve the updated tables.
– Table status page on POS: Please update menu for the iCHEF POS App of your restaurant to update the number of seats.
– The added tables will be displayed at the bottom of table list by default.
❷ Available seats
This define the range of available seats for customers to choose on the reservation website, consisting of [Minimum Seats] and [Maximum Seats] configured in the backend.
- Minimum Seats: It can be configured independently here.
- – Maximum Seats: It represents the number of seats for the table. Any adjustment here will be synced to the settings in [Store Management] > [Table Arrangements].
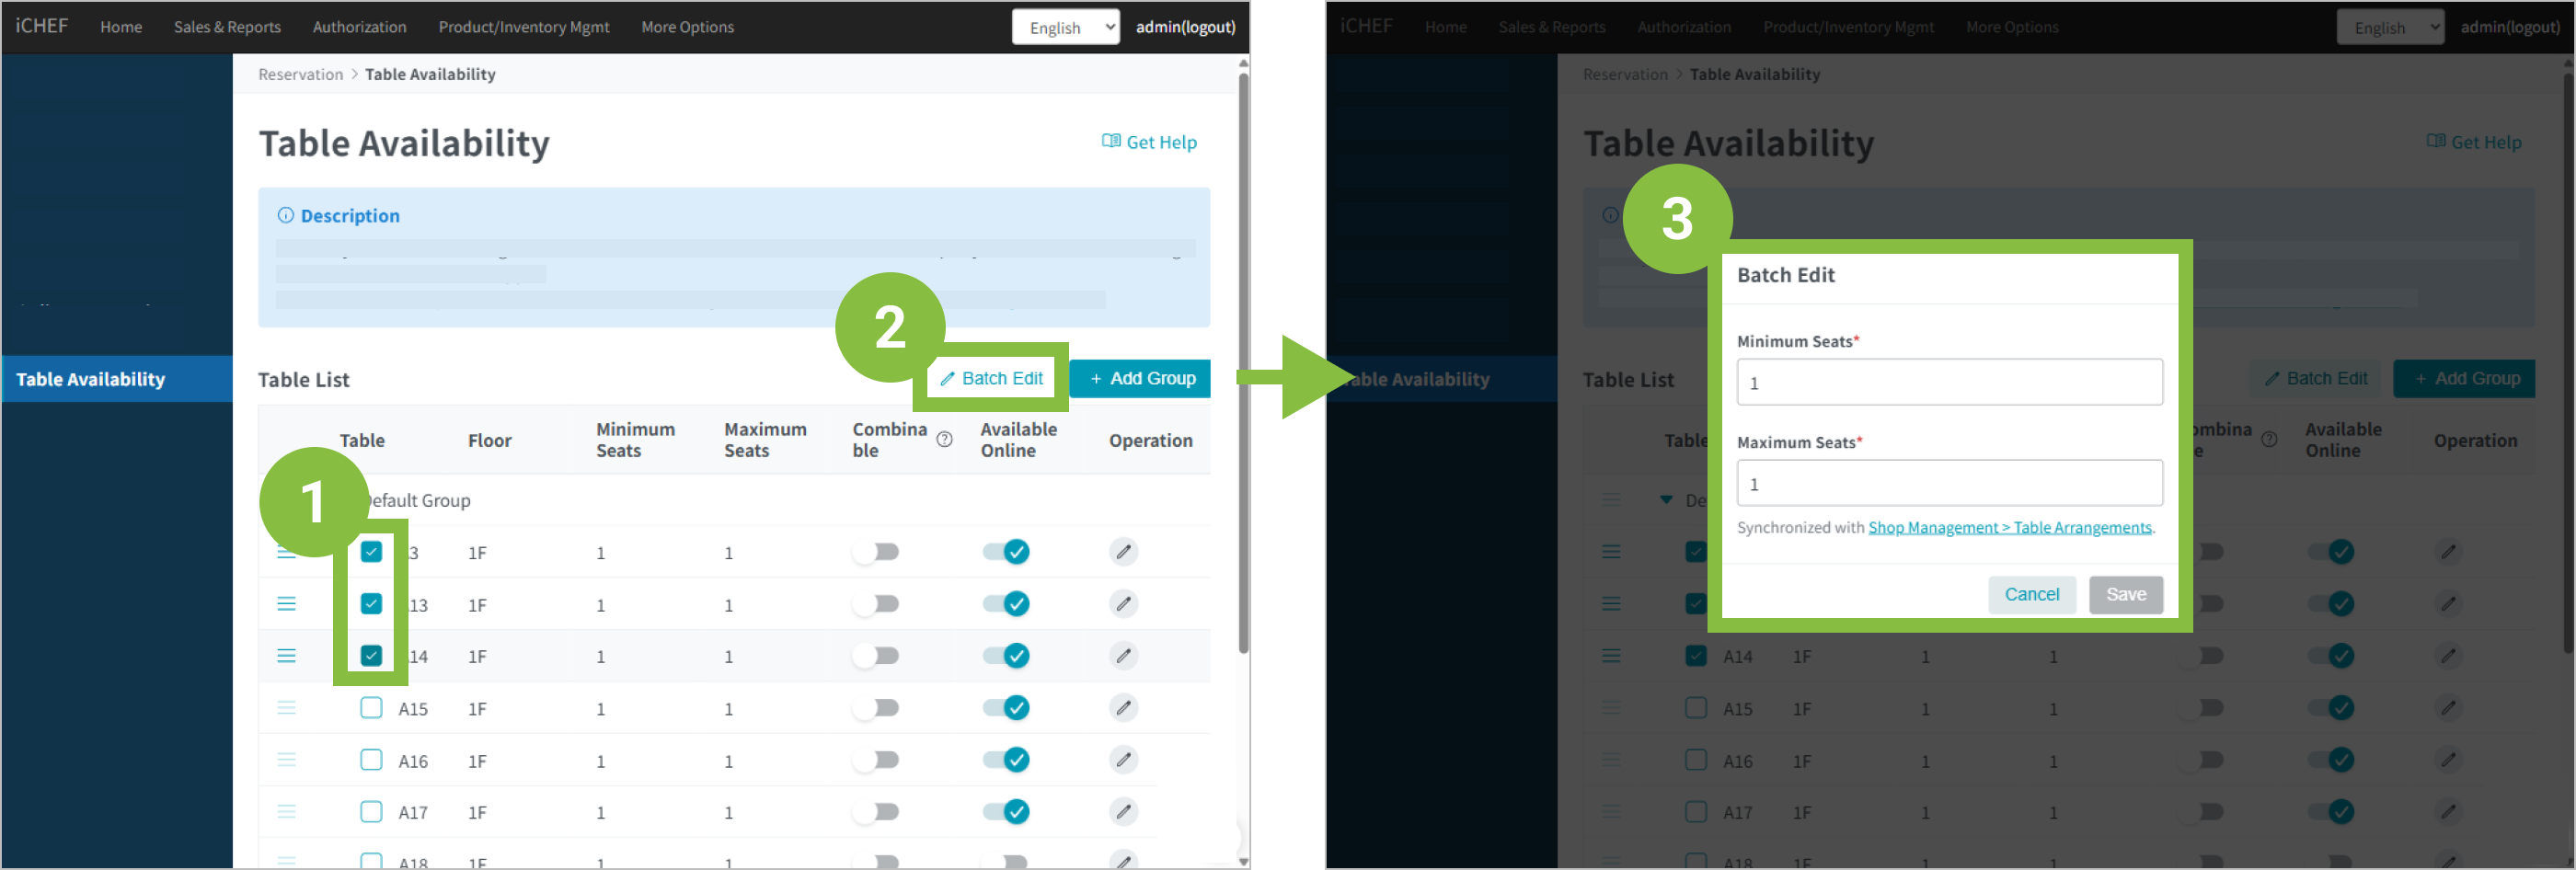
There are 2 ways to adjust the number of available seats:
- Edit the number one by one for each table: Click the pen icon under [Operation] of the table you want to adjust, and configure the number of seats.

- Edit the number by batch: Select the tables you want to adjust, click [Batch Edit] on the upper right of the page, and configure the number of seats.
After you complete the settings:
– Reservation website: It is updated automatically to allow customers to reserve the updated number of seats.
– Table status page on POS: Please update menu for the iCHEF POS App of your restaurant to update the number of seats.
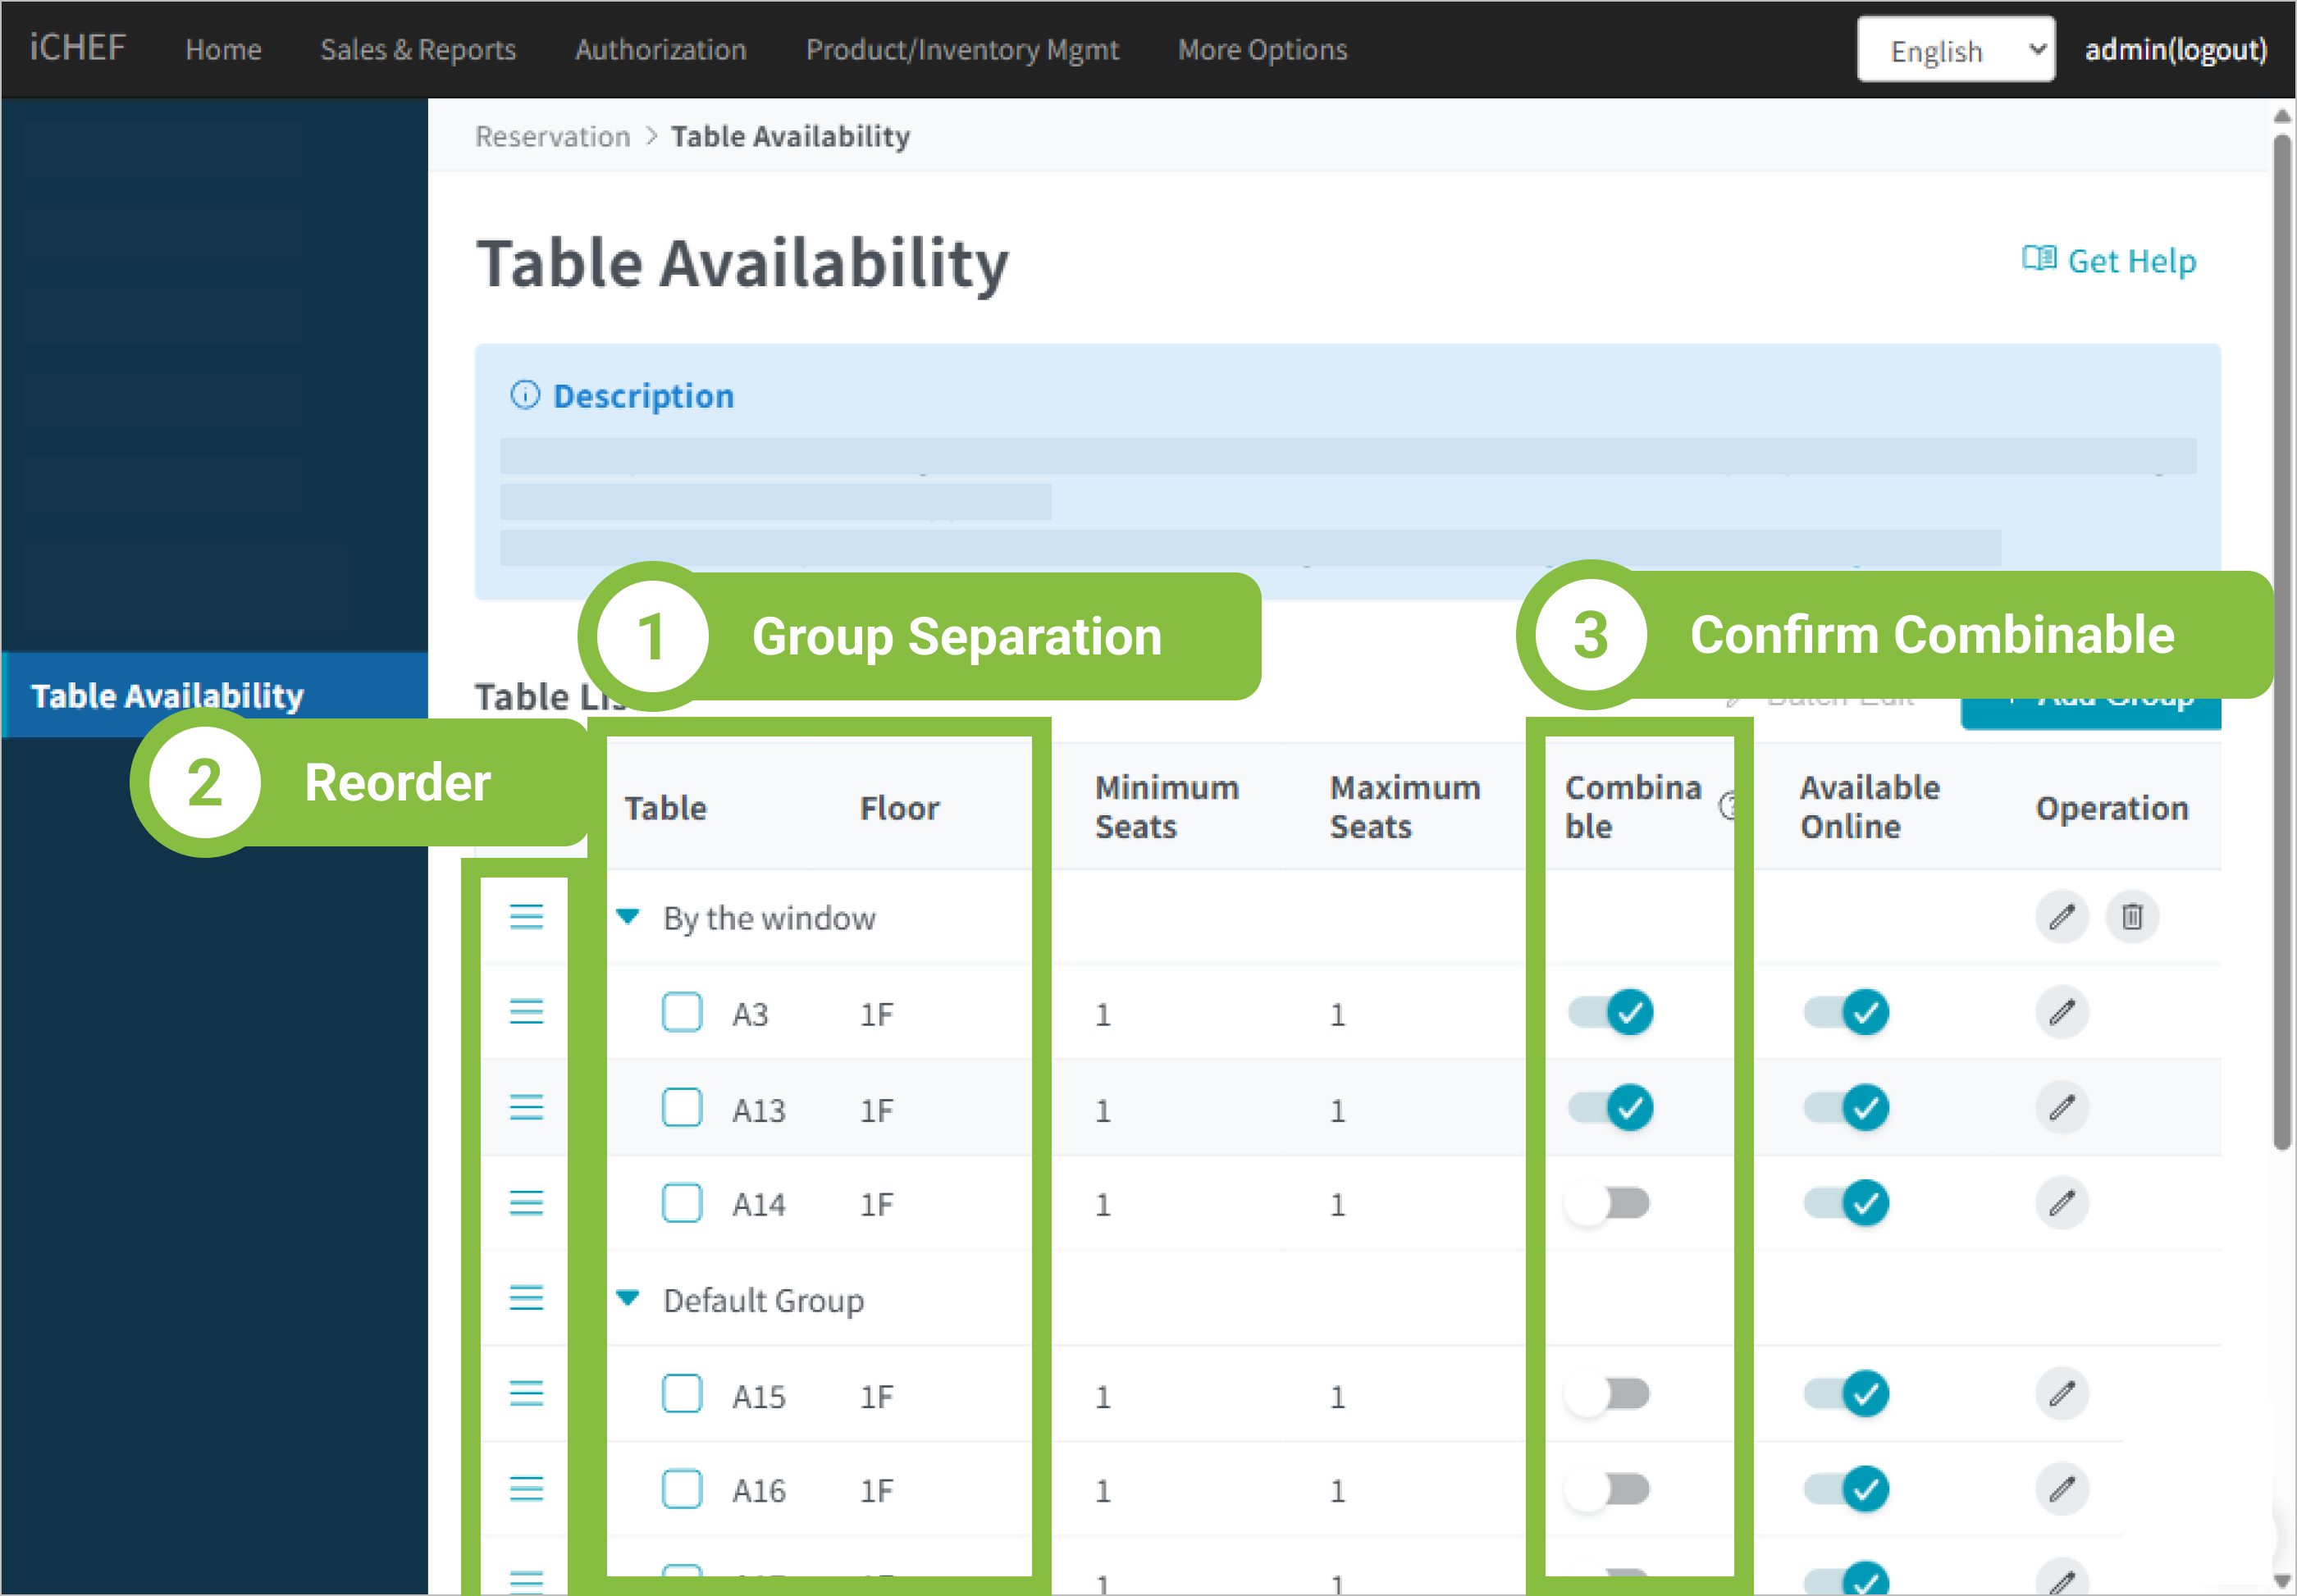
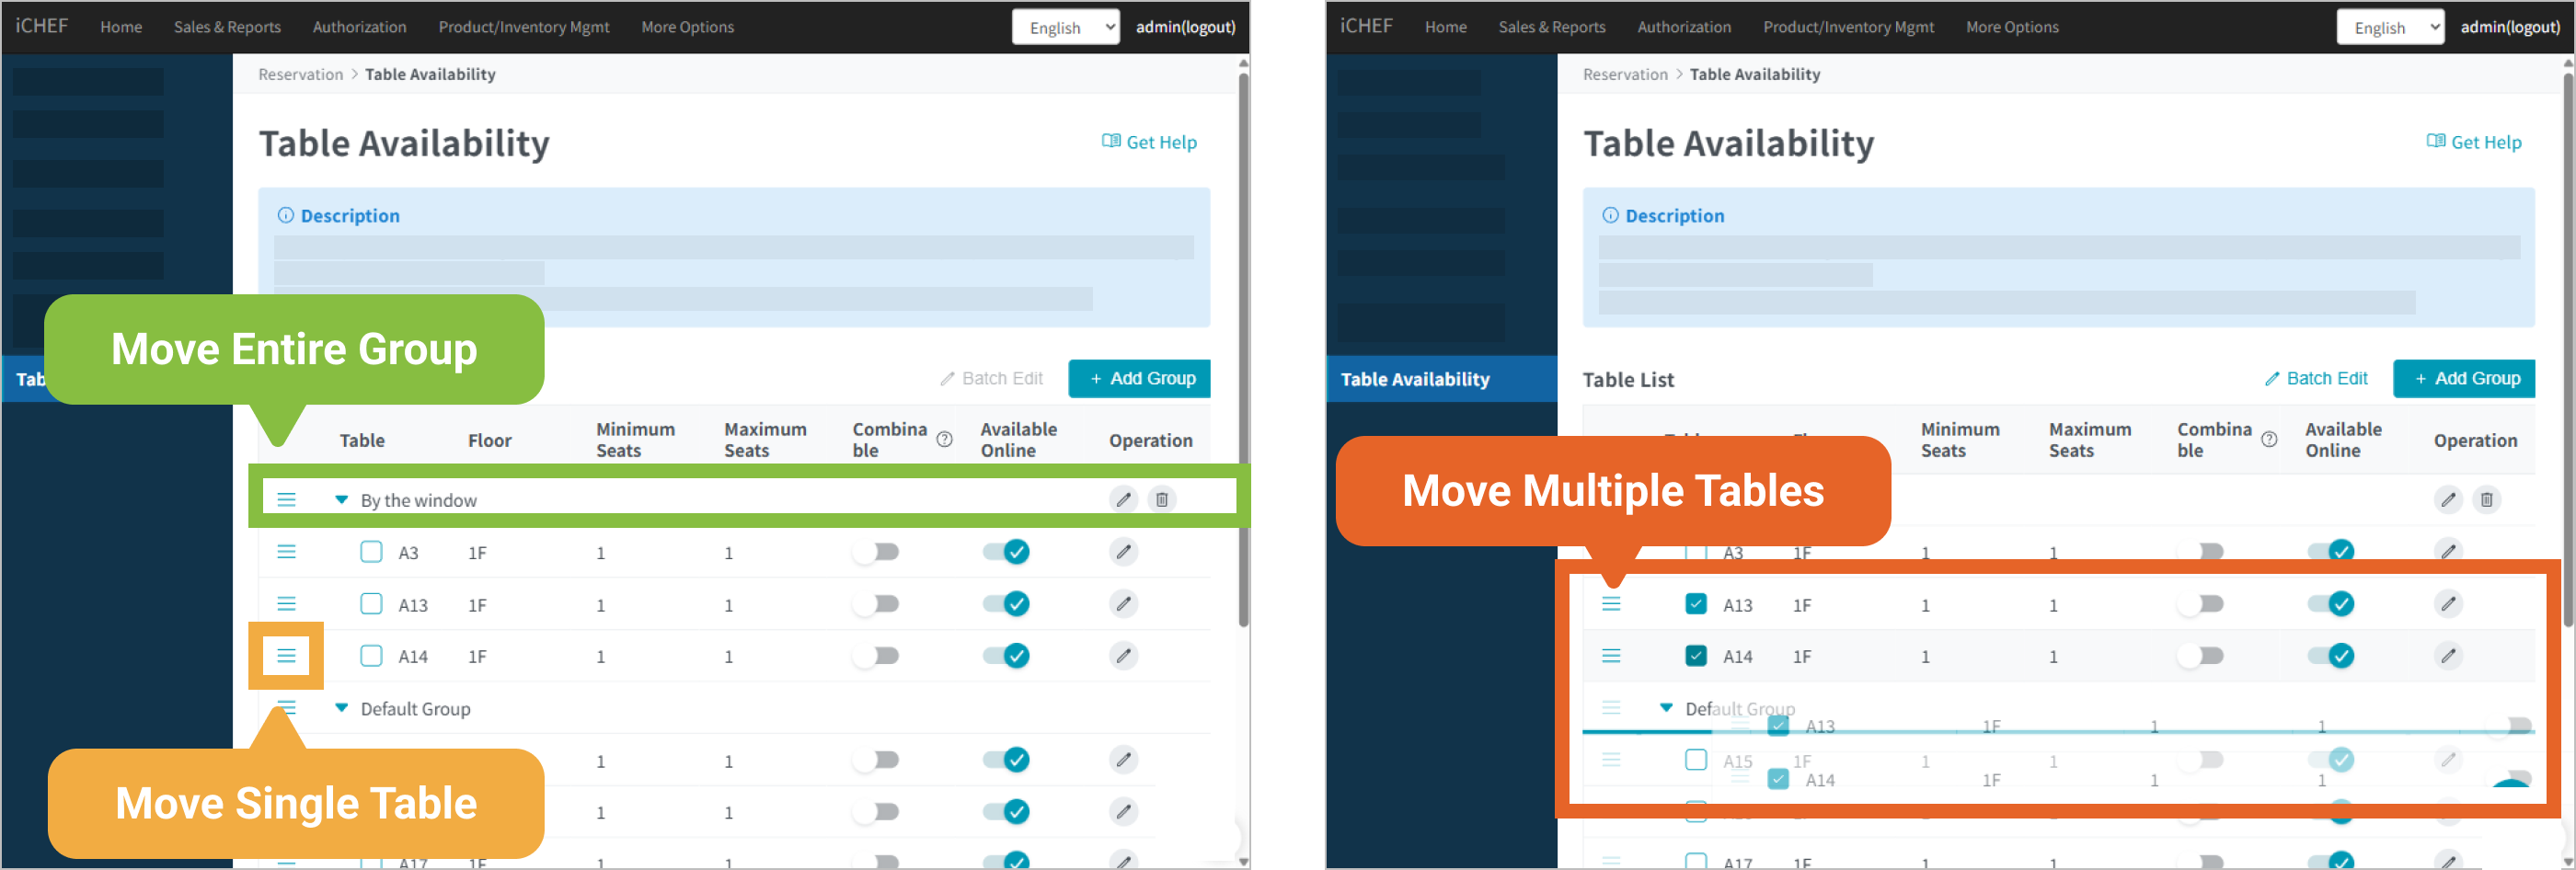
❸ Table group
Besides setting up a single table, you can create a group by clicking [+ Add Group] on the upper right of the page, and drag multiple tables under the group to add tables. The tables in the same group can be combined automatically for customers to reserve. You can also set up the [Reservation Conditions] for the groups to create more reservation opportunities! Learn More

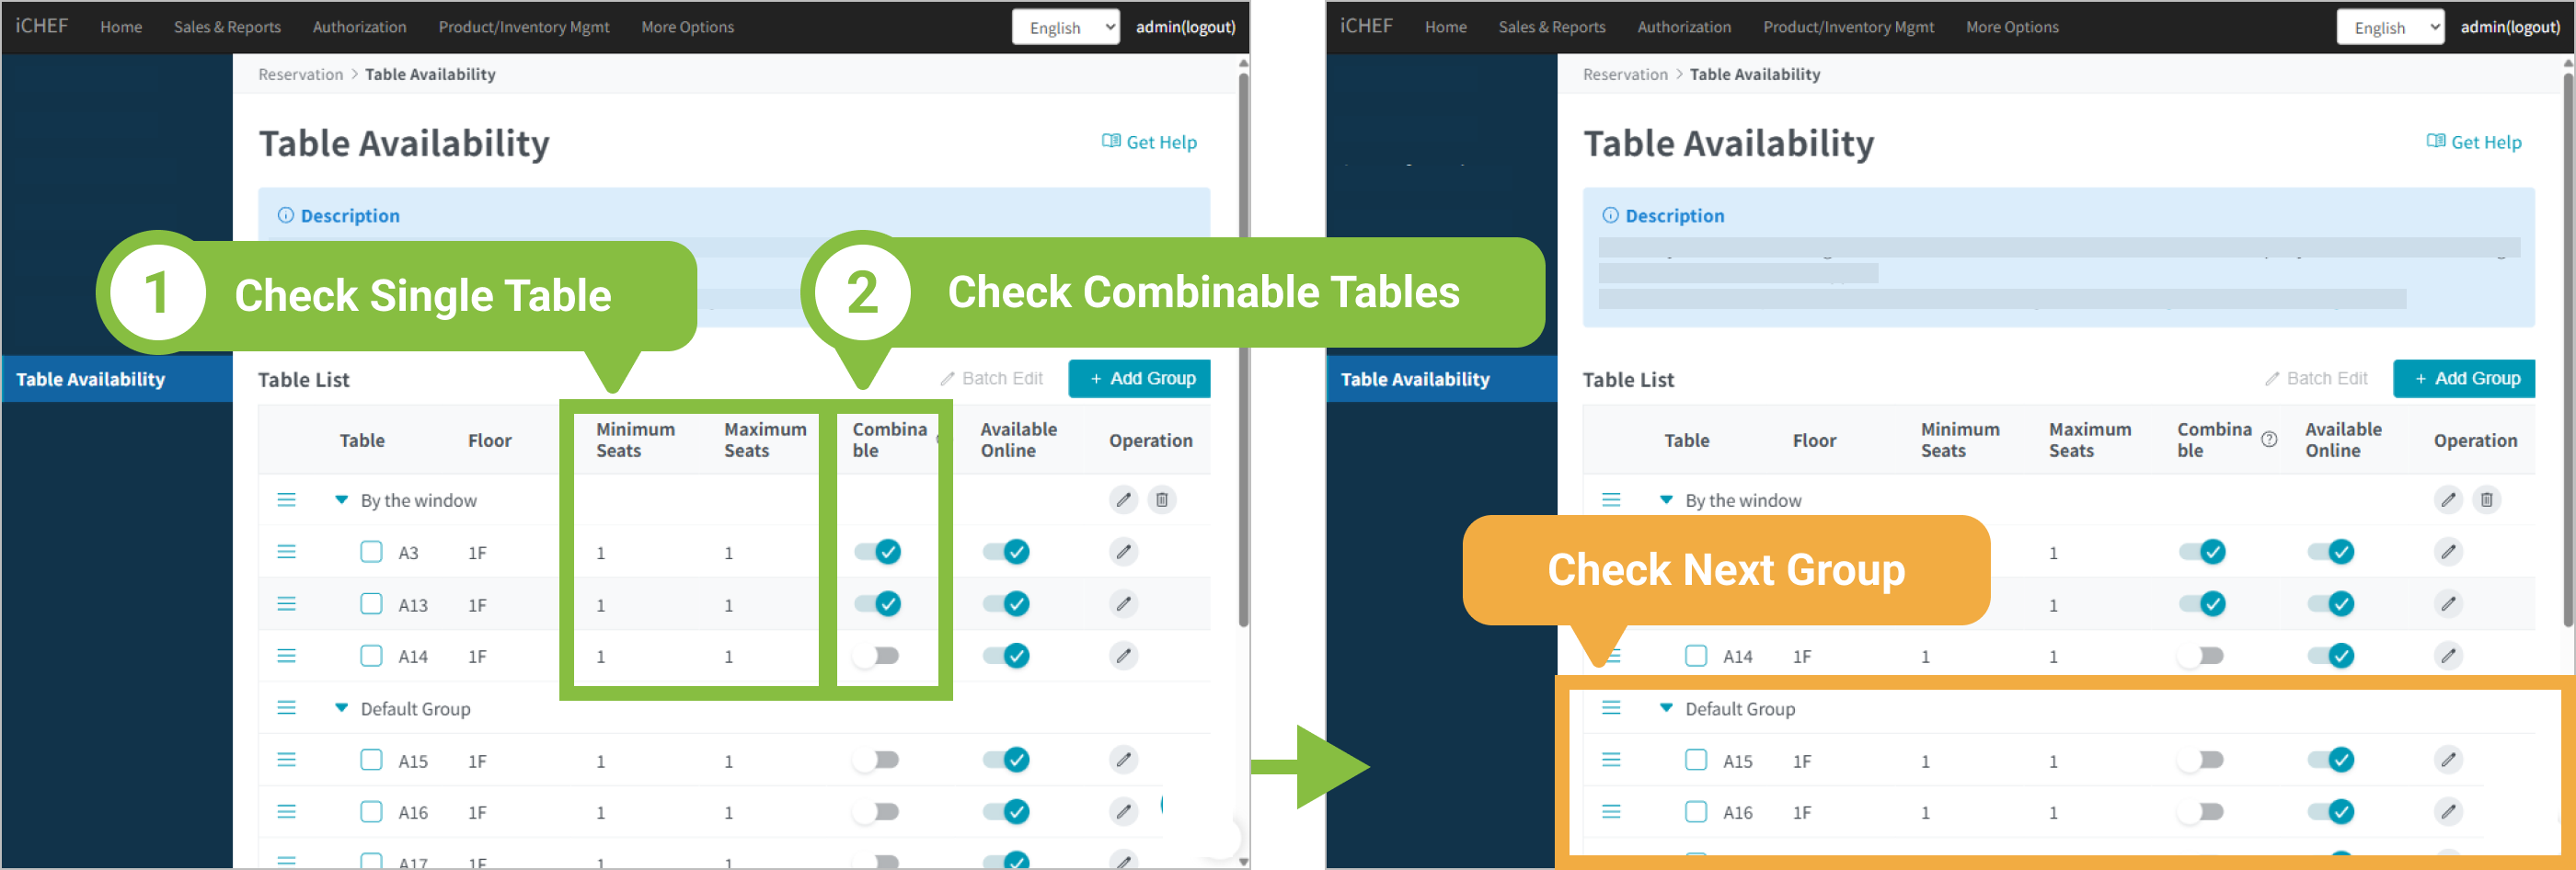
When there is a table group and the tables of the groups are set as [Combinable], the number of seats available for customers to reserve online will be the combination of [Maximum Seats] for each table in the group.

After you complete the settings, the system will update menu automatically to apply the configuration to your reservation website.
2. Table scheduling
Besides basic settings, you can adjust the table order. The system will automatically assign reservations to tables according to the number of seats required. However, you can still adjust the table assignment manually before you check in the customers on iCHEF POS App.

➊ Table order by default
Under [Table Availability], the tables will be assigned by their orders in the list, from the top to the bottom. The tables are sorted by English alphabets (A-Z) and numbers (1-99). You can drag the tables by clicking and holding the [☰] icon to adjust their orders.
– The order of tables is based on your manual settings. The change of table name will not affect the order of tables.
– After you complete the settings, the system will update menu automatically to apply the configuration to your reservation website.
➋ Table assignment based on the number of seats required
For a table group, the system will assign the tables of 1 seat first and then the combinable tables according to the order of tables.
After you set the tables in a group as [Combinable], the system will check if they can fulfill the number of seats required when the tables of 1 seat are insufficient. If the tables in the group cannot can fulfill the number of seats required, the system will proceed to check the next group.
❸ Table status
The system will check the default order of tables first and then the table status on iCHEF POS App. If the table usage duration overlaps that of an occupied table, the system will check the next table that can fulfill the number of seats required.
In addition to auto-assign, the system will display the information of reserved tables and dine-in orders on the page of [Reservation] for you to manage table status better.
- Timeline mode: The reserved tables and dine-in orders are marked in gray field.
- Reserved table: The duration starts from the moment it is reserved to the moment the selected reservation hour ends.
- Dine-in order: The duration starts from the moment it is created to the moment the table usage duration ends.
- Add or edit reservation info: For the occupied tables that are marked with gray field.

Tips for Backend Settings
- Divide the tables into different areas, such as bar and window side, and create table groups.
- Consider which groups and tables you wish to assign to online reservations, and adjust the order of tables.
- Decide which of the tables in a group that can be combined for reservation, and enable the function of [Combinable] for them.