
All of the items displayed on the website of online store are imported according to the settings of [Product/Inventory Mgmt] > [Inventory Management]. You can select the desired items and import them to the websites of Mobile Ordering (Takeout) and Mobile Ordering (Dine-in).

Please go to the backend and follow the steps below to configure your targeted function.
➤ iCHEF Backend:[Product/Inventory Mgmt] > [Menu Setting] > Mobile Ordering (Takeout)]
➤ iCHEF Backend:[Product/Inventory Mgmt] > [Menu Setting] > [Mobile Ordering (Dine-in)]

➊ Import items& Assign Serving Hours
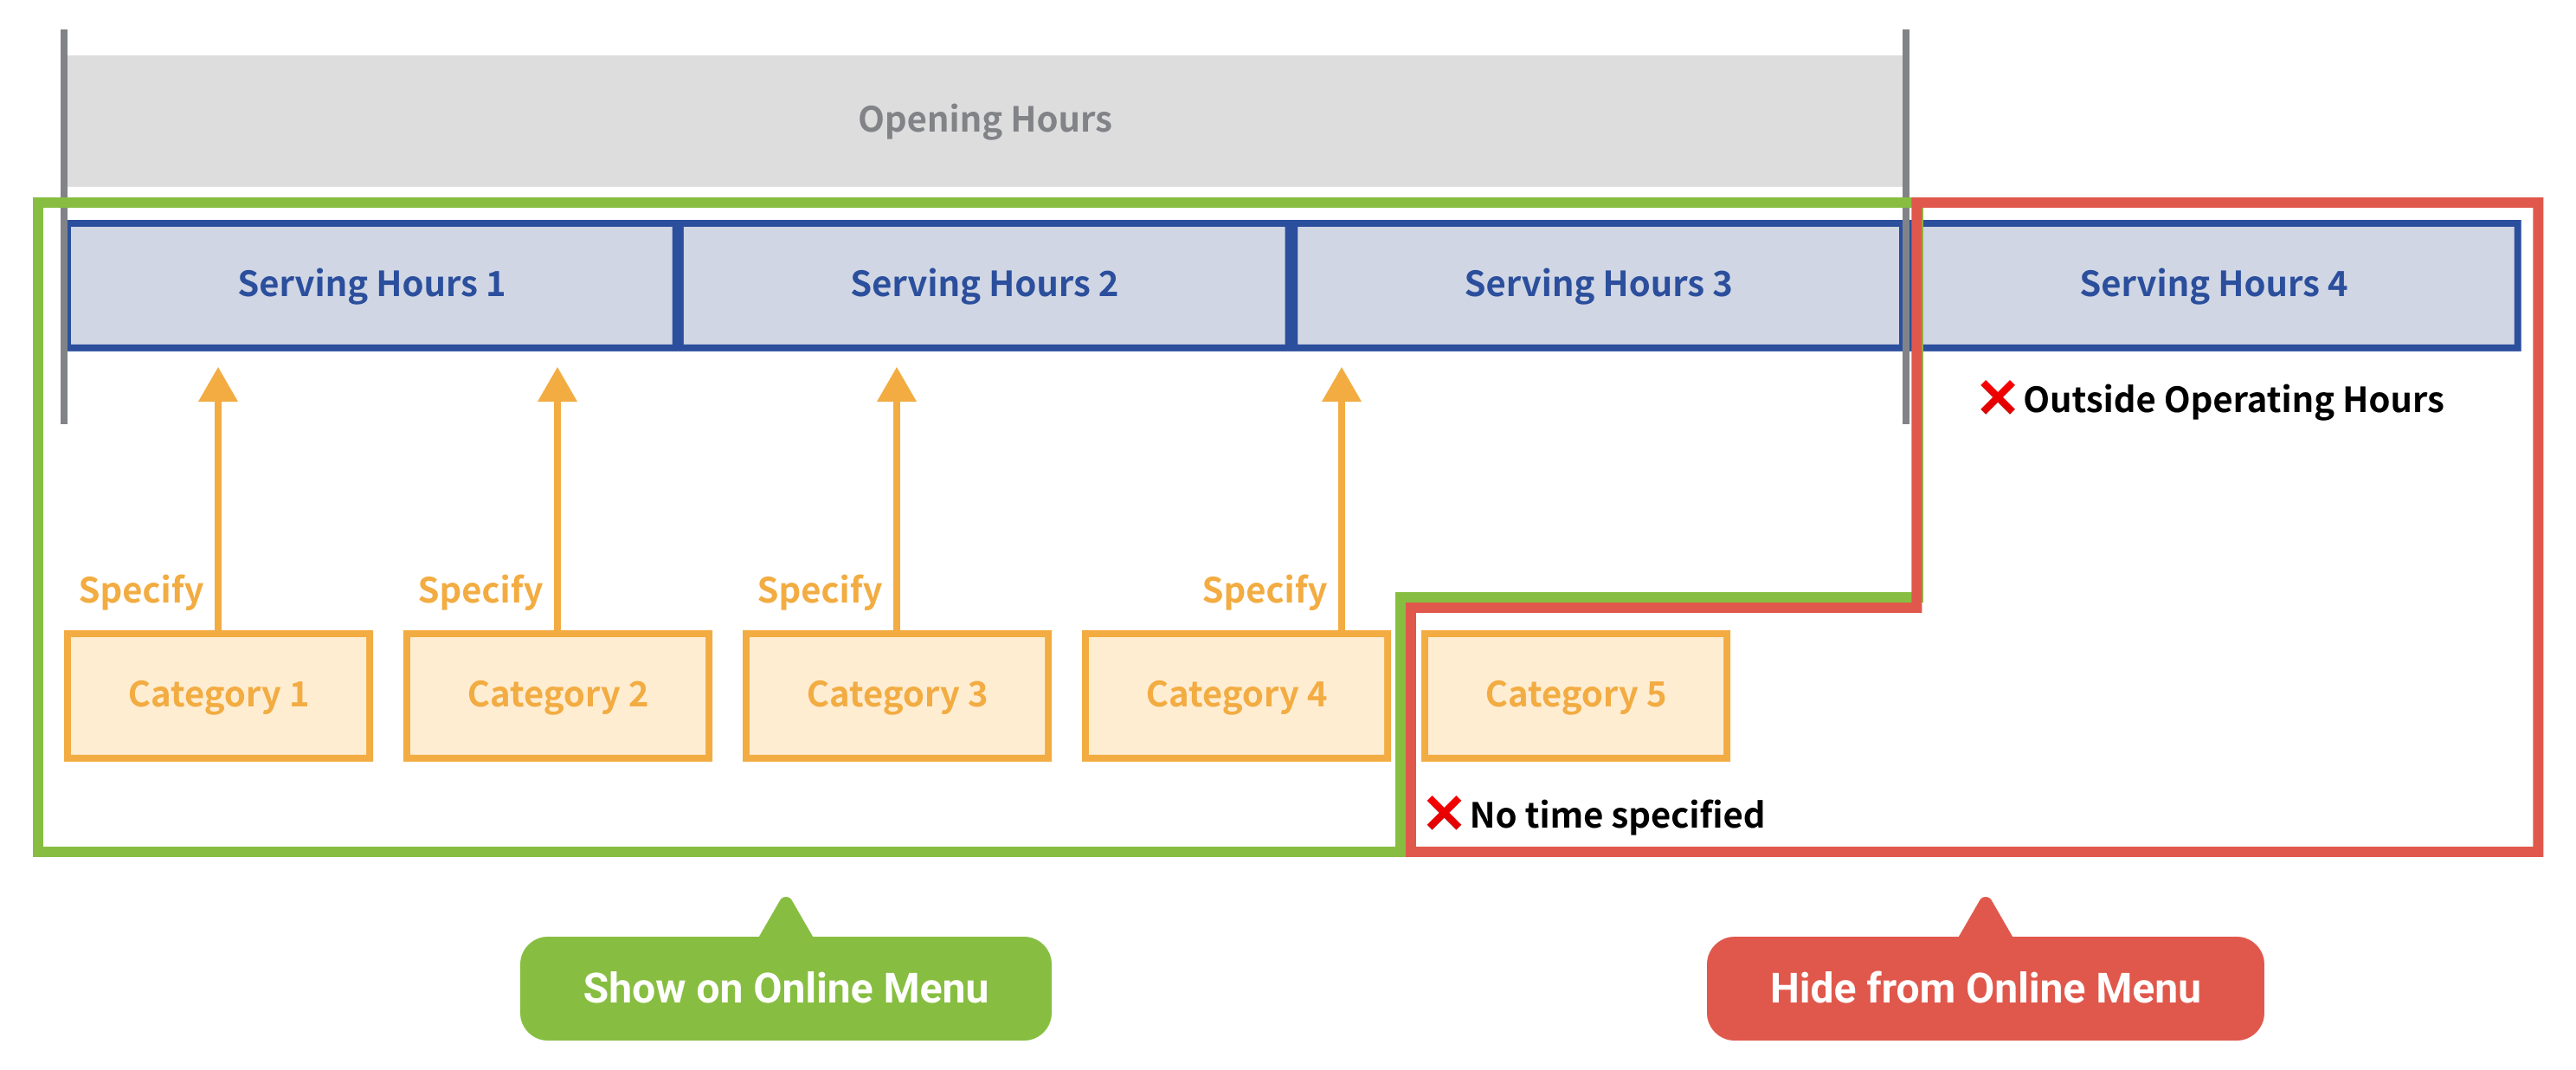
You can choose to import all items with a single click, or add categories and then manually select the items you wish to list. Then, specify Serving Hours for the Items Categories. The system will display the Items Categories specified for that Serving Hours period, within the set Opening Hours.
One-Tap Import
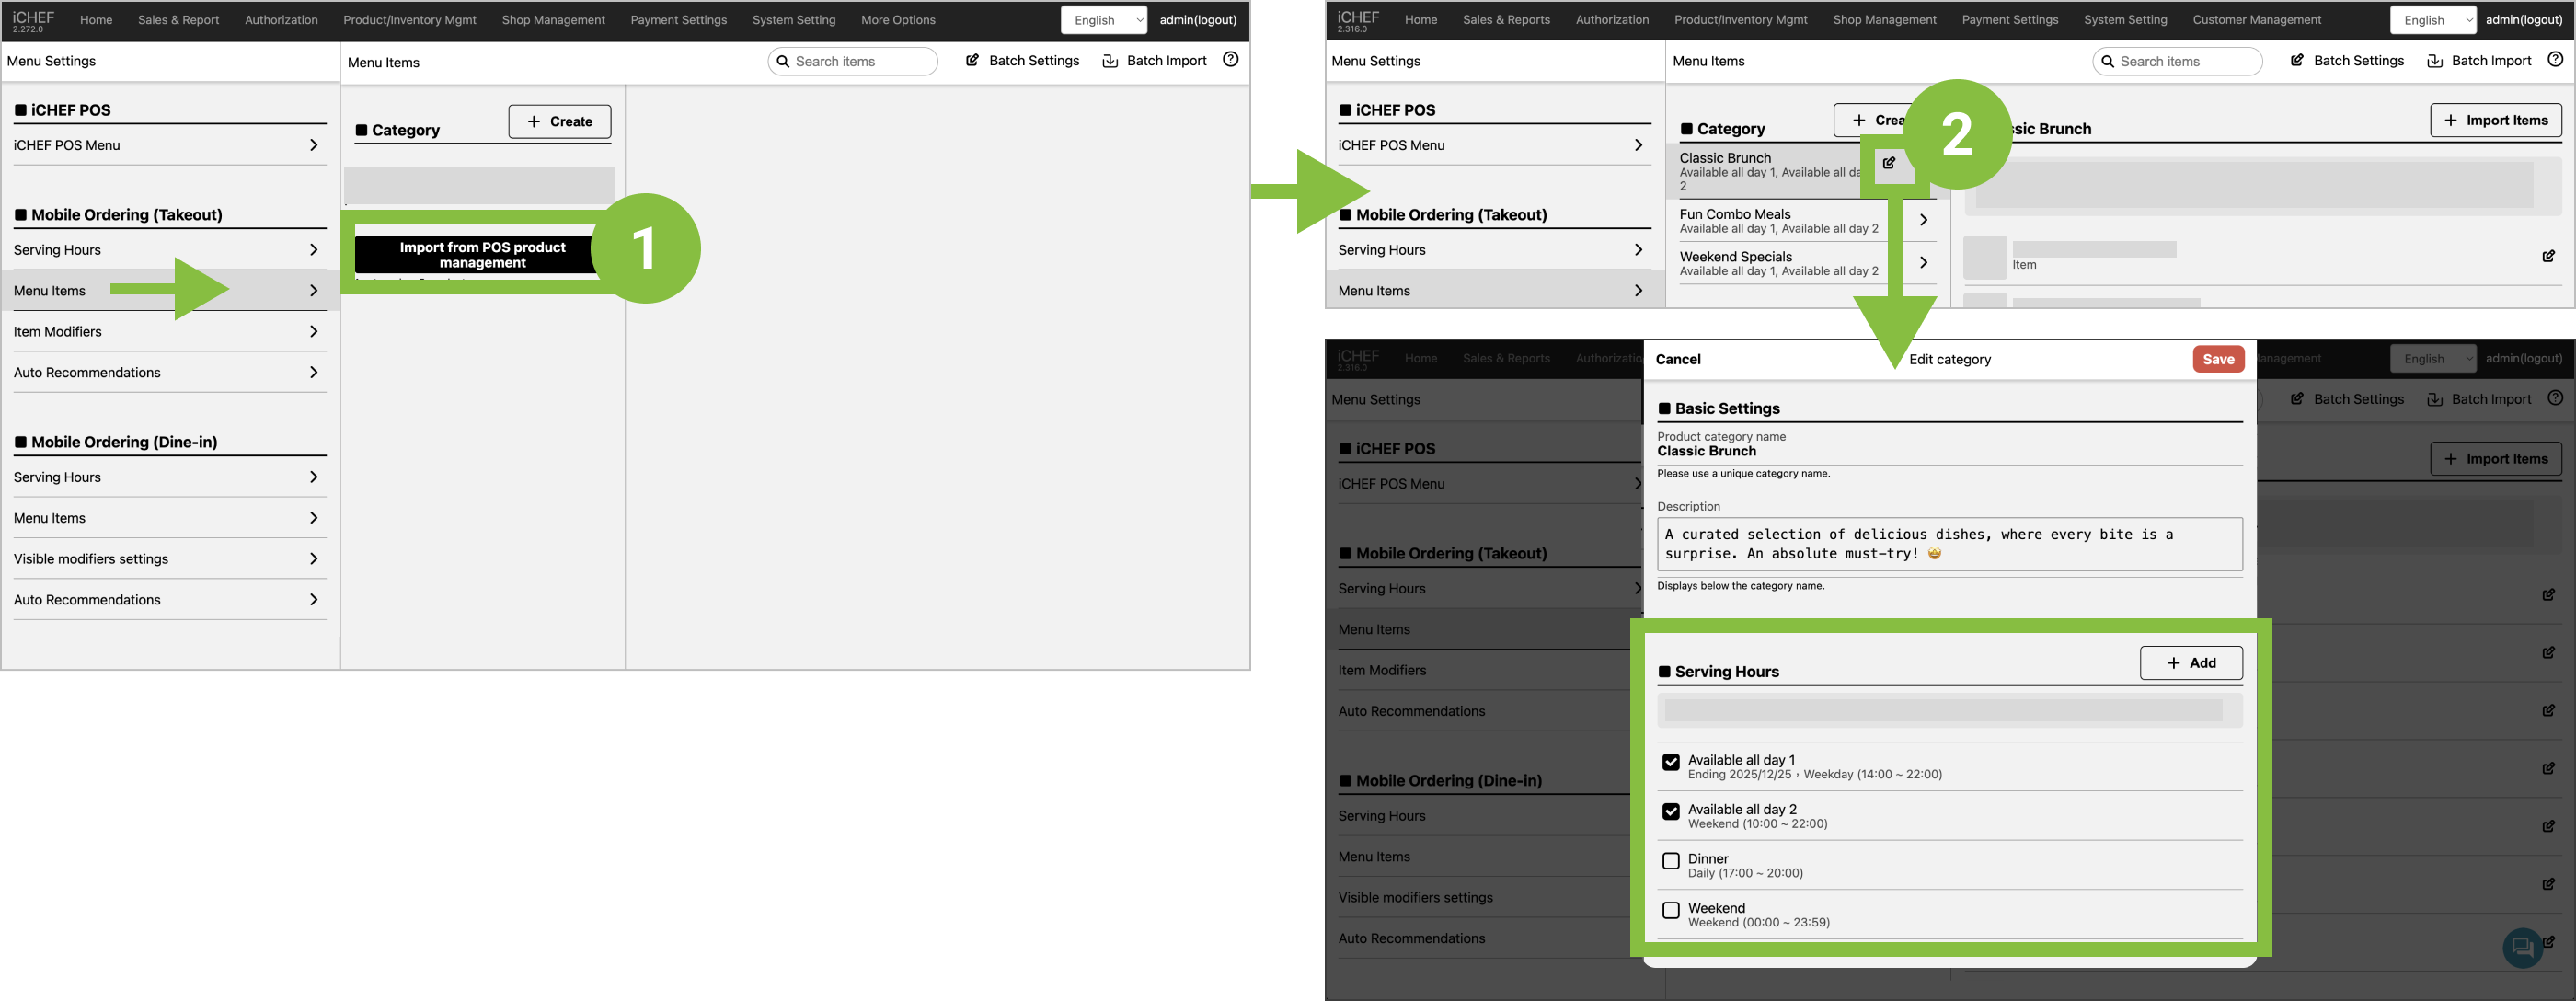
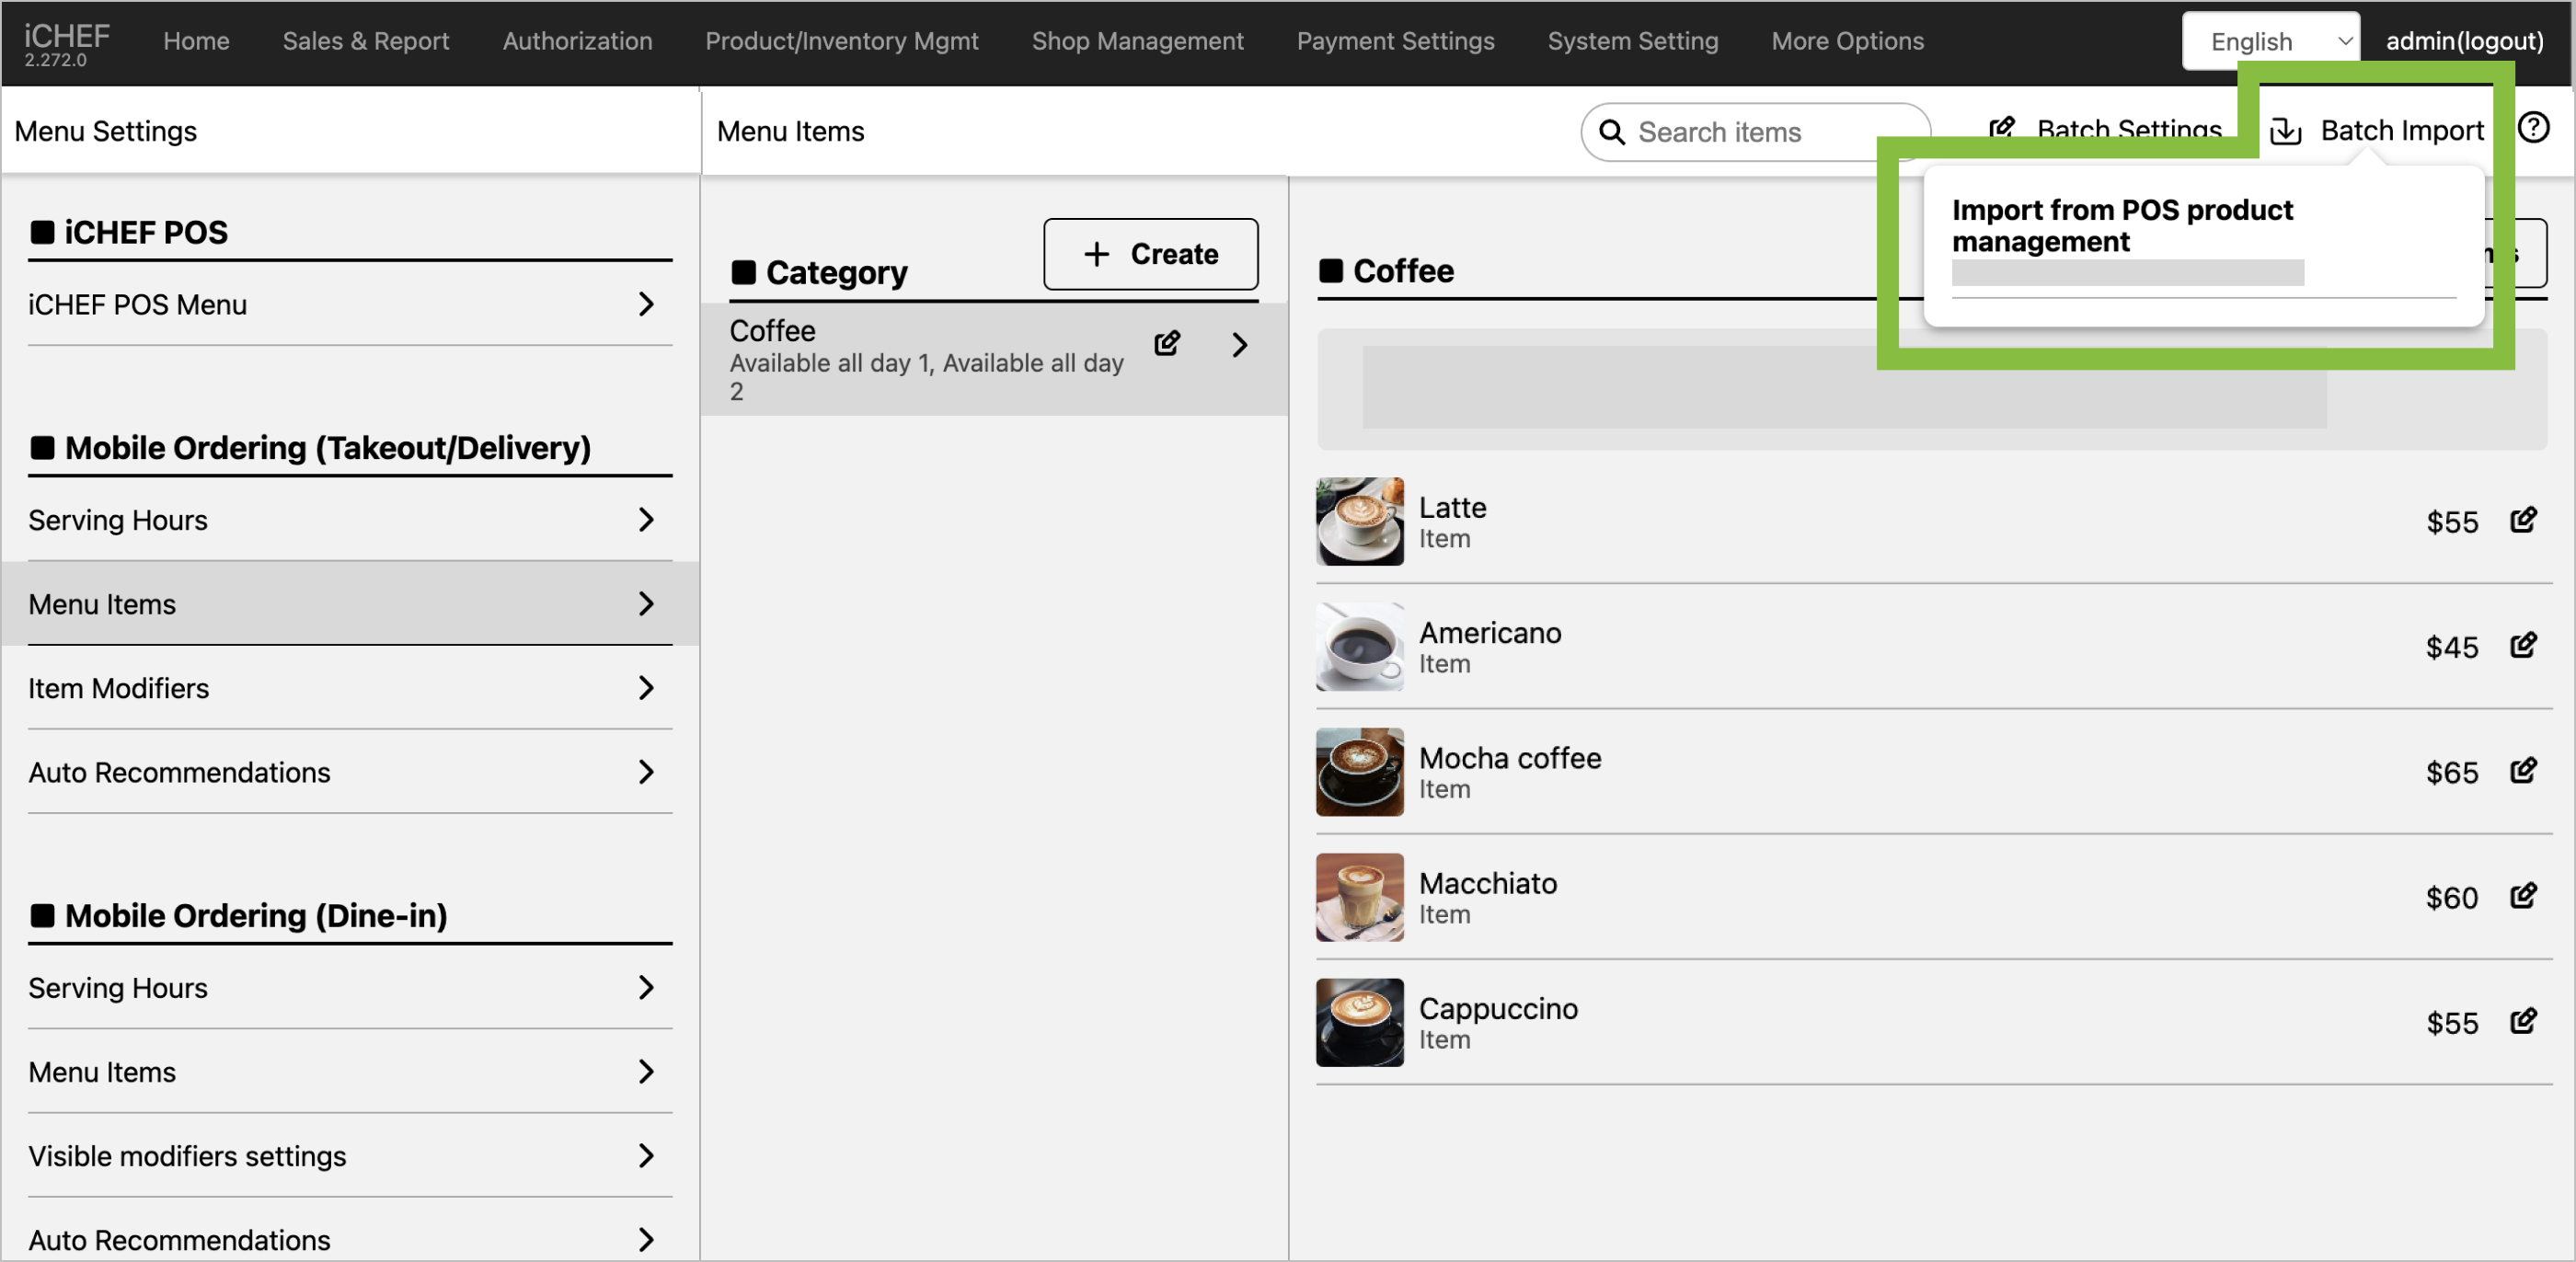
- Enter the [Menu Item Settings] of the corresponding feature section. Tap [Import from POS product management] to directly import all categories and items from the POS.
- After the import is complete, please edit the [Product Category] to assign [Serving Hours].
Manual Selection
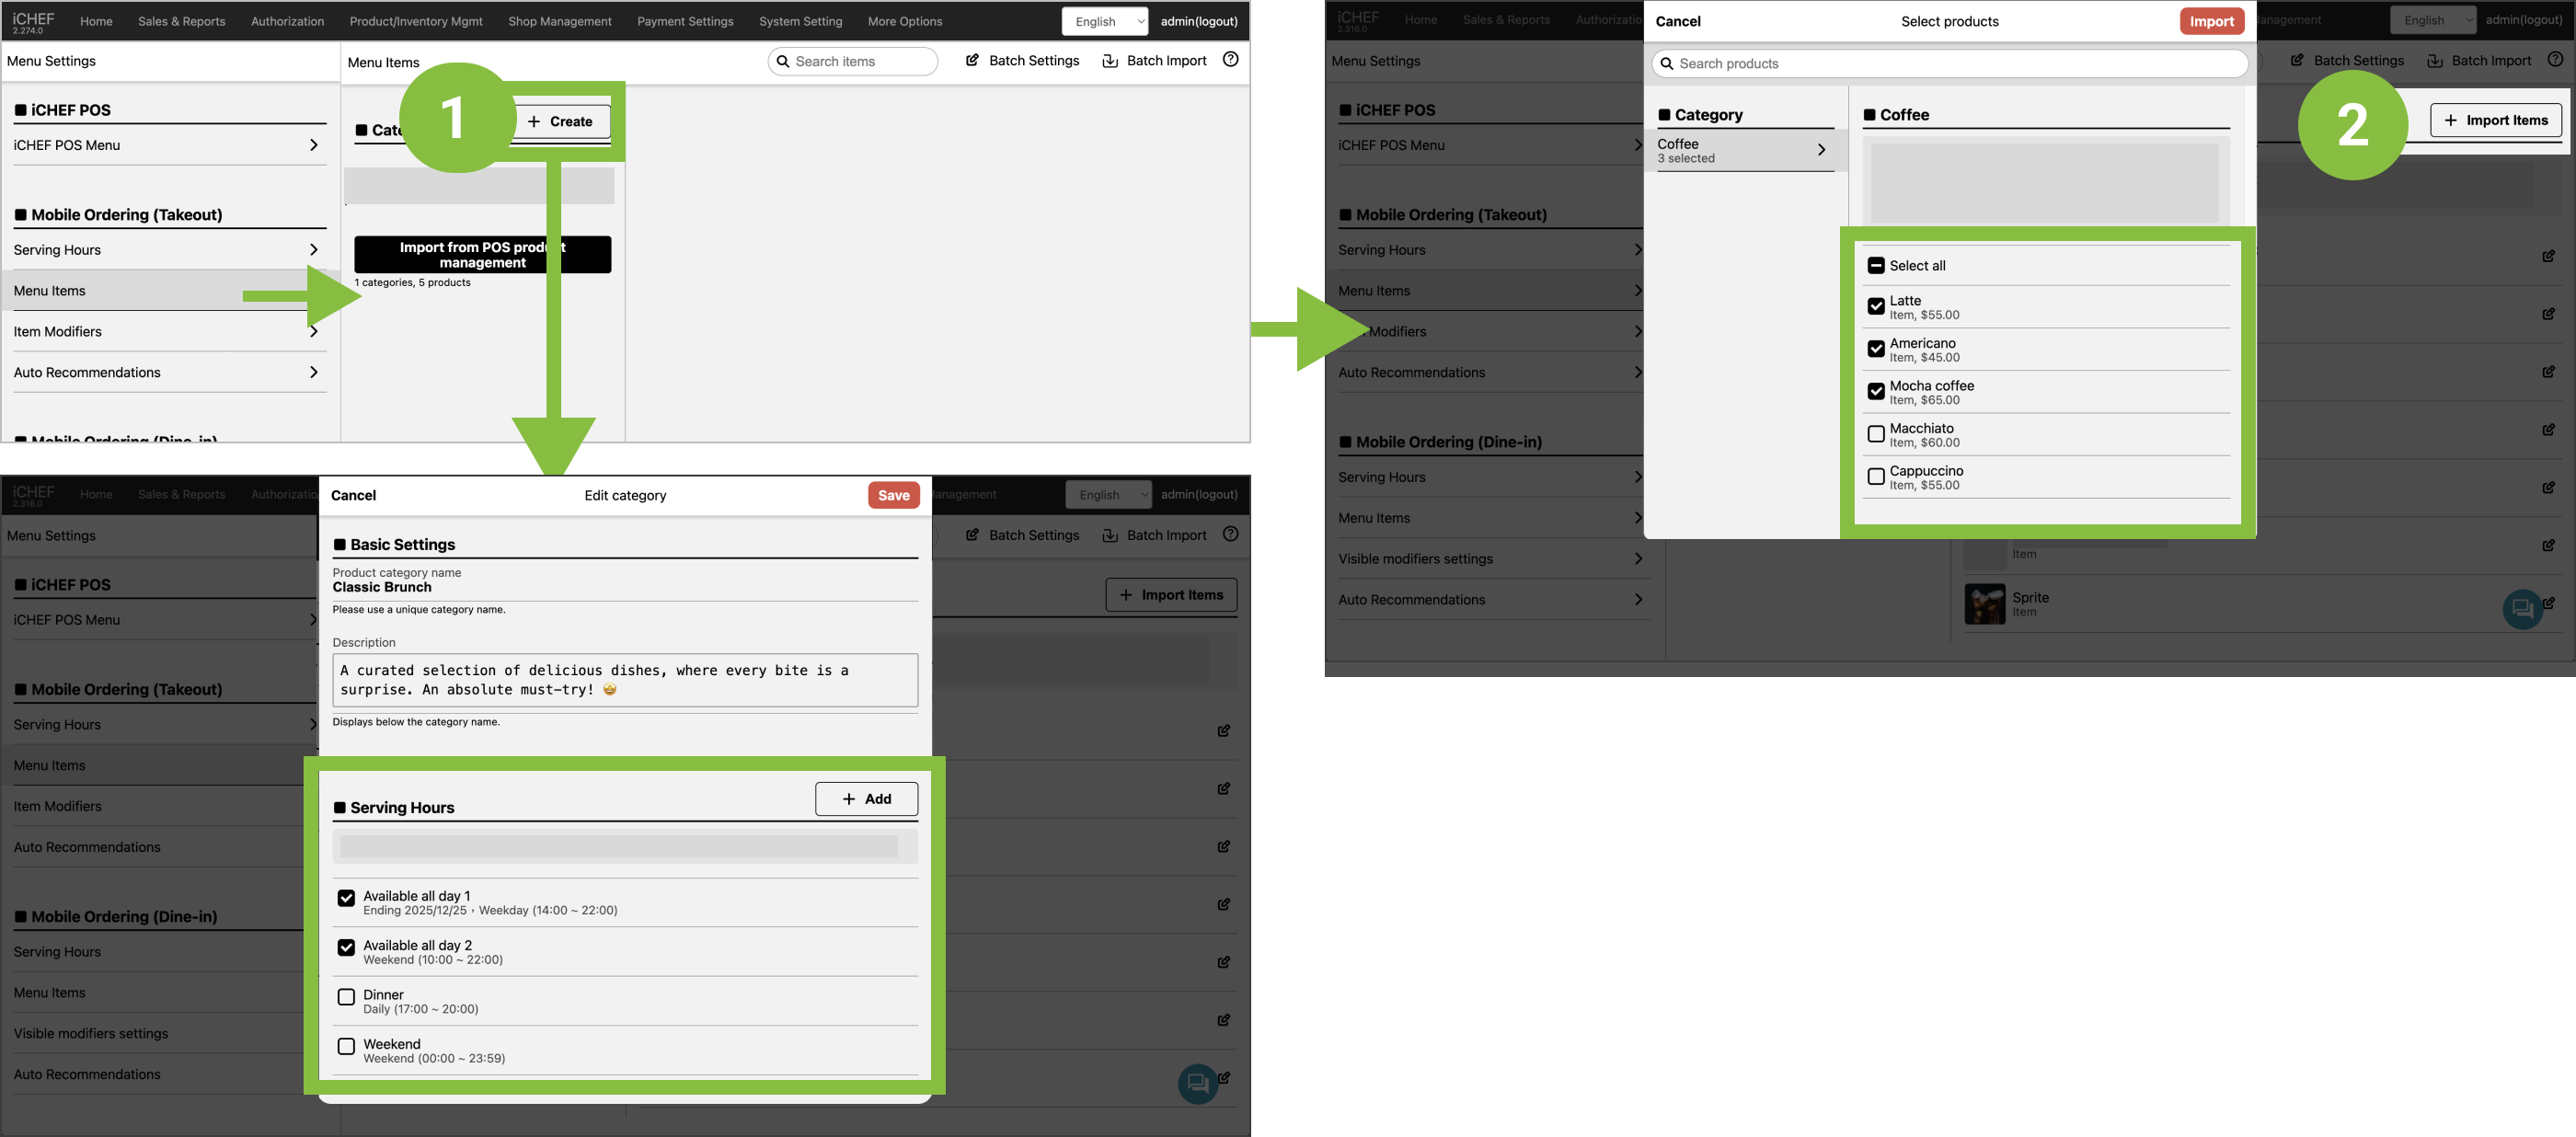
- Add a category, and select [Serving Hours].
- Tap the [Import items] button, and select items to list. (Each item can only be listed in one product category).
Online menu will show [Item Categories] from Menu Items based on the [Opening Hours] and [Serving Hours] settings.
- Opening Hours:
- Mobile Ordering (Takeout): Based on the Backend Store Information > Opening Hours Settings.
- Mobile Ordering (Dine-in): The Backend has no Opening Hours setting, so it is automatically considered daily / all-day availability.
- Reservation Pre-Order (TW): Based on the Backend Reservation Rules > Reservation Hours.
- Serving Hours: Set in Product/Inventory Mgmt > Menu Settings under [Serving Hours] settings.
- Items Category: Set in Product/Inventory Mgmt > Menu Settings under [Import Items] settings.
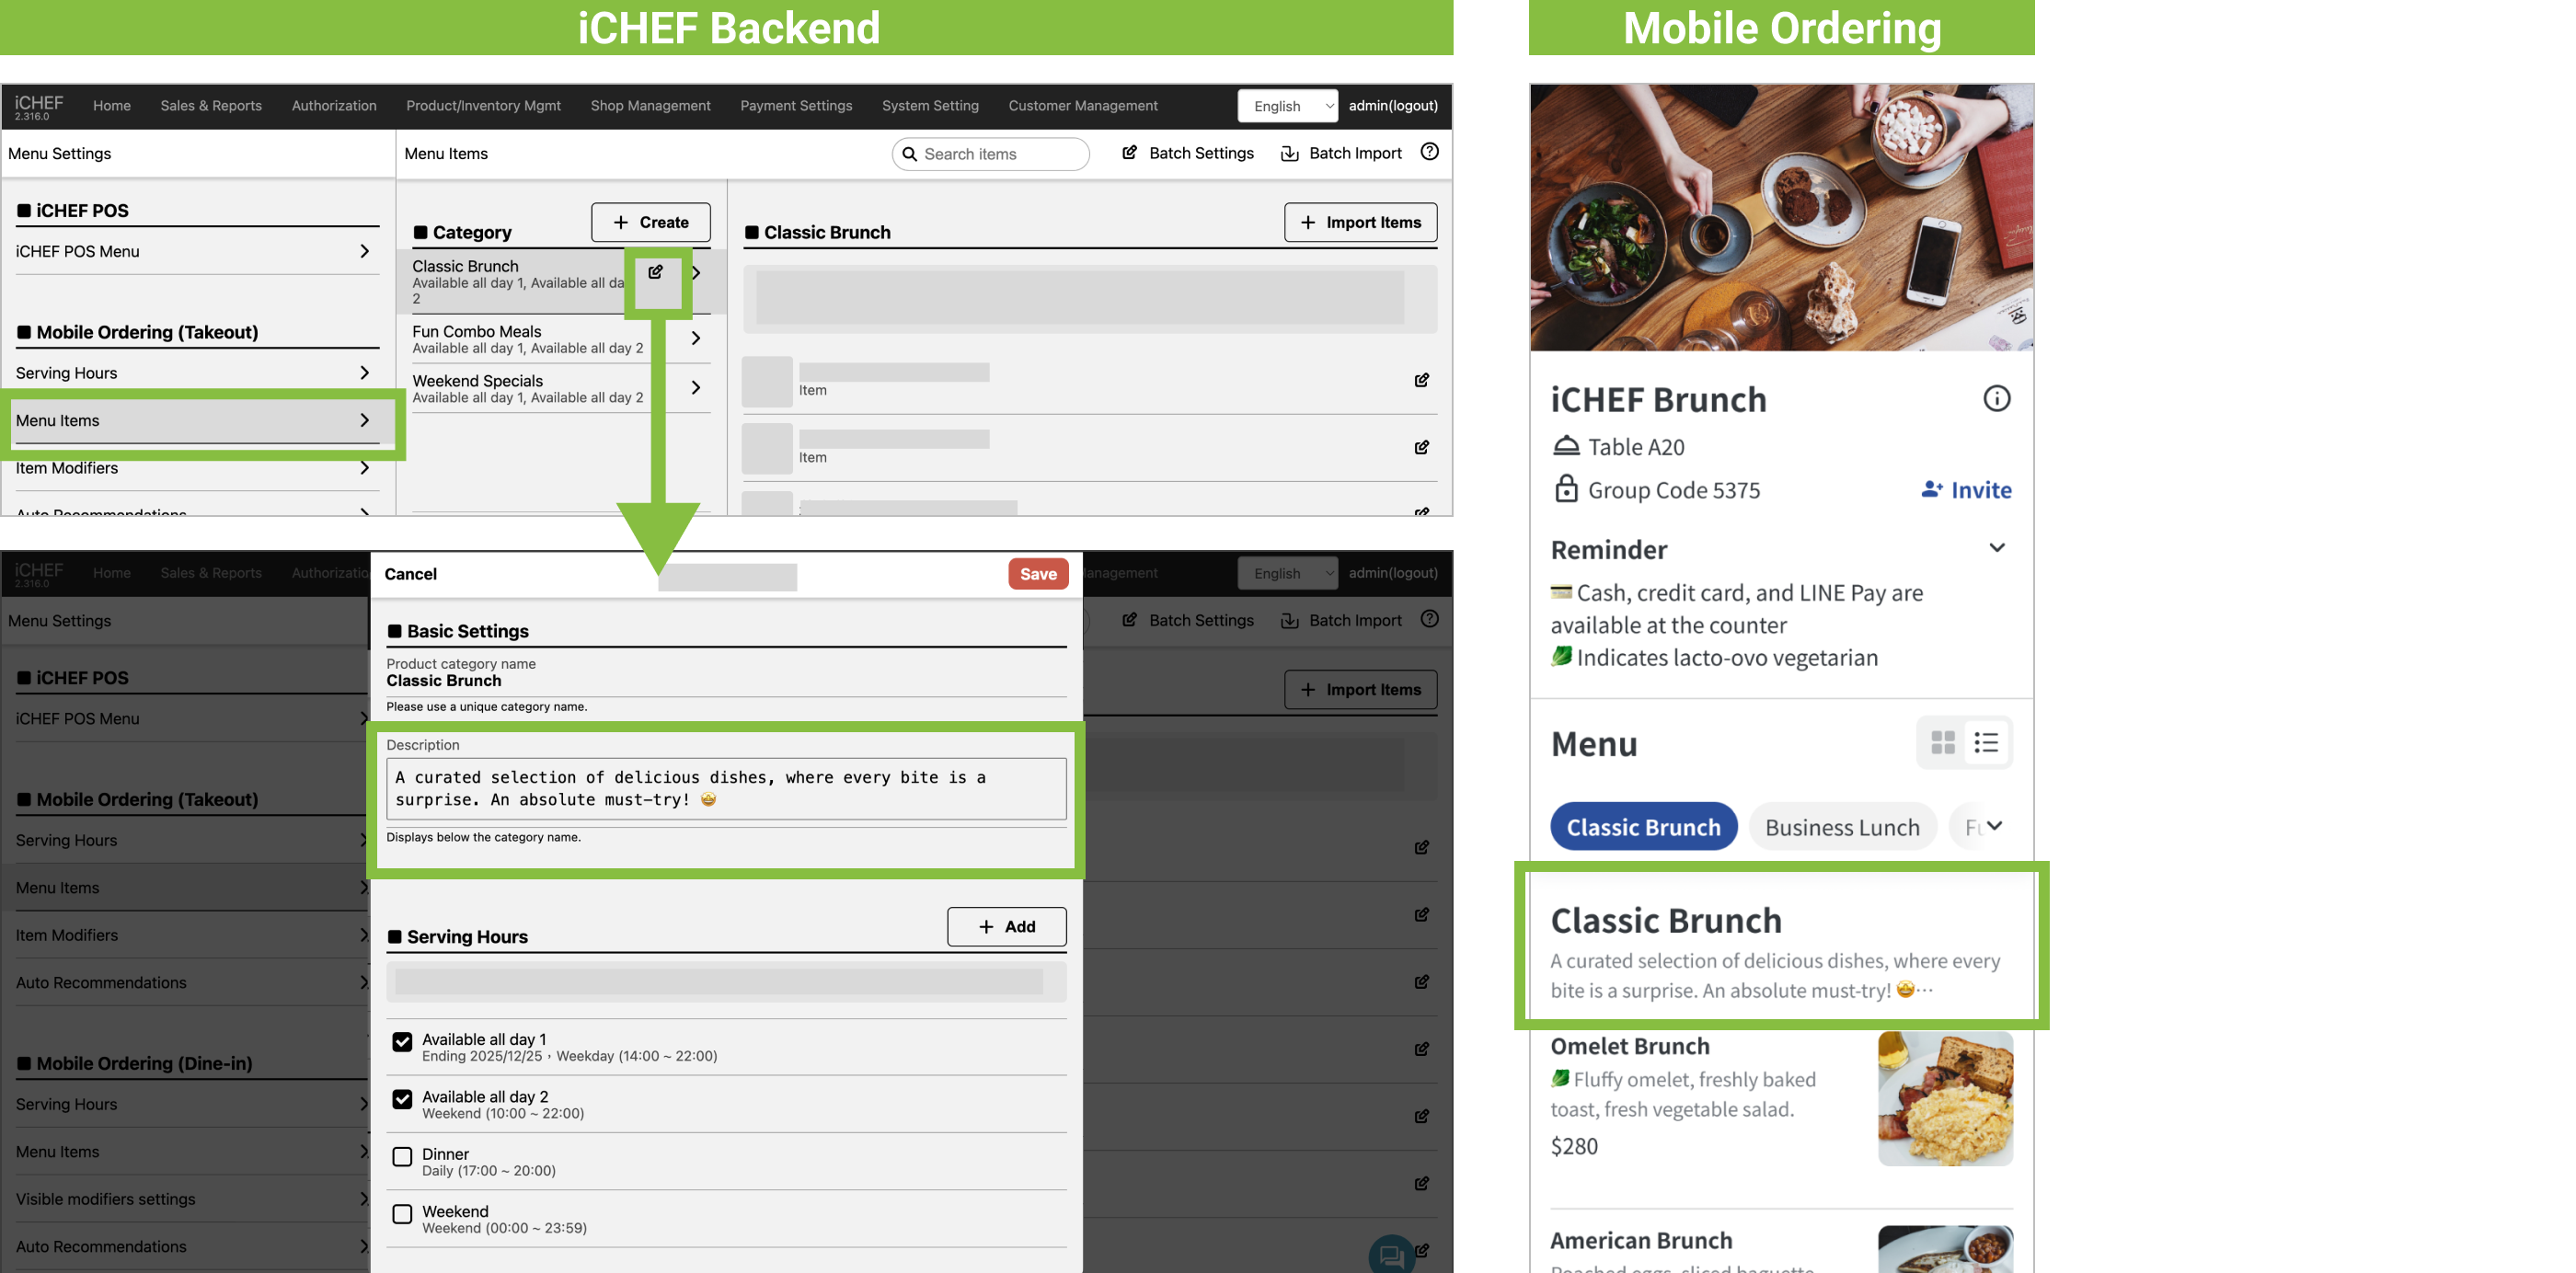
Tap the [Edit] icon next to the product category name. In addition to editing the item’s name and Serving Hours, you can also add a unique descriptive text for the category. Text and emojis are both supported—feel free to type! Once applied, customers will be able to see the category’s description on the Online Store.
After importing items to your website, you can adjust the information of imported product to provide more details in a more attractive way for your customers.
- Item name: The settings will be applied to the display on your website only. For the name on the report, will follow the [Product/Inventory Mgmt] setting.
- Item description: It will be displayed below the product name, so that consumers can learn more about the product description.
- Item Image: You can upload the images for all of the products as well as set menu items.

– The item price specified here should be consistent with that on the POS. If you need to set different prices, please go to [Product/Inventory Mgmt] and add the item, and then import it to your online store.
– To remove an item from your website, please click the pen icon and click [Delete product]. This setting will not be synced to the POS.
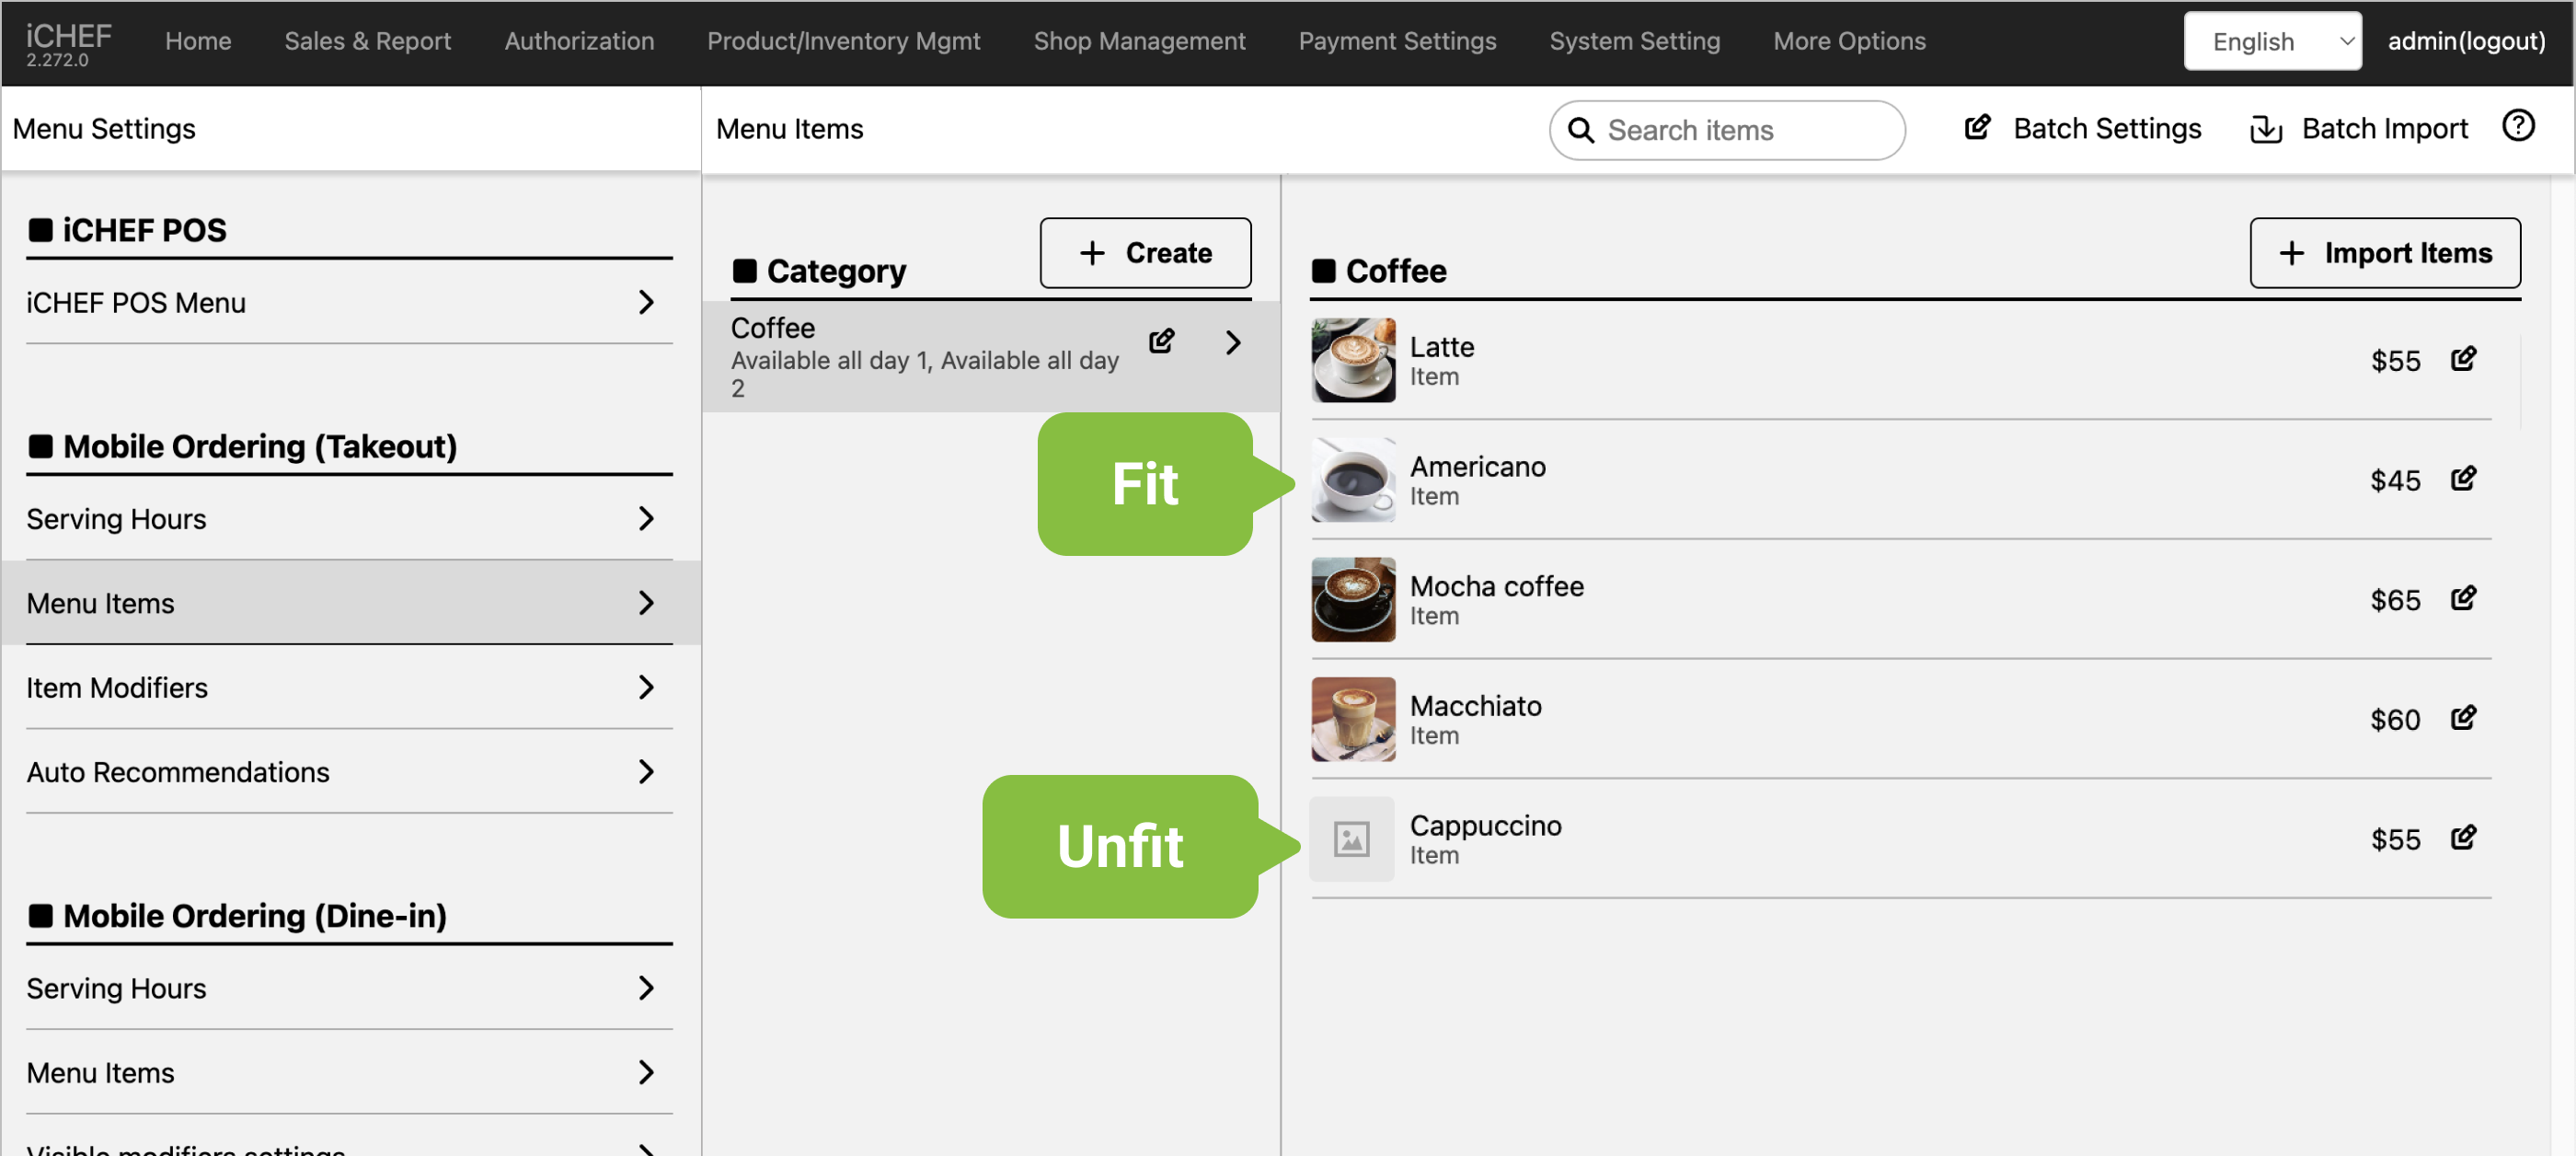
When the POS item image size is not suitable for the Online Store, the item image will not be imported. Please edit the item and re-upload.
Recommended minimum size: 750 x 750 px
- Fit: Items’ images will be imported.
- Unfit: The item image is blank as default. Please upload again.
The [Batch Import] feature in the top right is recommended for when you want to update the entire menu. This action will directly replace all currently listed items and cannot be undone. Please reconfirm.
Items imported via [Batch Import] will be automatically assigned to the first Serving Hours.
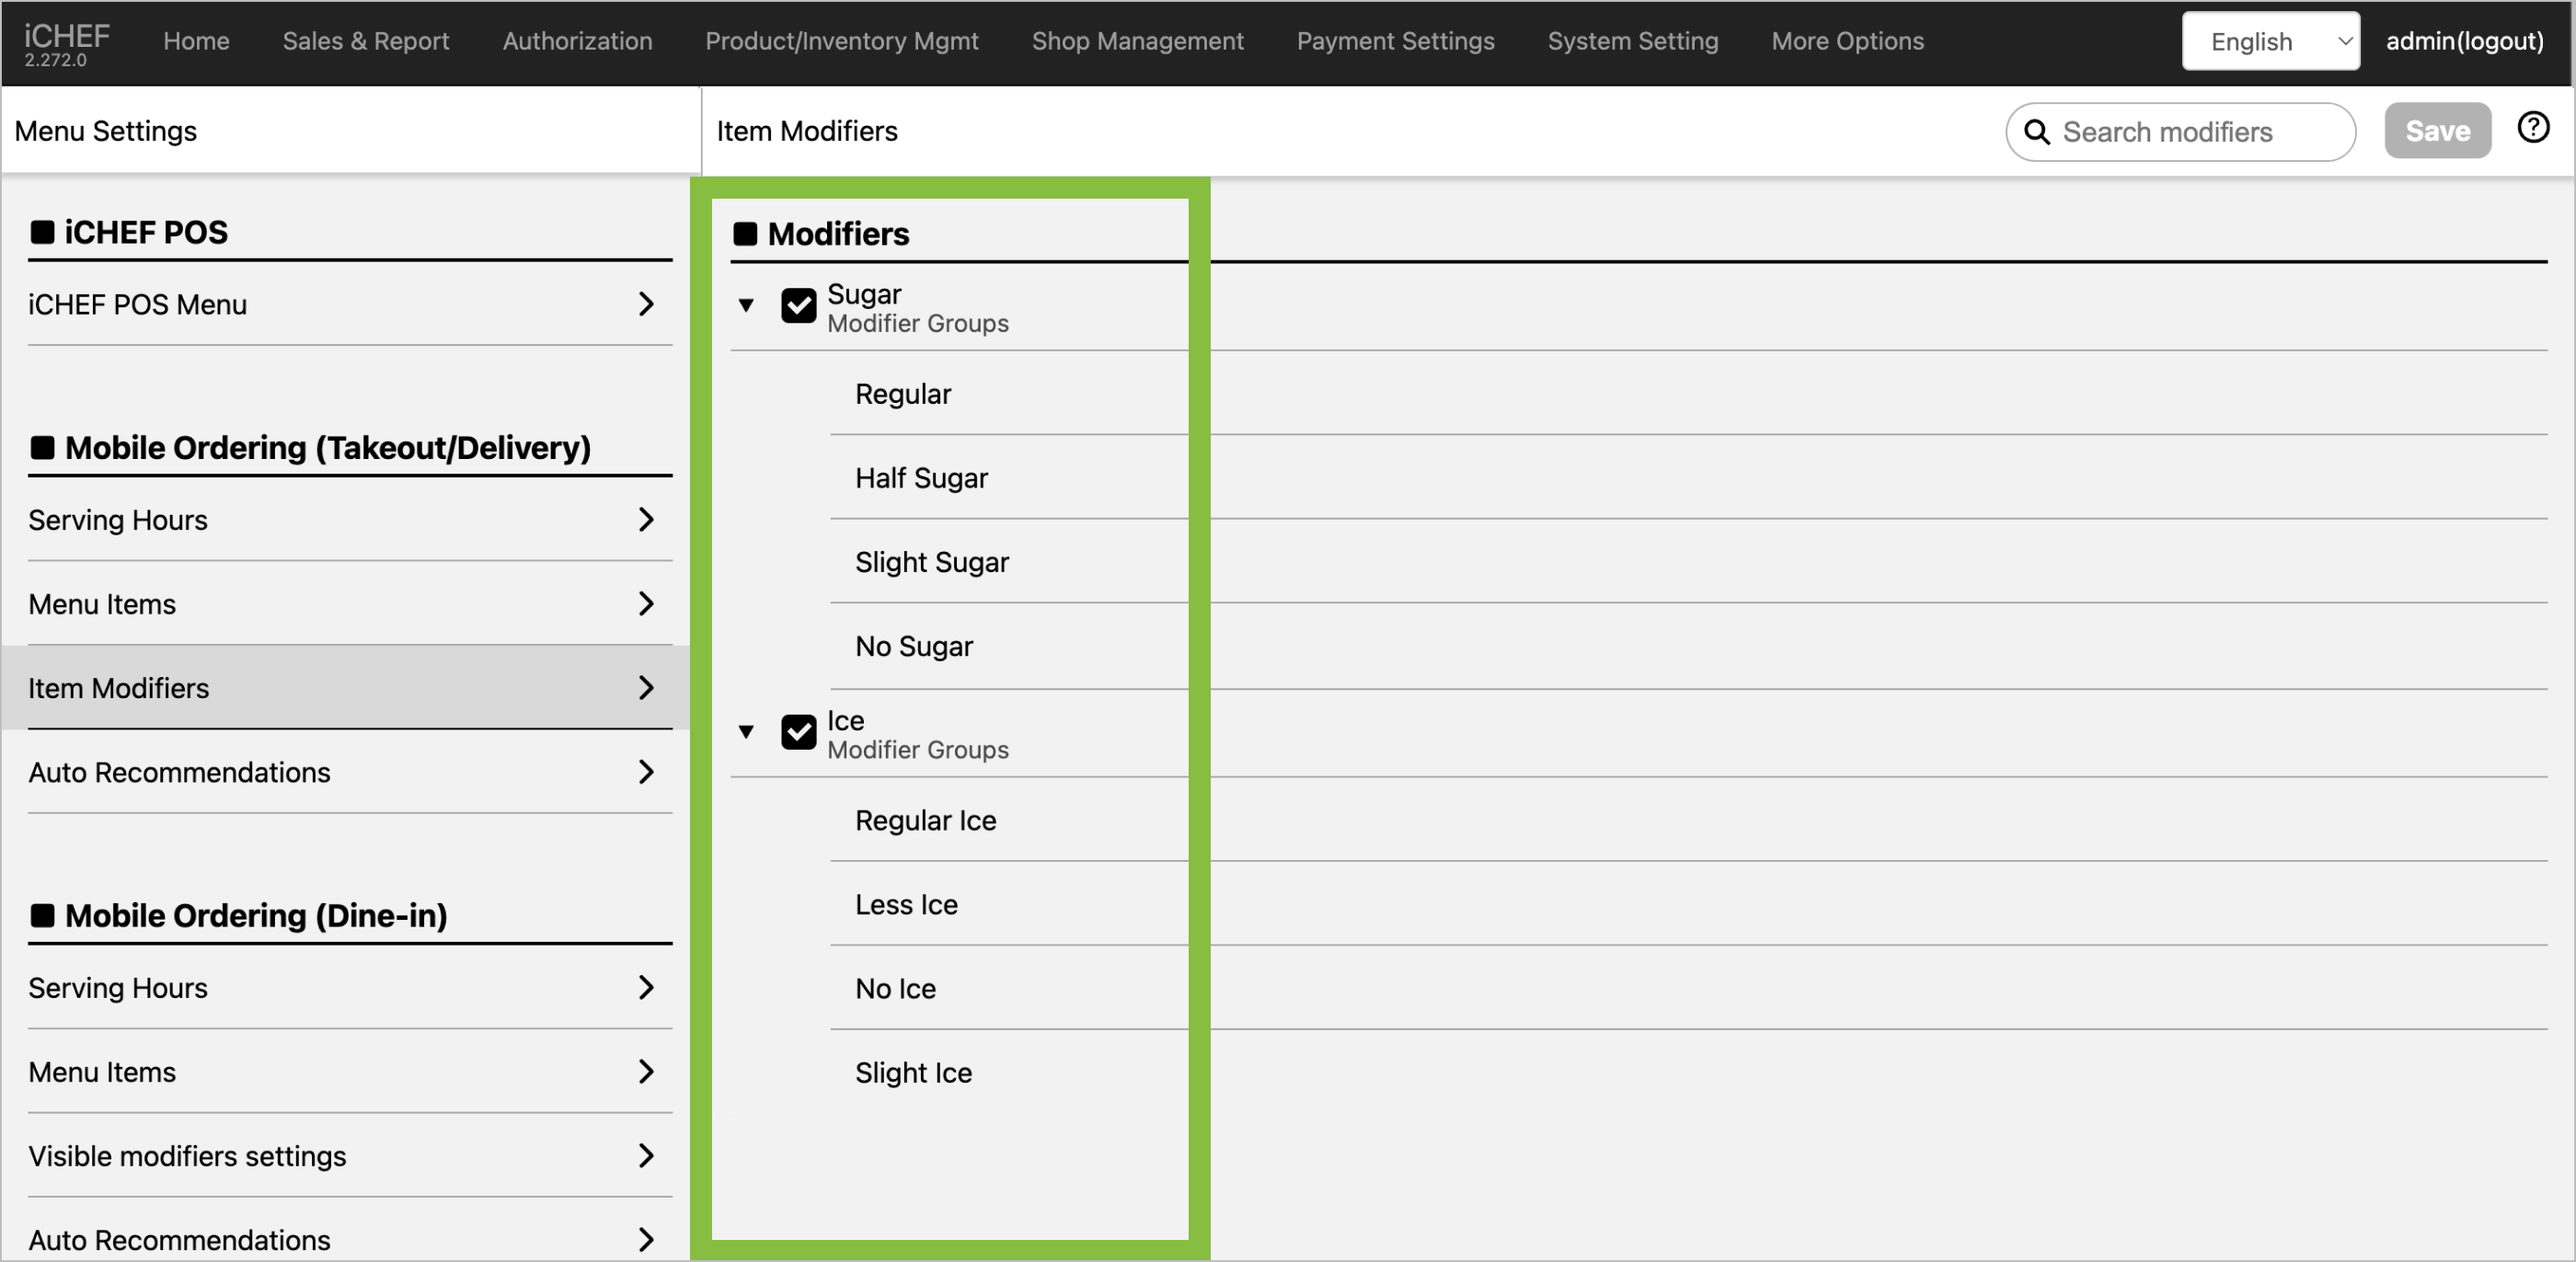
➋ Check visible modifiers
The modifiers will be imported automatically. Please find your targeted function and click [Visible modifiers settings] to edit the modifiers visible on your website. The options you select will be available to customers.
➌ Adjust Item Order
Tap [Batch Settings > Reorder products] in the top right to drag and adjust the order of categories and items. The webpage will display them according to this order. Make your main items appear first! Increase customer selection opportunities.

After completing the settings, please [Update Menu] for iCHEF POS App, and you can check the latest menu on your website!
- Mobile Ordering (Takeout): Go to [Online Store] > [Mobile Ordering (Takeout)] and click your website URL to check the menu.
- Mobile Ordering (Dine-in): Go to [Online Store] > [Mobile Ordering (Dine-in)] > [Static QR Code], download any one of the table card and scan it to check the menu.
