取得台新刷卡機後,即可至 iCHEF 後台啟用台新刷卡機支付模組,並完成 POS 連線設定,就可以正式開始使用 台新刷卡機結帳囉!

一、啟用支付模組
➤ Backend location: Payment Settings > Payment Modules
- 展開「+新增」
- 點選「台新刷卡機支付模組」
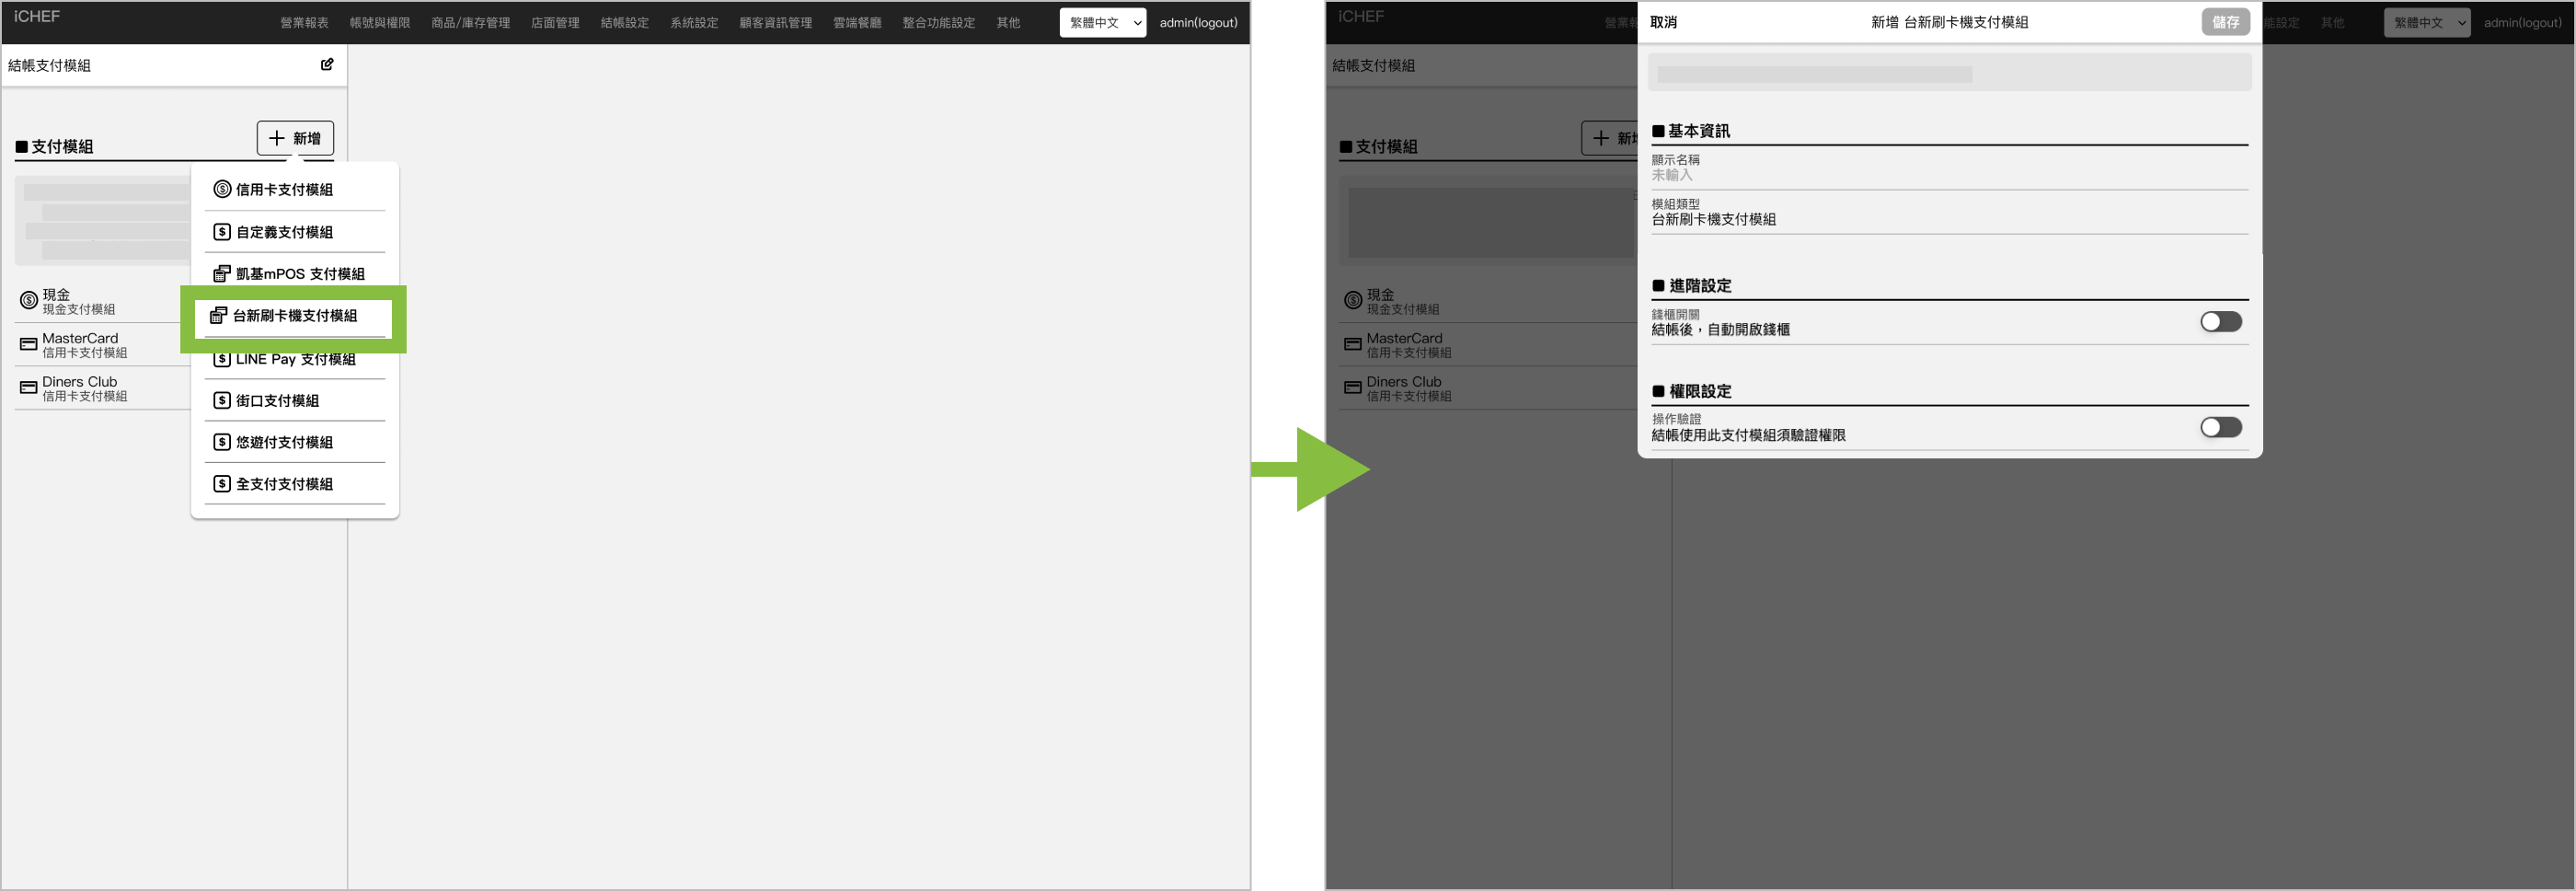
Display Name
Provide an easily recognizable name for the payment module. The custom name will be displayed on the POS checkout page, summary/closure process, and the backend sales reports.
Cash Drawer Control
This setting determines whether the cash drawer opens automatically after a consumer checks out using this payment module.
- On: Cash drawer opens automatically
- Off: Cash drawer does not open
Operation Verification
Set that only authorized employees can use this payment module. This setting will be synchronized with accounts and permissions.Learn More
新增完成後,請將 iCHEF POS 套用新設定檔登入 再完成連線設定,即可使用。
二、POS 連線設定
結帳頁已出現台新刷卡機支付模組選項後,就可以開始將 POS 與刷卡機連線。
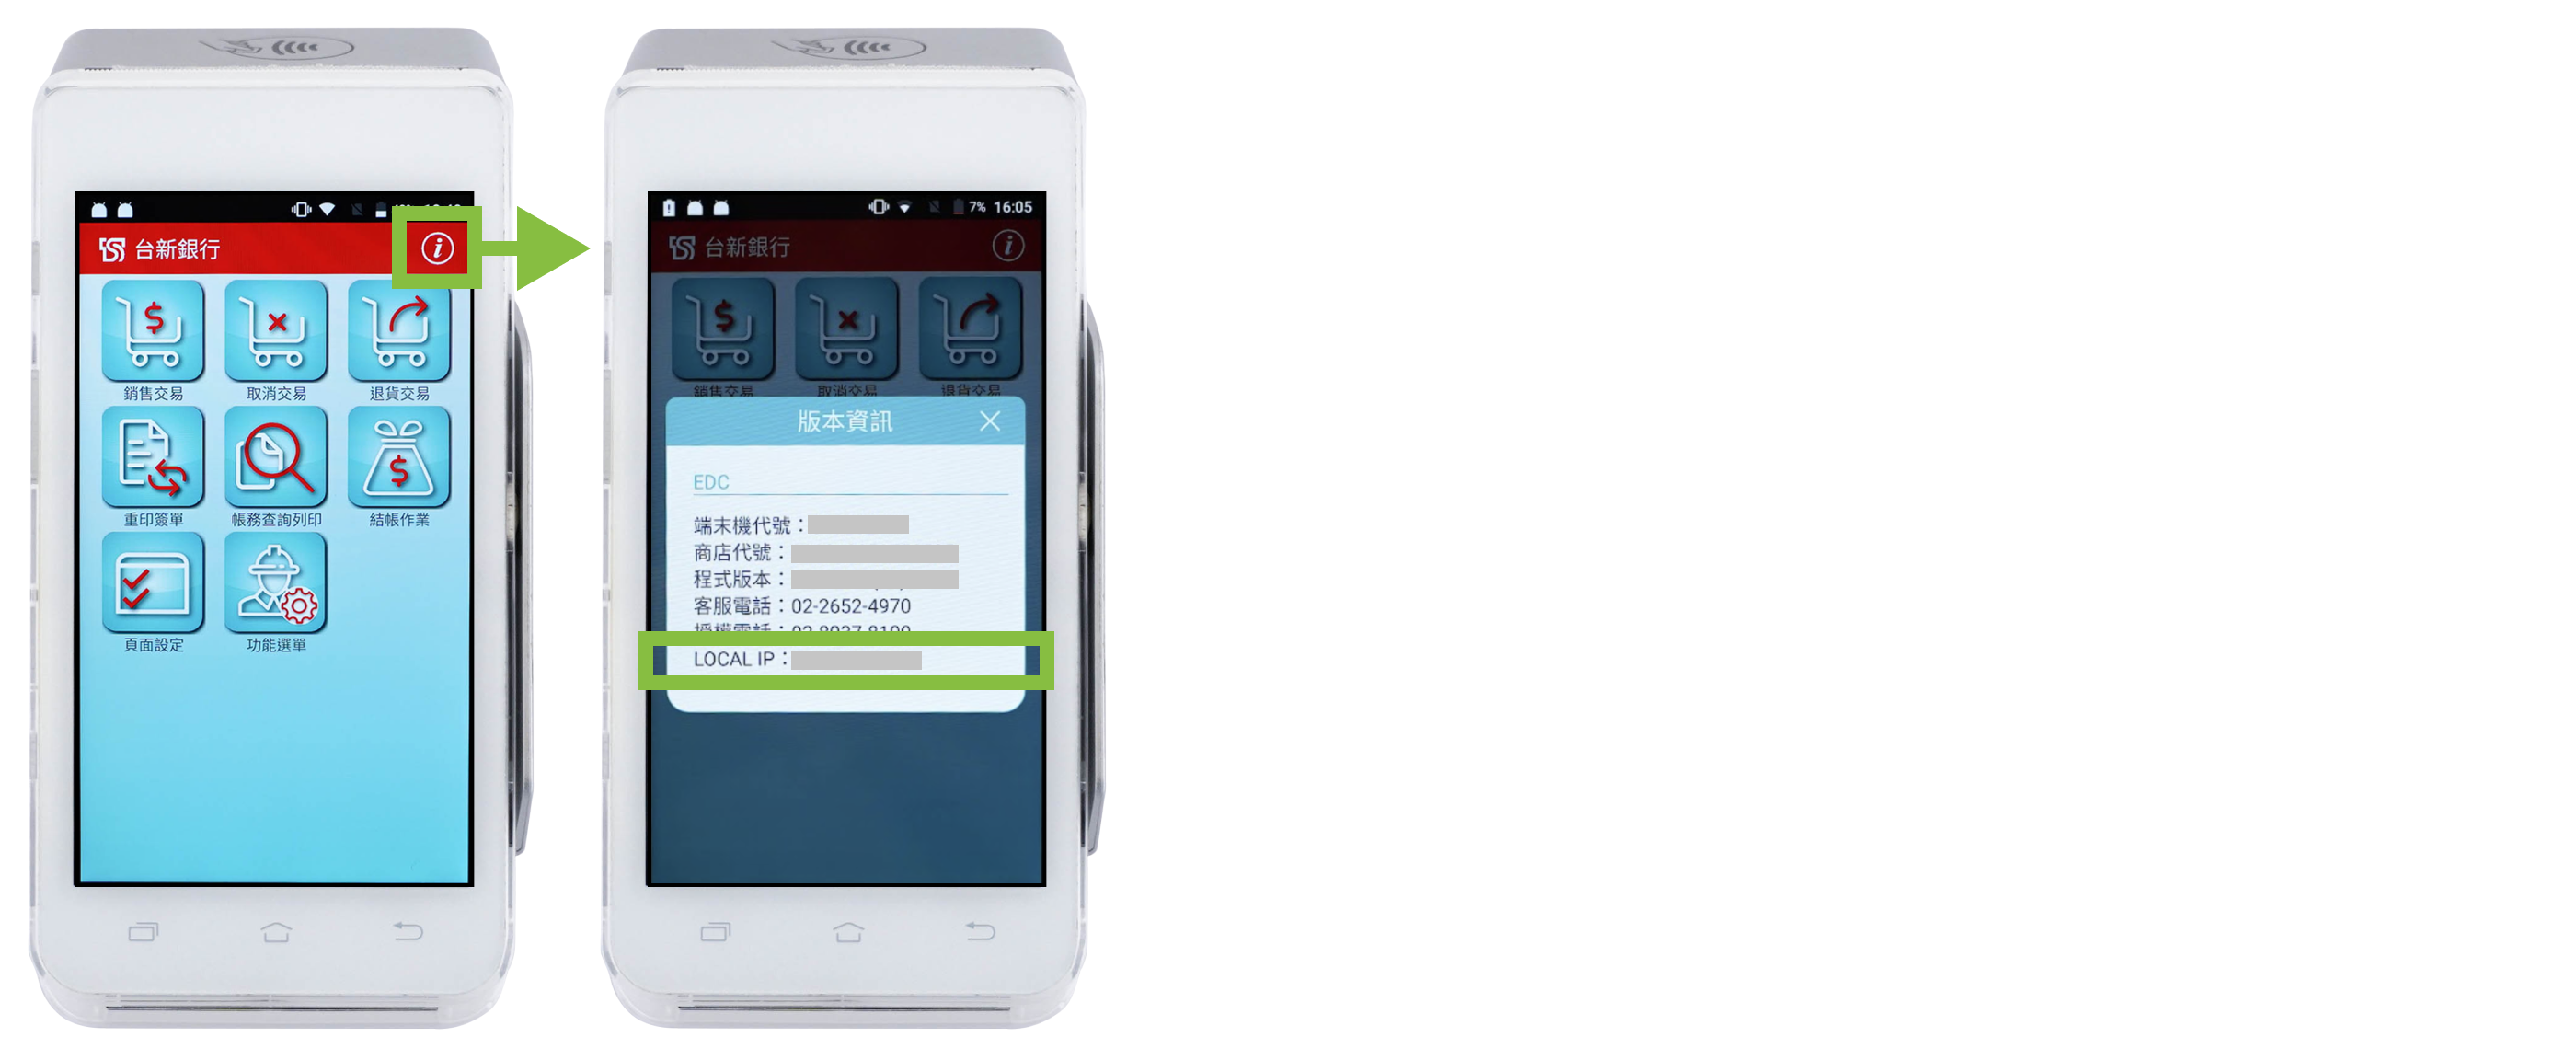
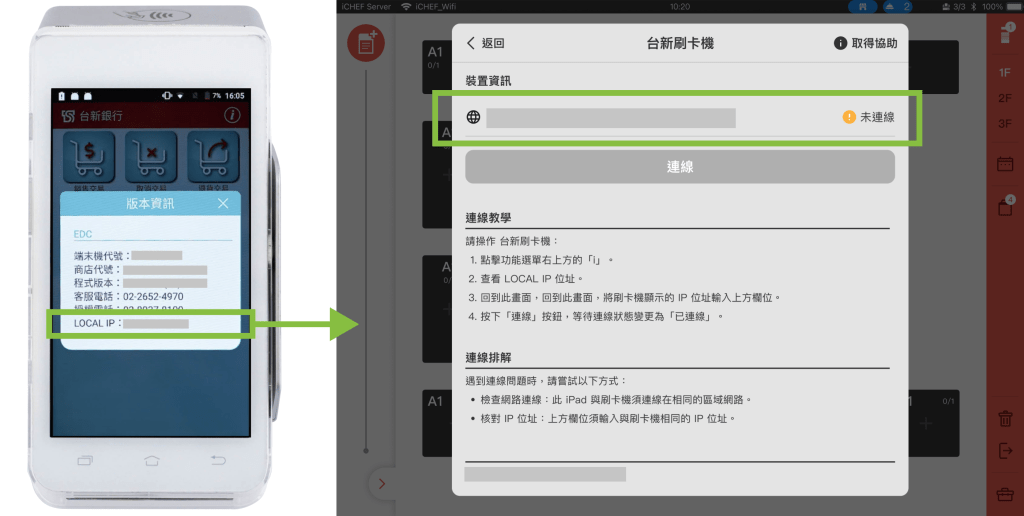
步驟 1:查看刷卡機 IP 位置
請操作台新刷卡機:
- 點擊功能選單右上方的「i」。
- 查看 LOCAL IP 位址。
步驟 2:iCHEF POS 連線
➤ iCHEF POS App 位置:工具箱 > 裝置管理 > 刷卡機 > 台新刷卡機
- 將刷卡機顯示的 IP 位址輸入裝置資訊欄位。
- 按下「連線」按鈕,等待連線狀態變更為「已連線」。
連線成功時,刷卡機會跳出「錯誤訊息」:此為連線測試,可忽略。

連線排解
連線狀態與說明對照:
| Status | Instructions |
|---|---|
 | iCHEF POS App 尚未與刷卡機連線。 |
 | iCHEF POS App 與刷卡機連線成功,可開始使用刷卡機結帳。 |
 | iCHEF POS App 與刷卡機連線失敗,請依下方說明檢查網路與 IP 位置。 |
遇到連線失敗時,請嘗試以下方式:
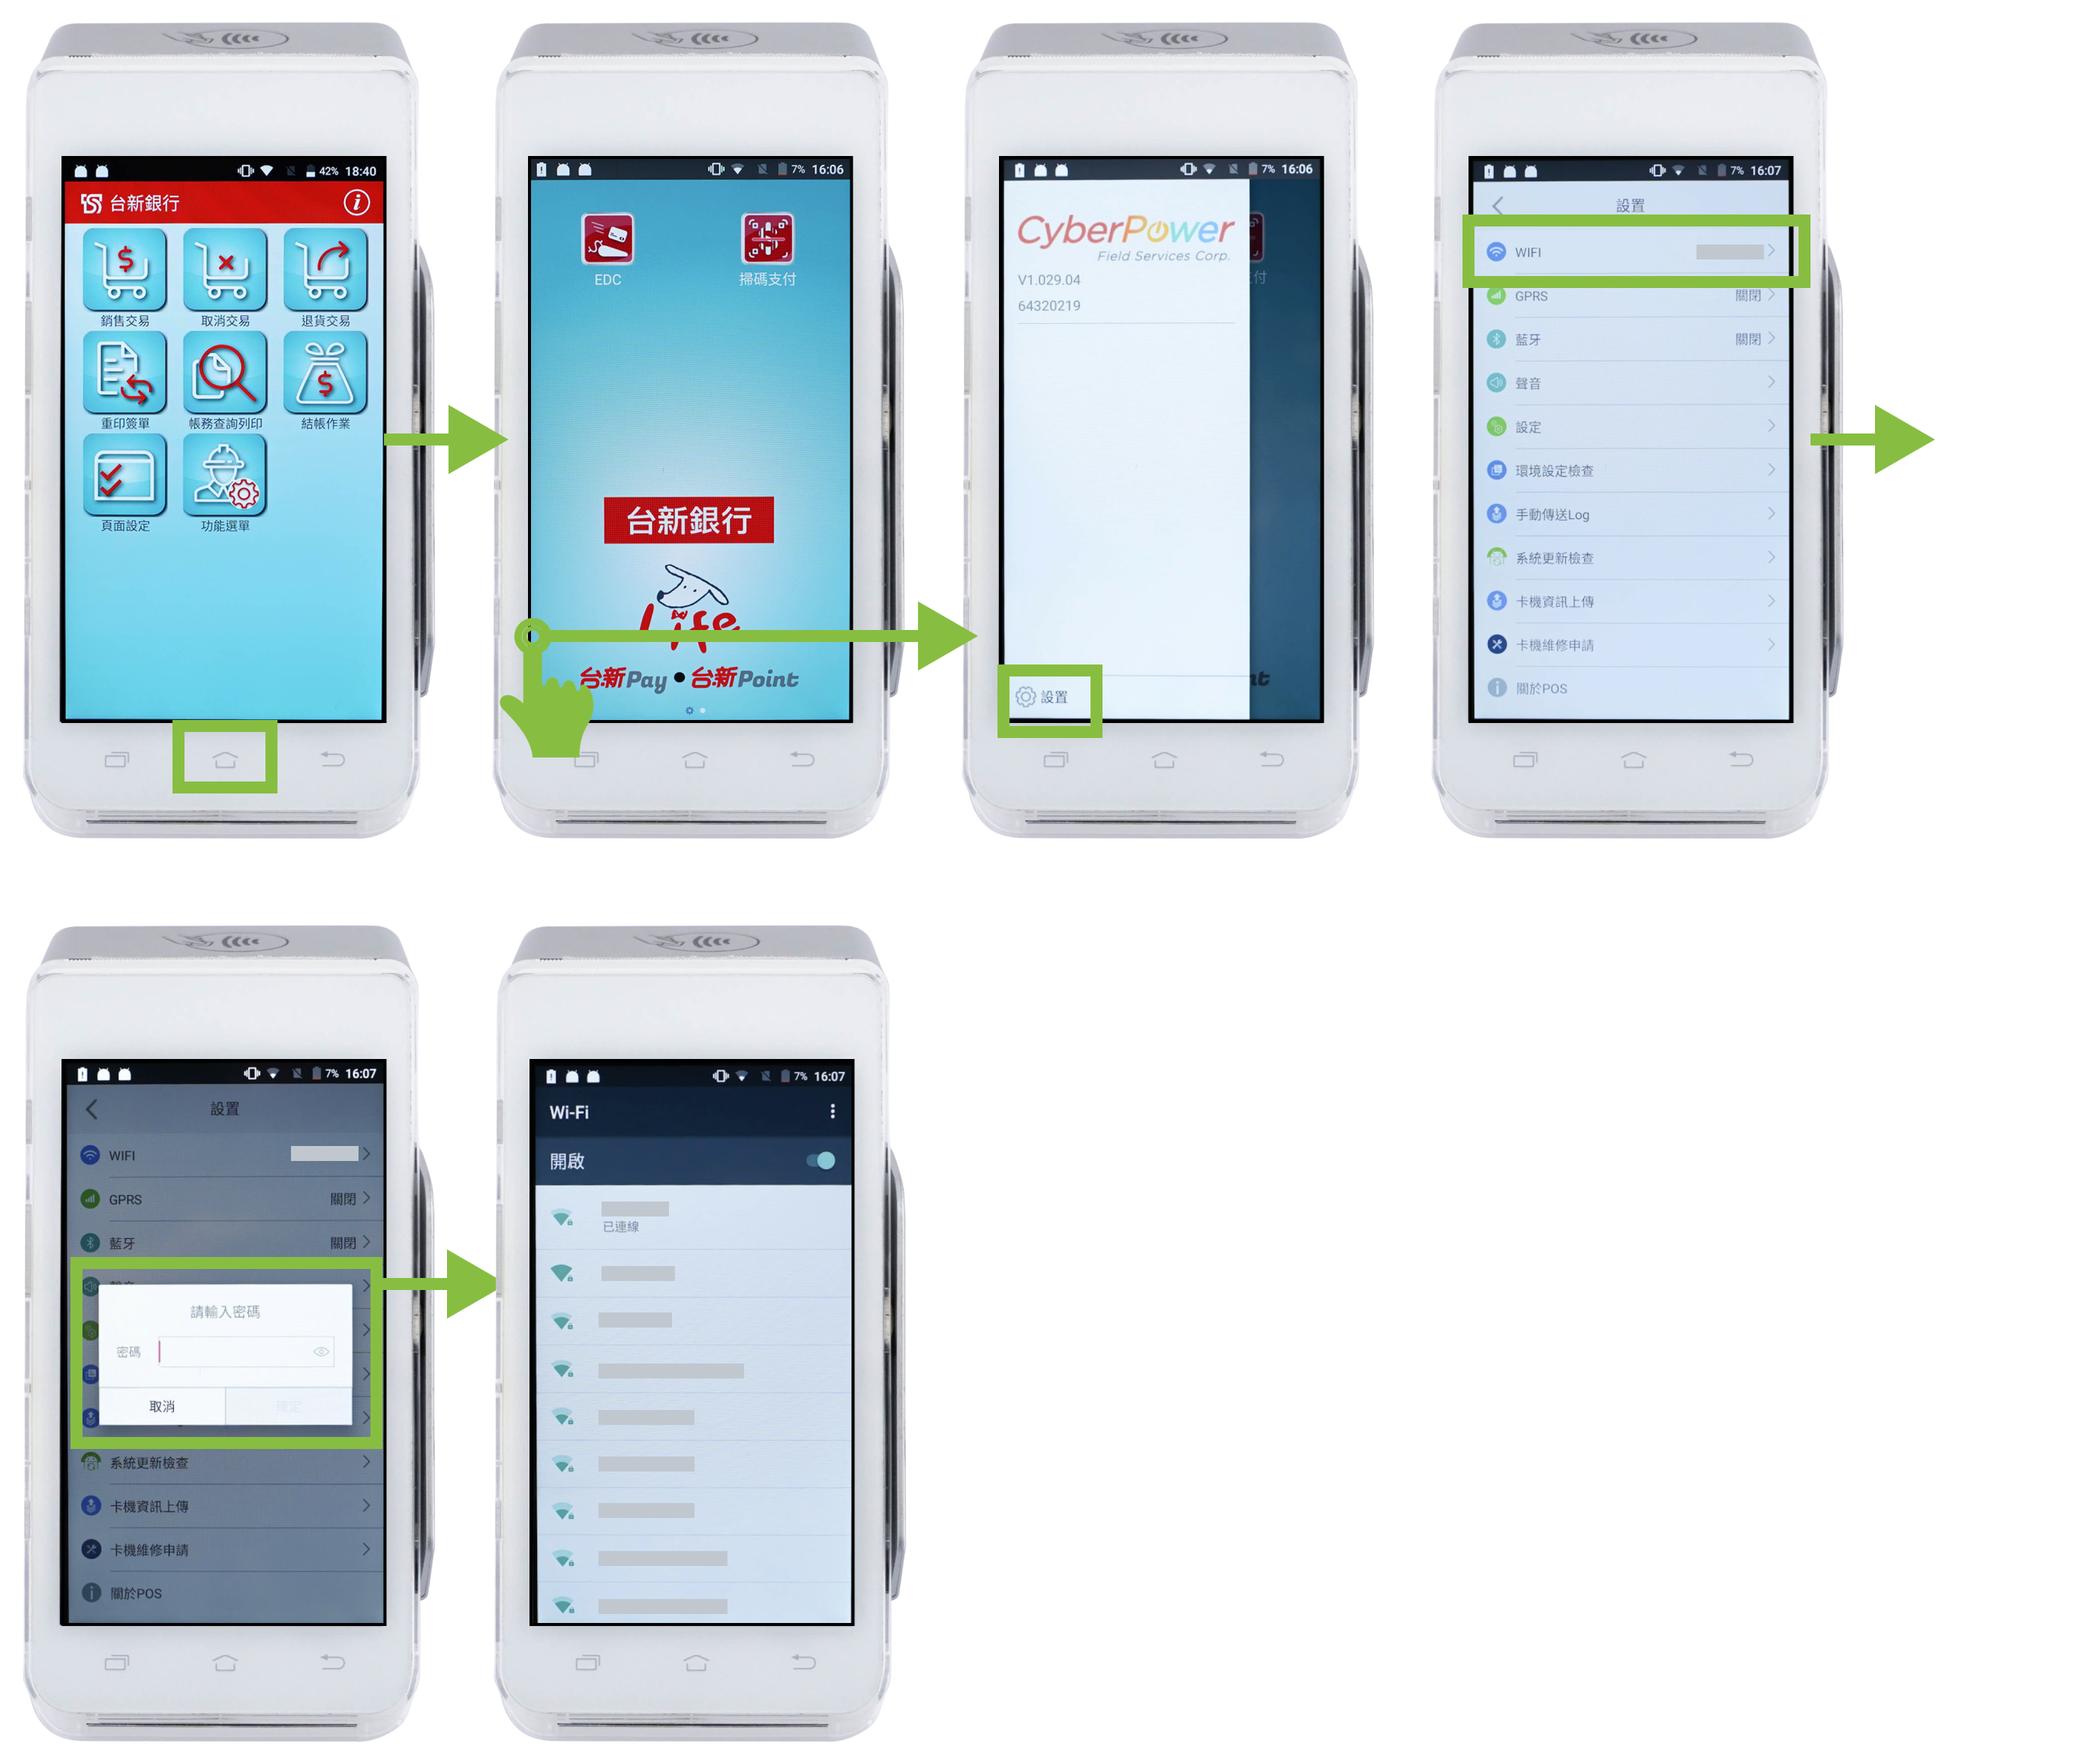
- 按刷卡機下方的房子功能鍵,回到桌面。
- 從畫面左側滑開,進入「設置 > Wifi」
- 輸入刷卡機密碼
- 確認「已連線」的 Wi-Fi 是否與 iCHEF POS App 使用的 iPad 相同。
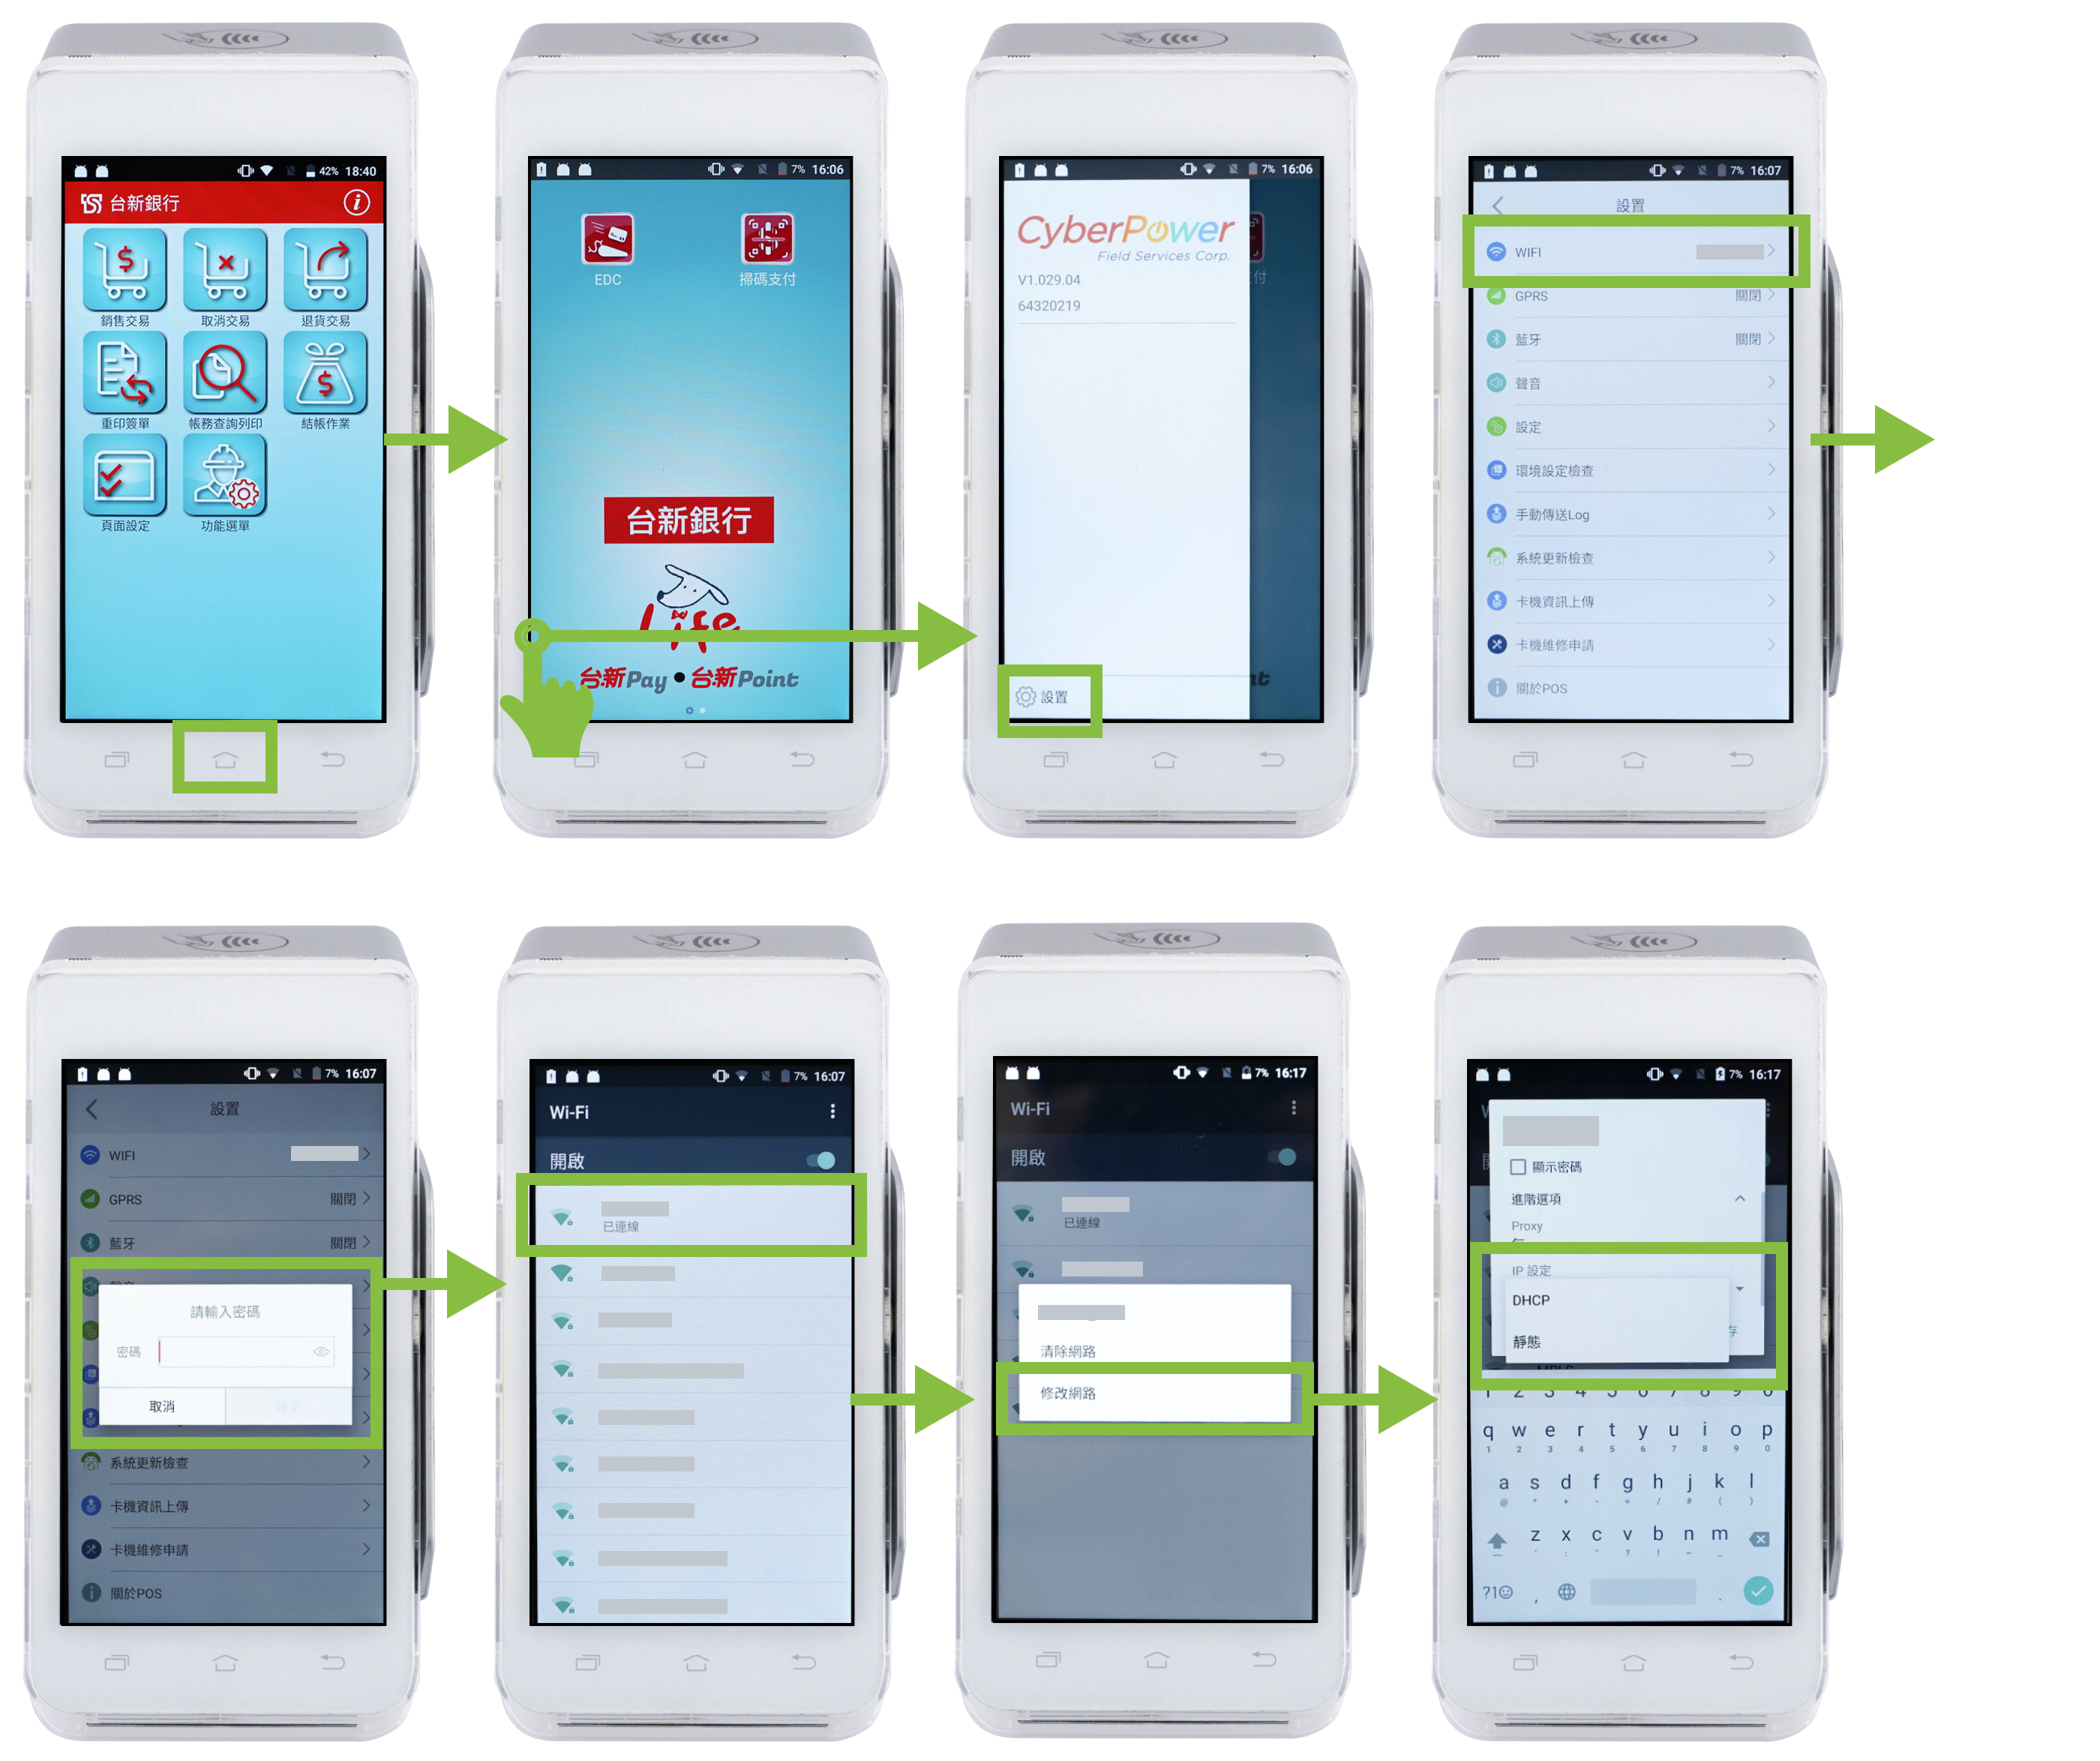
IP 位置建議選擇「靜態」,即可不用重新連線,確認與調整方式如下:
- 按刷卡機下方的房子功能鍵,回到桌面。
- 將畫面左側滑開,進入「設置 > Wifi」
- 輸入刷卡機密碼
- 長按連線中的 Wi-Fi,選擇「修改網路」
- 打開進階選項往下滑,在「IP 設定」選擇「靜態」即可!