Considering the variety of businesses our partners are engaged in, iCHEF provides diversified functions and settings to meet different needs. The following instructions will show you how to add products, create orders and manage checkouts on iCHEF POS through 5 fundamental steps.
Step 1: Add Products
Add Category
- Go to Product/Inventory Mgmt > Category
- Click [+ Add category]
- Enter a new category name
- Click [Save] to complete

Create Items
- Go to Product/Inventory Mgmt > Category
- Click [+ Add item]
- Enter product details
- Click [Save] to complete

- More about items and set menus: Create and Manage Items
- More about item modifiers and customizing menus: Modifier Settings
- More about purchase reminders and inventory management for ingredients: Inventory Settings
Edit and arrange the menus according to their categories or popularity to facilitate the ordering process.
- Go to Product/Inventory Mgmt > Menu Settings > iCHEF POS Menu
- Click on a cell and select [Place in multiple items sequentially]
- Select desired items and click [Confirm]

- Double-click the number of tab
- Enter a name of the tab
- Press [return ⏎ ] on your keyboard to complete

Learn more about: Set up Menu
Step 3: Table Settings
Create tables in the dine-in area on iCHEF POS according to the actual layout of your restaurant.
- Go to Shop Management > Table Setting
- Drag a table in the left panel to the grid area
- Click on the table to edit table number and number of seats

Learn more about: Table Settings
To prevent the settings configured at the backend from affecting the on-site operation with iCHEF POS, iCHEF will record all the updates automatically after you complete the settings. The system will not download new settings or apply the changes to the iPad until you click [Update menu] on the login page.
- Complete the settings as instructed in the 3 steps above
- Launch iCHEF POS app on your iPad
- Enter your login ID and password
- Click [Update menu] to download new settings

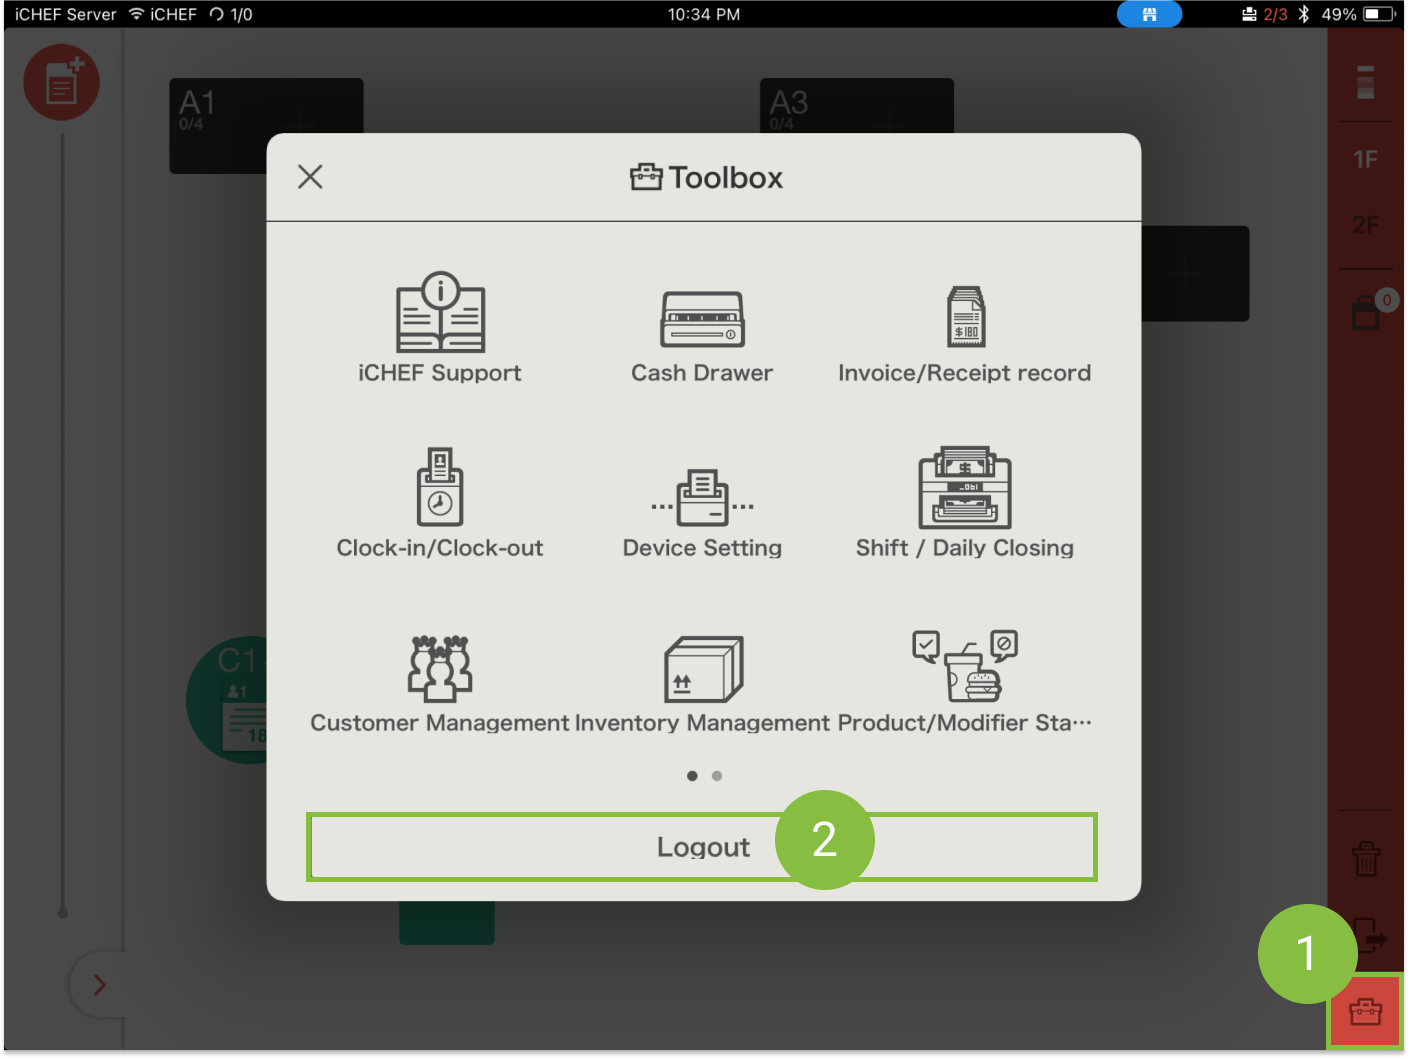
- Click the toolbox icon in the lower-right corner
- Click [Logout]
- Click the [——] button or slide up
- Check
 at what time the system updates menu

Step 5: Create an Order
After updating menu and logging into the system, you will see that the menu pages and table settings are all displayed on iCHEF POS. Now, you can start creating an order on your iPad.
Dine-in Orders
Submit orders
- Click [+] on the table
- Select the ordered items on menu page
- Enter the number of customers
- Click [Submit]

Checkout
- Click on the order that is to be checked out
- Slide right for fast checkout

Takeout Orders
Submit orders
- Click on the takeout symbol to switch to the takeout area
- Click [Takeout]
- Select the ordered items
- Click [Submit]

Checkout
- Click on the order that is to be checked out
- Slide right for fast checkout

- More about print behavior after submitting orders and print types: Printer Settings
- More about the tips for creating orders and managing checkout: Advance operations for orders