
After completing [Reservation] activation in the backend, you can record your reservations via the iCHEF POS App. All information will synchronize online, and the system will automatically send notifications to customers. No worries about mishearing, mistaking, or misreading. Start using iCHEF Reservation now to replace your in-store paper records.
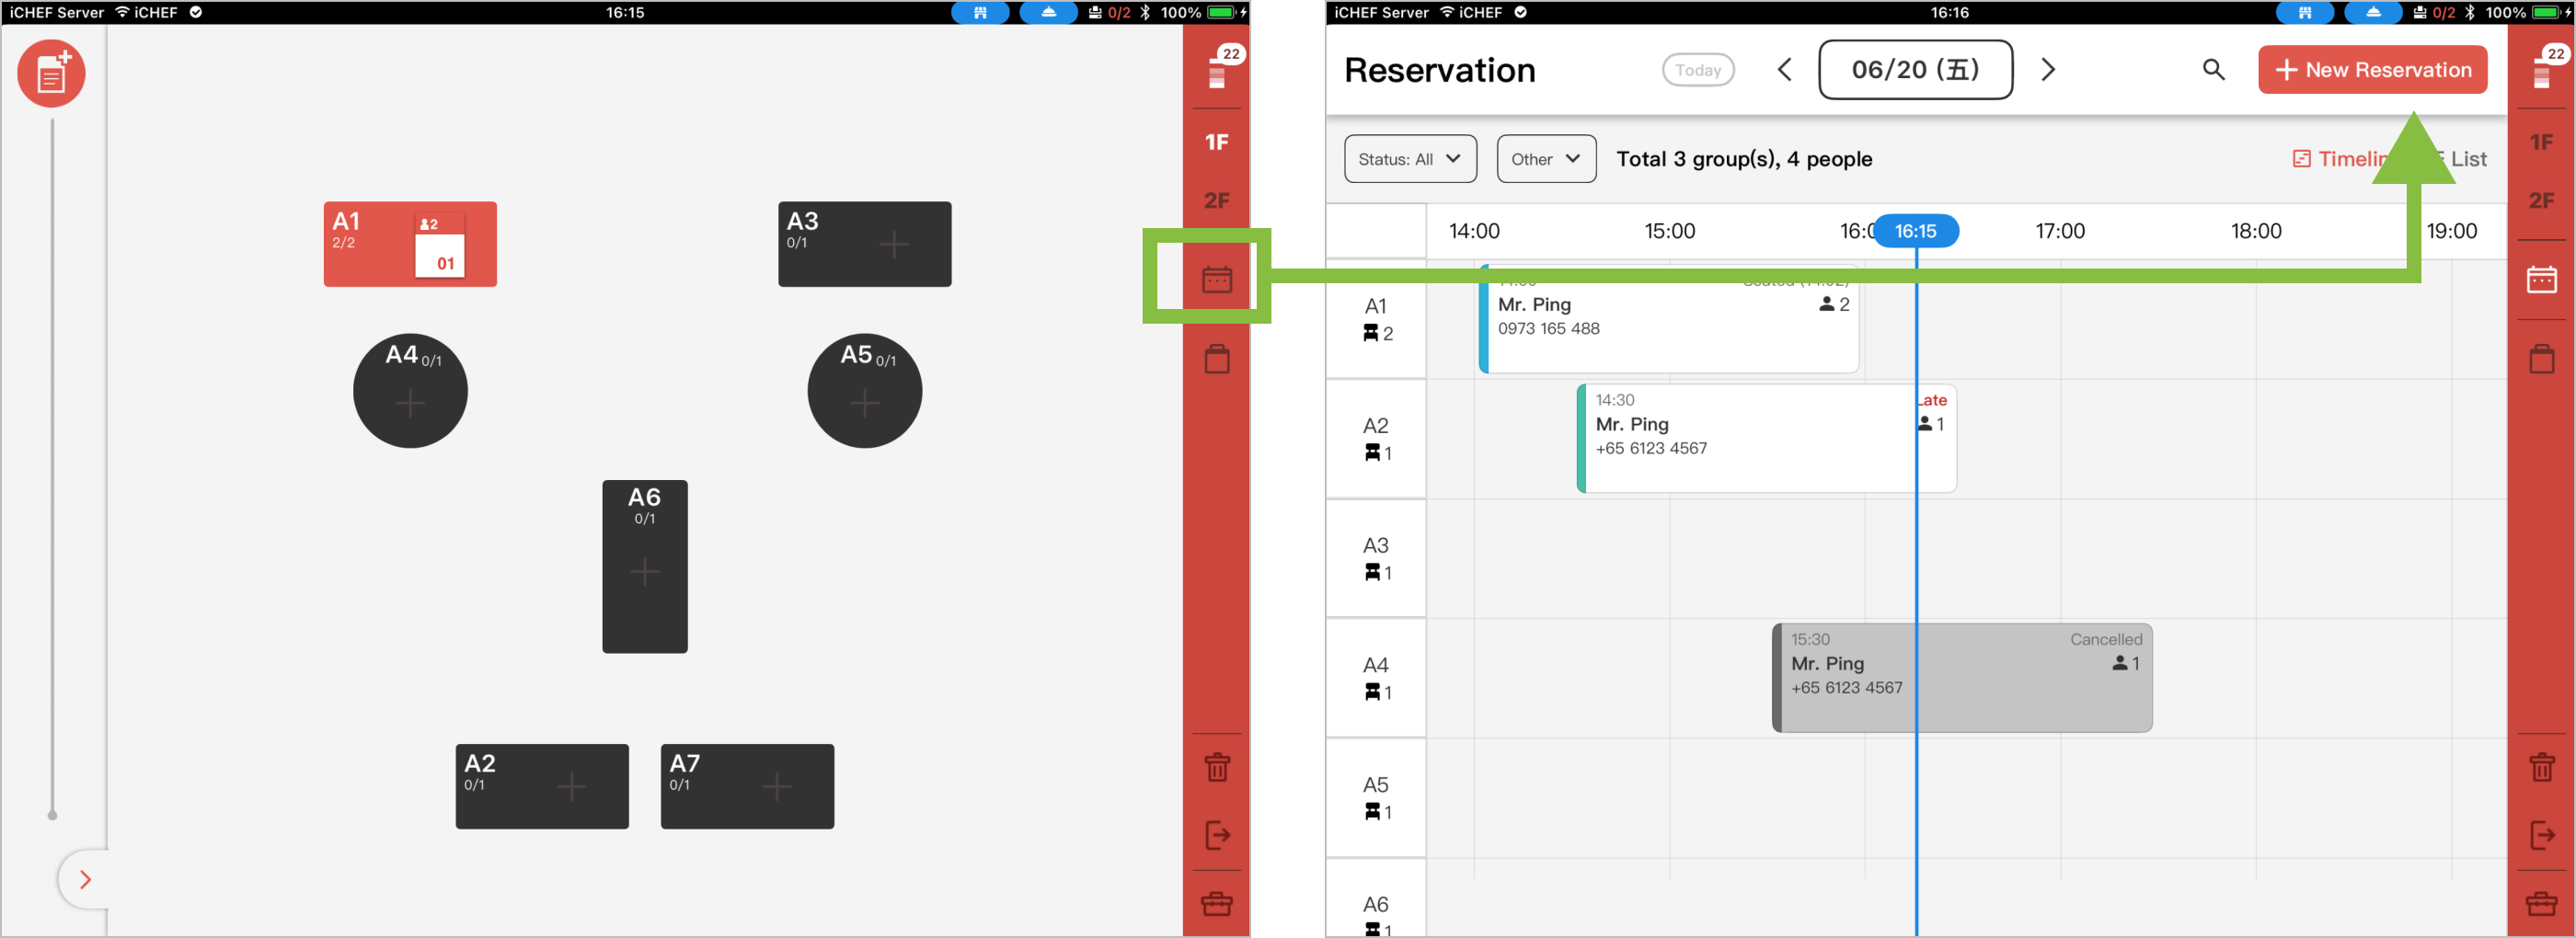
➤ iCHEF POS App Path: Switch to Reservation Page > Add Reservation
When using [Reservation], an internet connection is required. After entering the Reservation management page, tap [Add Reservation] on the top right to complete the reservation by following the steps below:

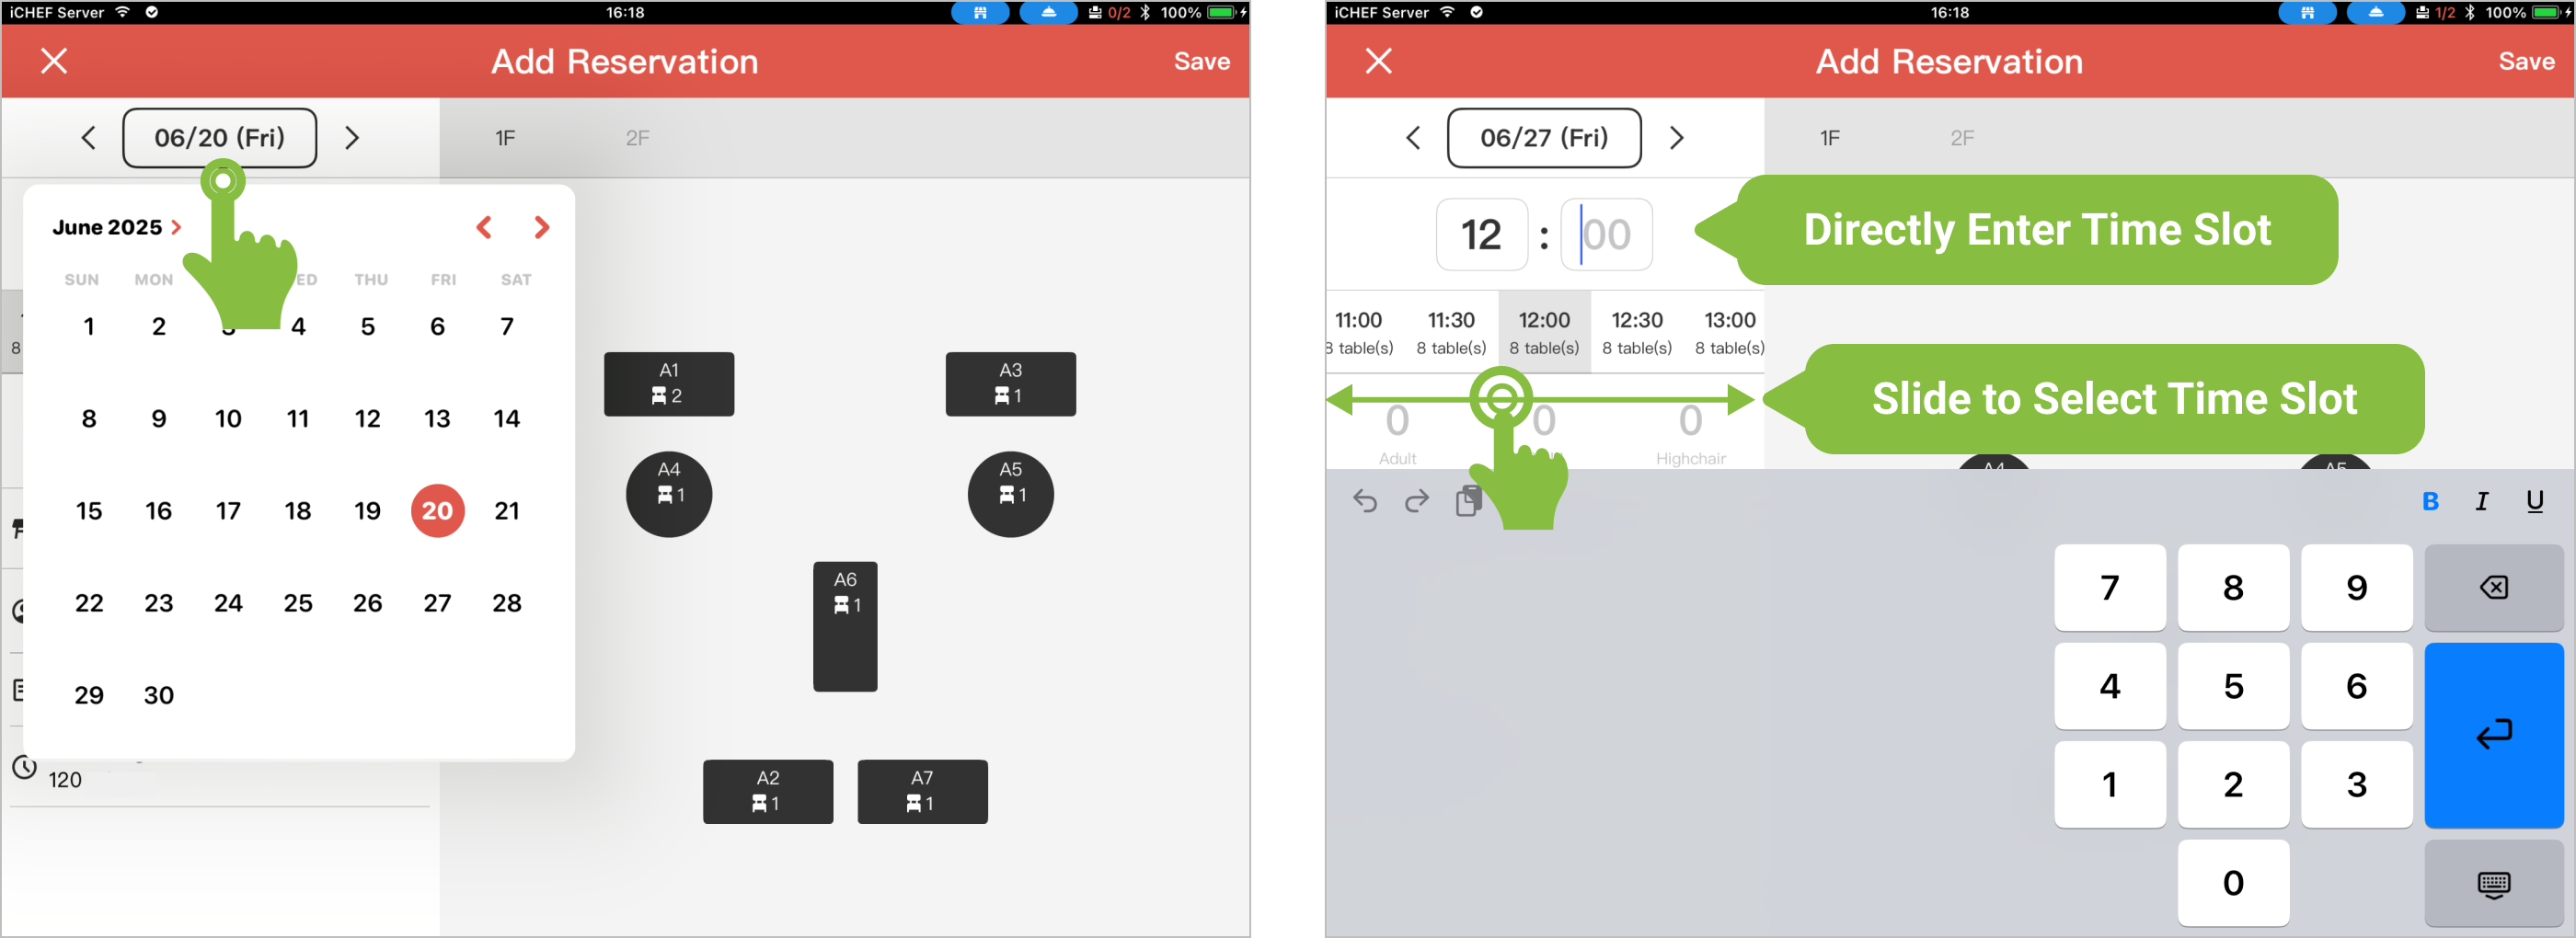
Step 1: Confirm Reservation Time
- Date (Required): Tap the date and select directly from the calendar.
- When an unavailable date for reservation is selected, [No Reservable Tables] will be displayed on the screen; please select another date.
- Time (Required): You can directly tap to enter a specific time, or swipe left and right to view time slots and remaining table counts. Displayed in black text indicates availability.
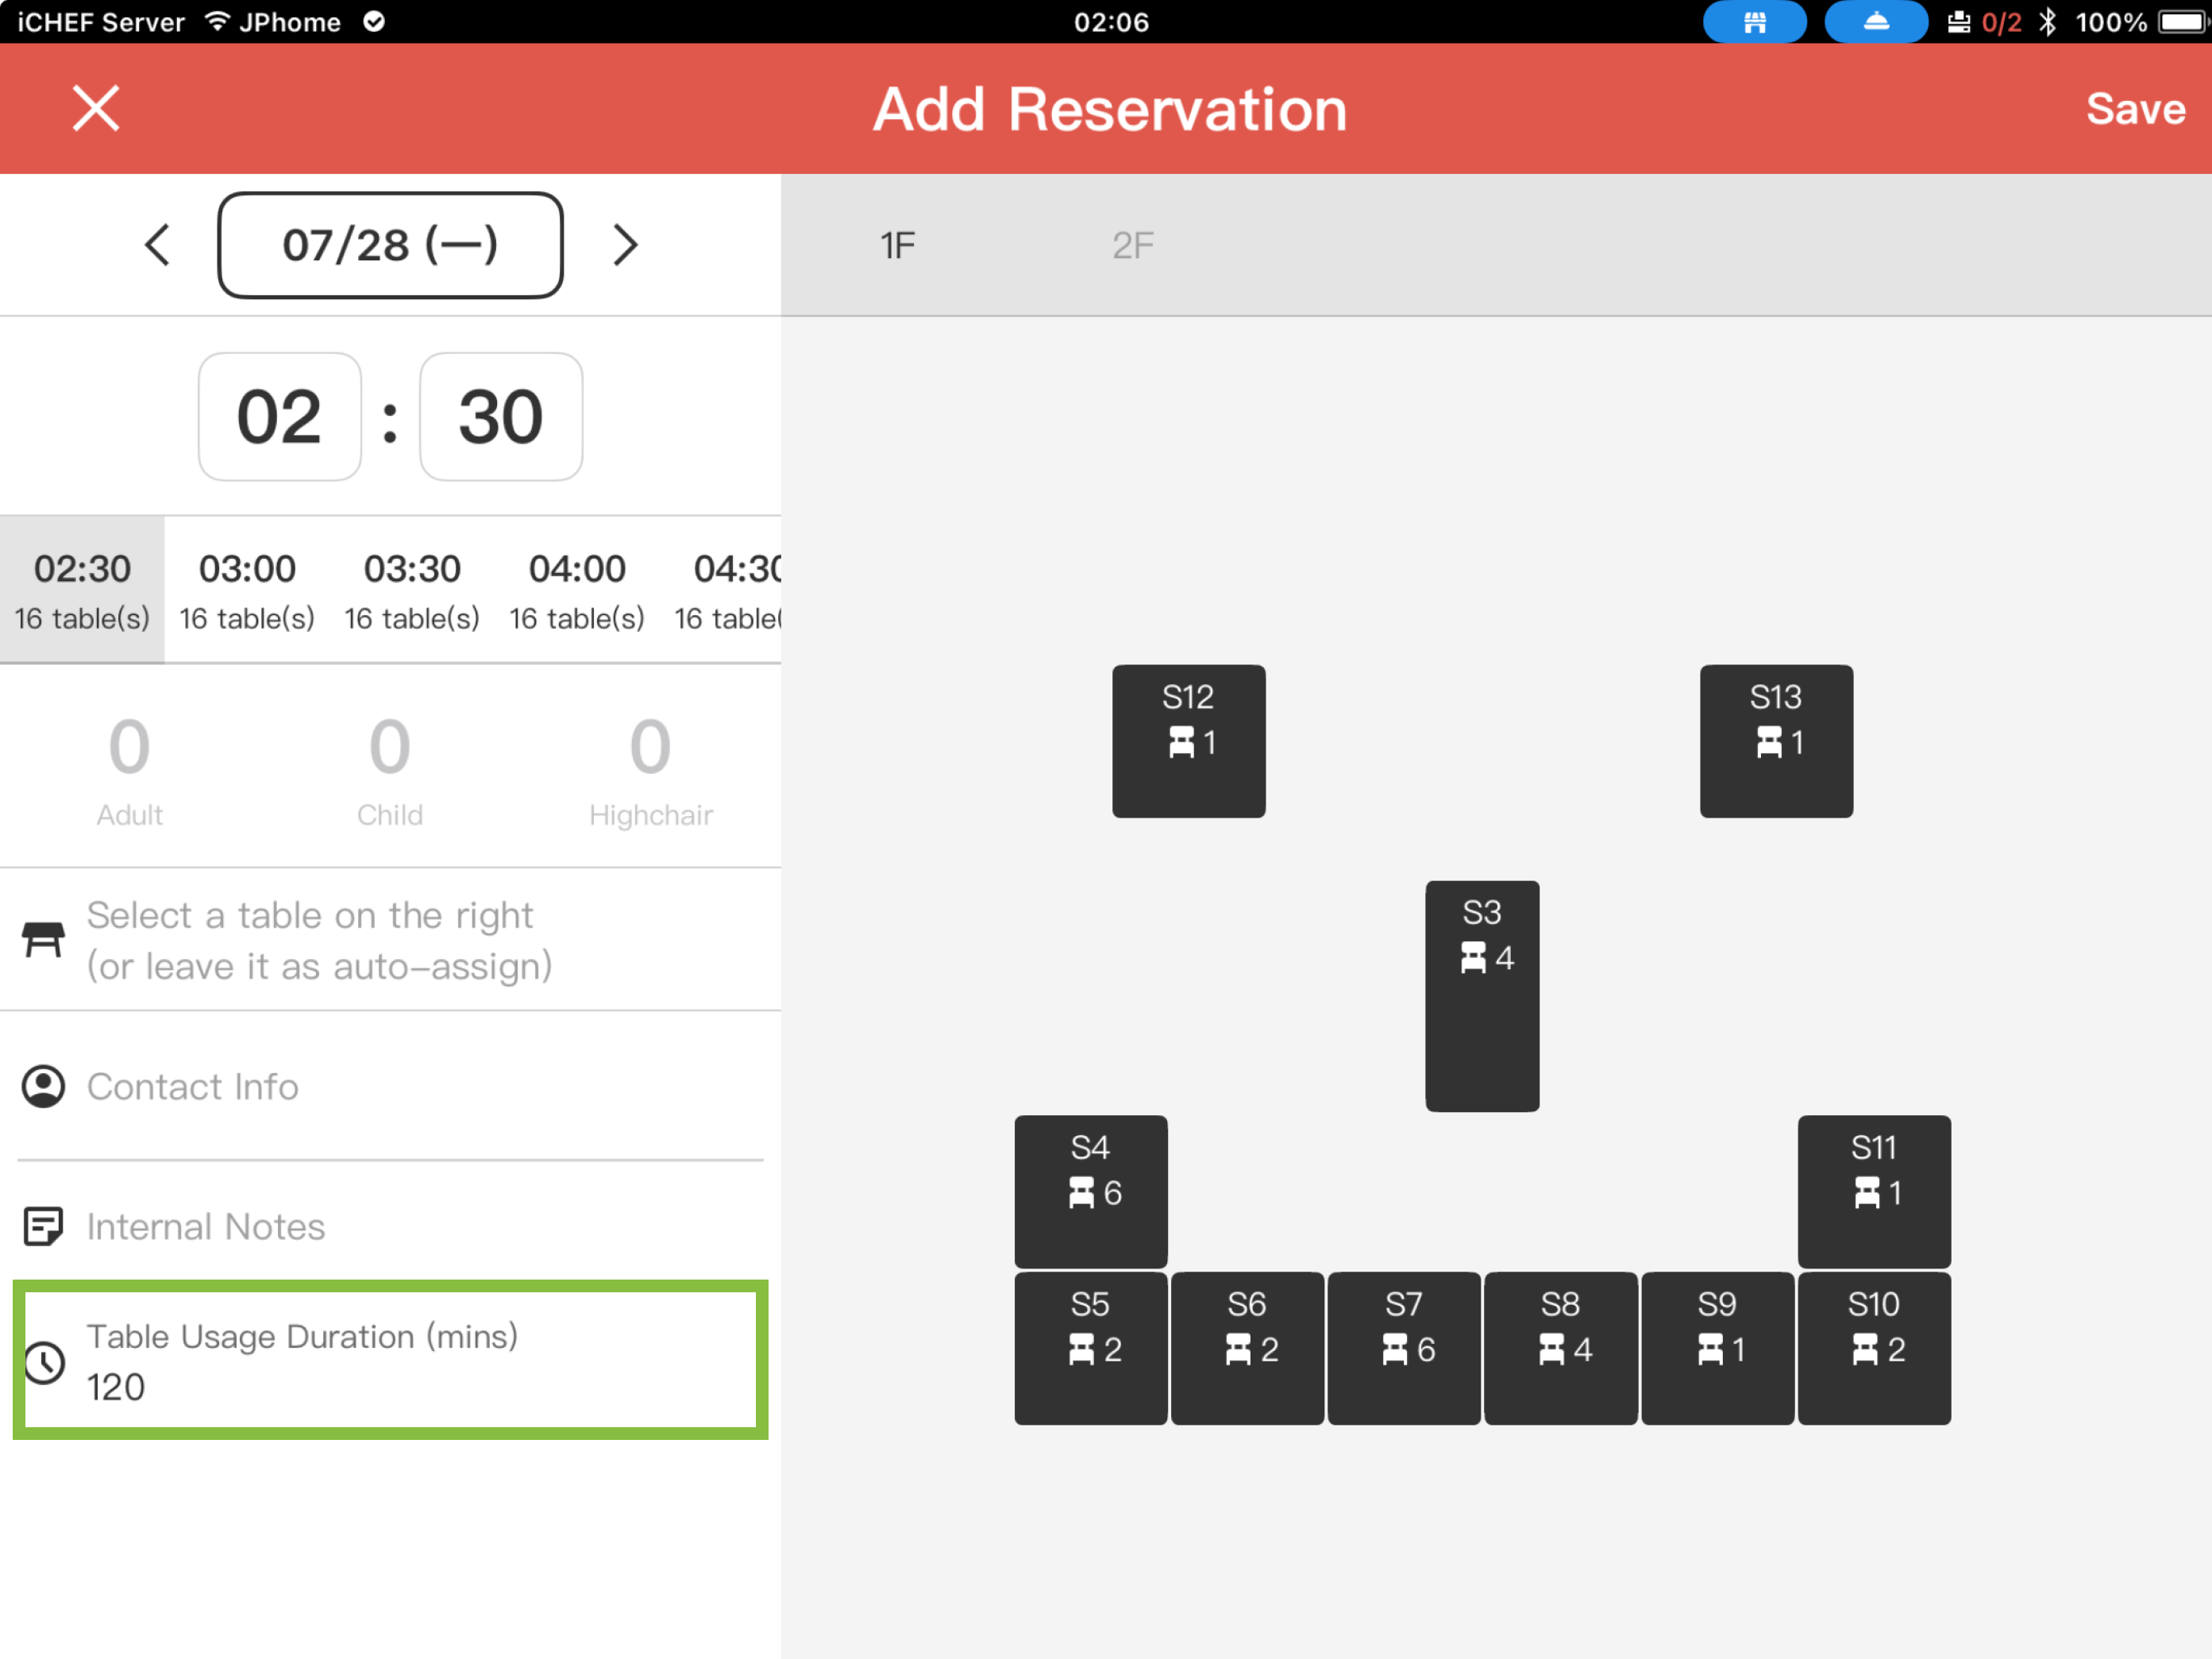
Step 2: Confirm Guest Count
Guest count is required. Tap the number to directly enter the quantity; at least one guest must be entered. The total guest count for tables will be calculated based on the number of Adults + Children. The high chair field is provided for restaurant flexibility, making it convenient for staff to prepare seating.

Step 3: Confirm Table Arrangement
After selecting the time and guest count, the system will display table usage status on the right screen, based on the reservation time and [Table Usage Duration]. Please arrange suitable tables for your guests; you can select from 1 to multiple tables.
- Red: Currently selected table.
- Gray: Already reserved table / In-use dine-in table (Dine-in order, [Reserved Table]).
- Black: Available table.
However, restaurants can still flexibly select already reserved tables based on on-site conditions (e.g., for combining tables).

Step 4: Leave Reservant Information
- Name, Gender (Required): After entering the name, you can tap to switch title: Mr./Ms./Other.
- Country Code, Phone (Required): Default is the local country code. If for an international guest, adjust the country code before entering.
- Email (Required): If for an international guest, this field can be filled to send notifications via Email instead.
- Notes: This field can be used as needed (e.g., Vegetarian, needs ice cream cake).

Step 5: Confirm Table Usage Duration
[Table Usage Duration] defaults to the time set in the backend. It can still be flexibly adjusted here.
Reservation Complete! Customer Will Receive Notification
- [Reservation Successful] Sent Instantly: iCHEF sends [Reservation Successful] SMS / Email notifications to customers, including a link to their reservation information.
- [Reservation Hold Reminder] Sent the Day Before: iCHEF sends [Reservation Hold] reminders to customers.
