Want to maximize reservations and not waste a single empty table? Simply add [Table Groups] based on your in-store table layout, and the system will automatically combine nearby tables for you, creating more reservation opportunities!

What are [Table Groups]?
Combinable Table Assignment
The iCHEF reservation system will prioritize assigning [Single Tables] that match the guest count to reservation slips, based on the default table order.
When a [Single Table] cannot meet the reservation needs, the system will check for tables with “[Combinable Tables]” enabled within the same group, and sequentially combine them to satisfy the guest count, then assign them to that reservation slip. If no tables within that group can meet the requirements, it will sequentially check the next [Table Group], ensuring every table in your store is utilized!

- In-store layout: 4 single tables by the window
- Customer online reservation: 2 people
System check order:
- Within the same group [Window Area], no [Single Table] fits 2 people.
- Within the same group [Window Area], tables have [Combinable Tables] enabled, and are combined sequentially.
- The system will assign W1+W2 to that reservation slip!

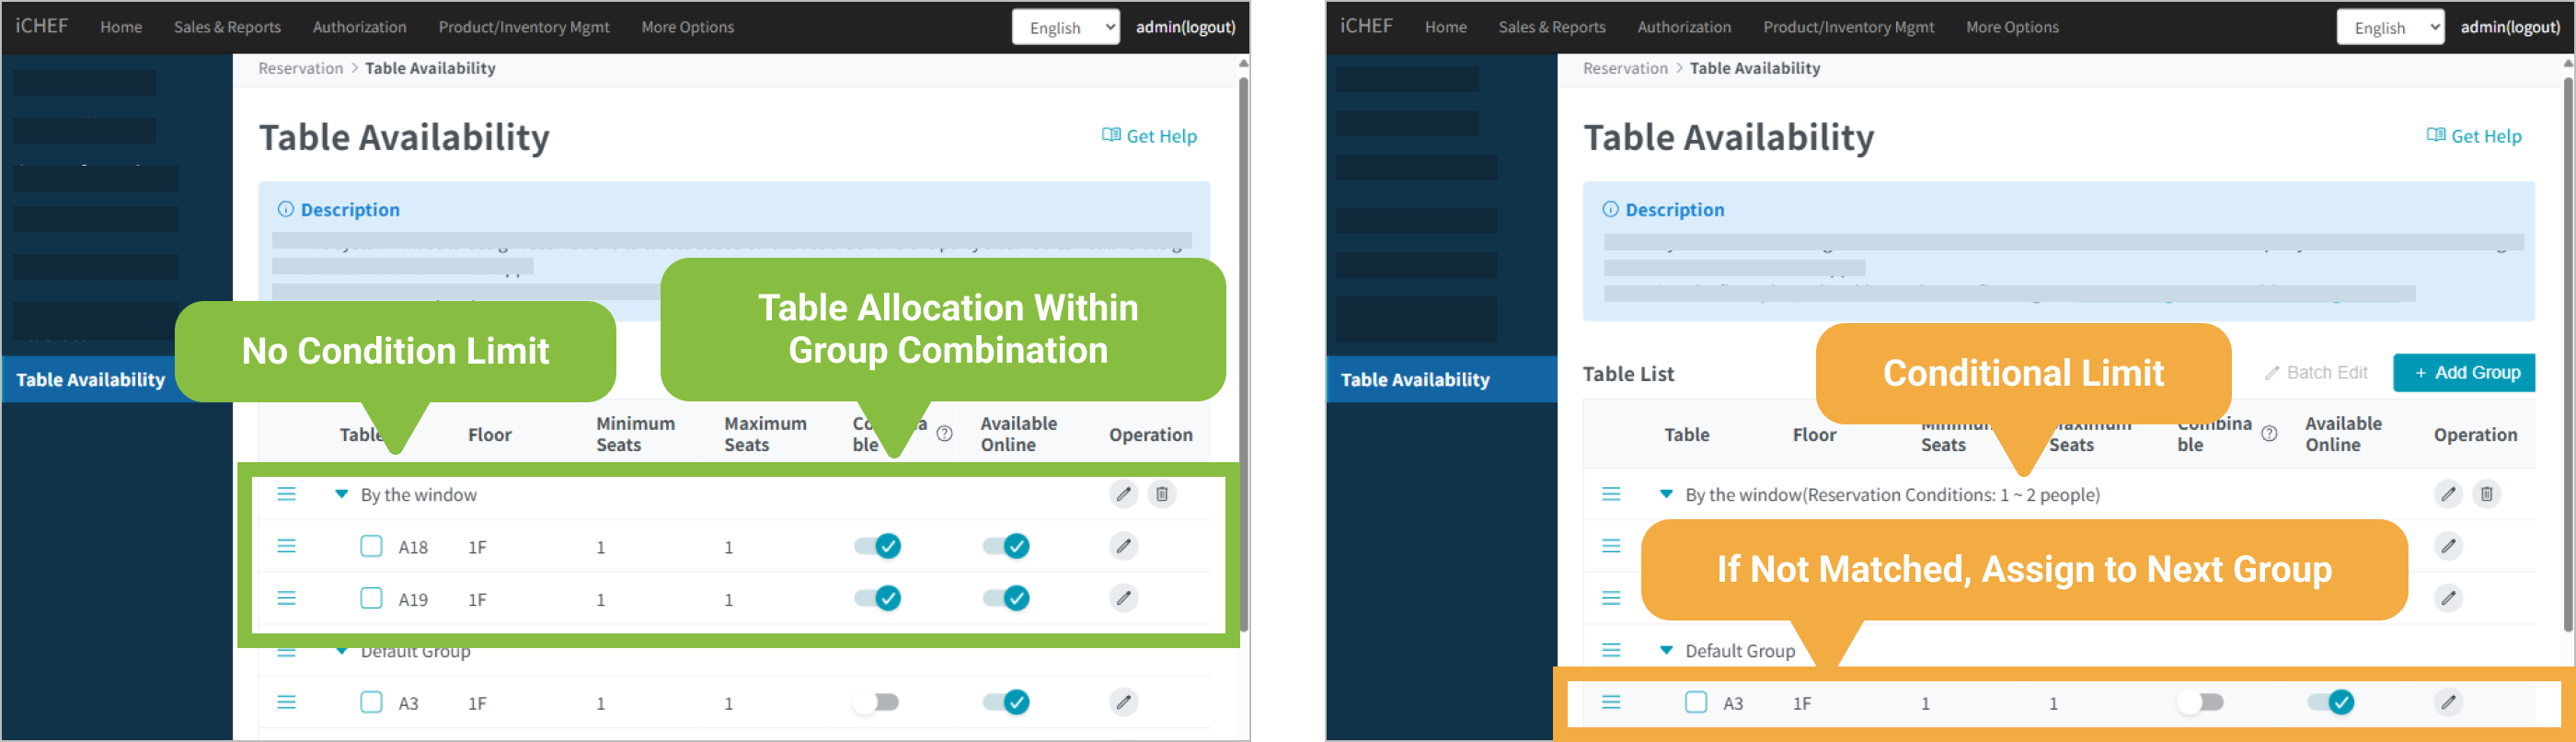
Within [Table Groups], you can set exclusive [Reservation Conditions]. Customers must meet these conditions when making a reservation to book tables within the group.
This prevents too few people from booking too large a table, and also prevents too many small tables from automatically combining into one, which could cause difficulty in moving tables around the store.
- In-store layout: 4 single tables by the window
- Customer online reservation: 4 people
Difference with and without setting Reservation Conditions:
- No Reservation Conditions set: The system will combine W1+W2+W3+W4 and assign them to that reservation slip.
- With Reservation Conditions set (min 1 ~ max 2 people): System checks and assigns as follows:
- Within the same group [Window Area], although all 4 tables have [Combinable Tables] enabled, the group’s reservation condition is a maximum of “2 people”.
- Therefore, this group will not meet the reservation requirements, and tables will be sequentially assigned to the next group.
- The system found that the first [Single Table] in the next group already meets the reservation requirement for 4 people, so it will assign A1 to that reservation slip!
- For a Single Table, [Minimum Guest Count] and [Maximum Guest Count]: The range of people this table can accommodate.
- For a Table Group, [Guest Count Condition]: The range of guest counts that tables within the group can accommodate for reservations.
For example, if I have 4 tables, each seating up to 4 people, but I don’t want to combine more than two tables, I can set:
- Each Single Table: Set [Minimum Guest Count] to 2, [Maximum Guest Count] to 4.
- Create a group and place all 4 tables in the same group.
- Group Condition: 2~8 guests. This means the maximum guest count for combined tables is 8 people (2 tables).

Add and Edit Groups
When no [Table Groups] have been added yet, the system will place all tables in the [Default Group]. You can add [Table Groups] based on actual operational needs; the steps and explanation for adding are as follows:
➤ Backend Path: Online Store > Reservation > Table Availability
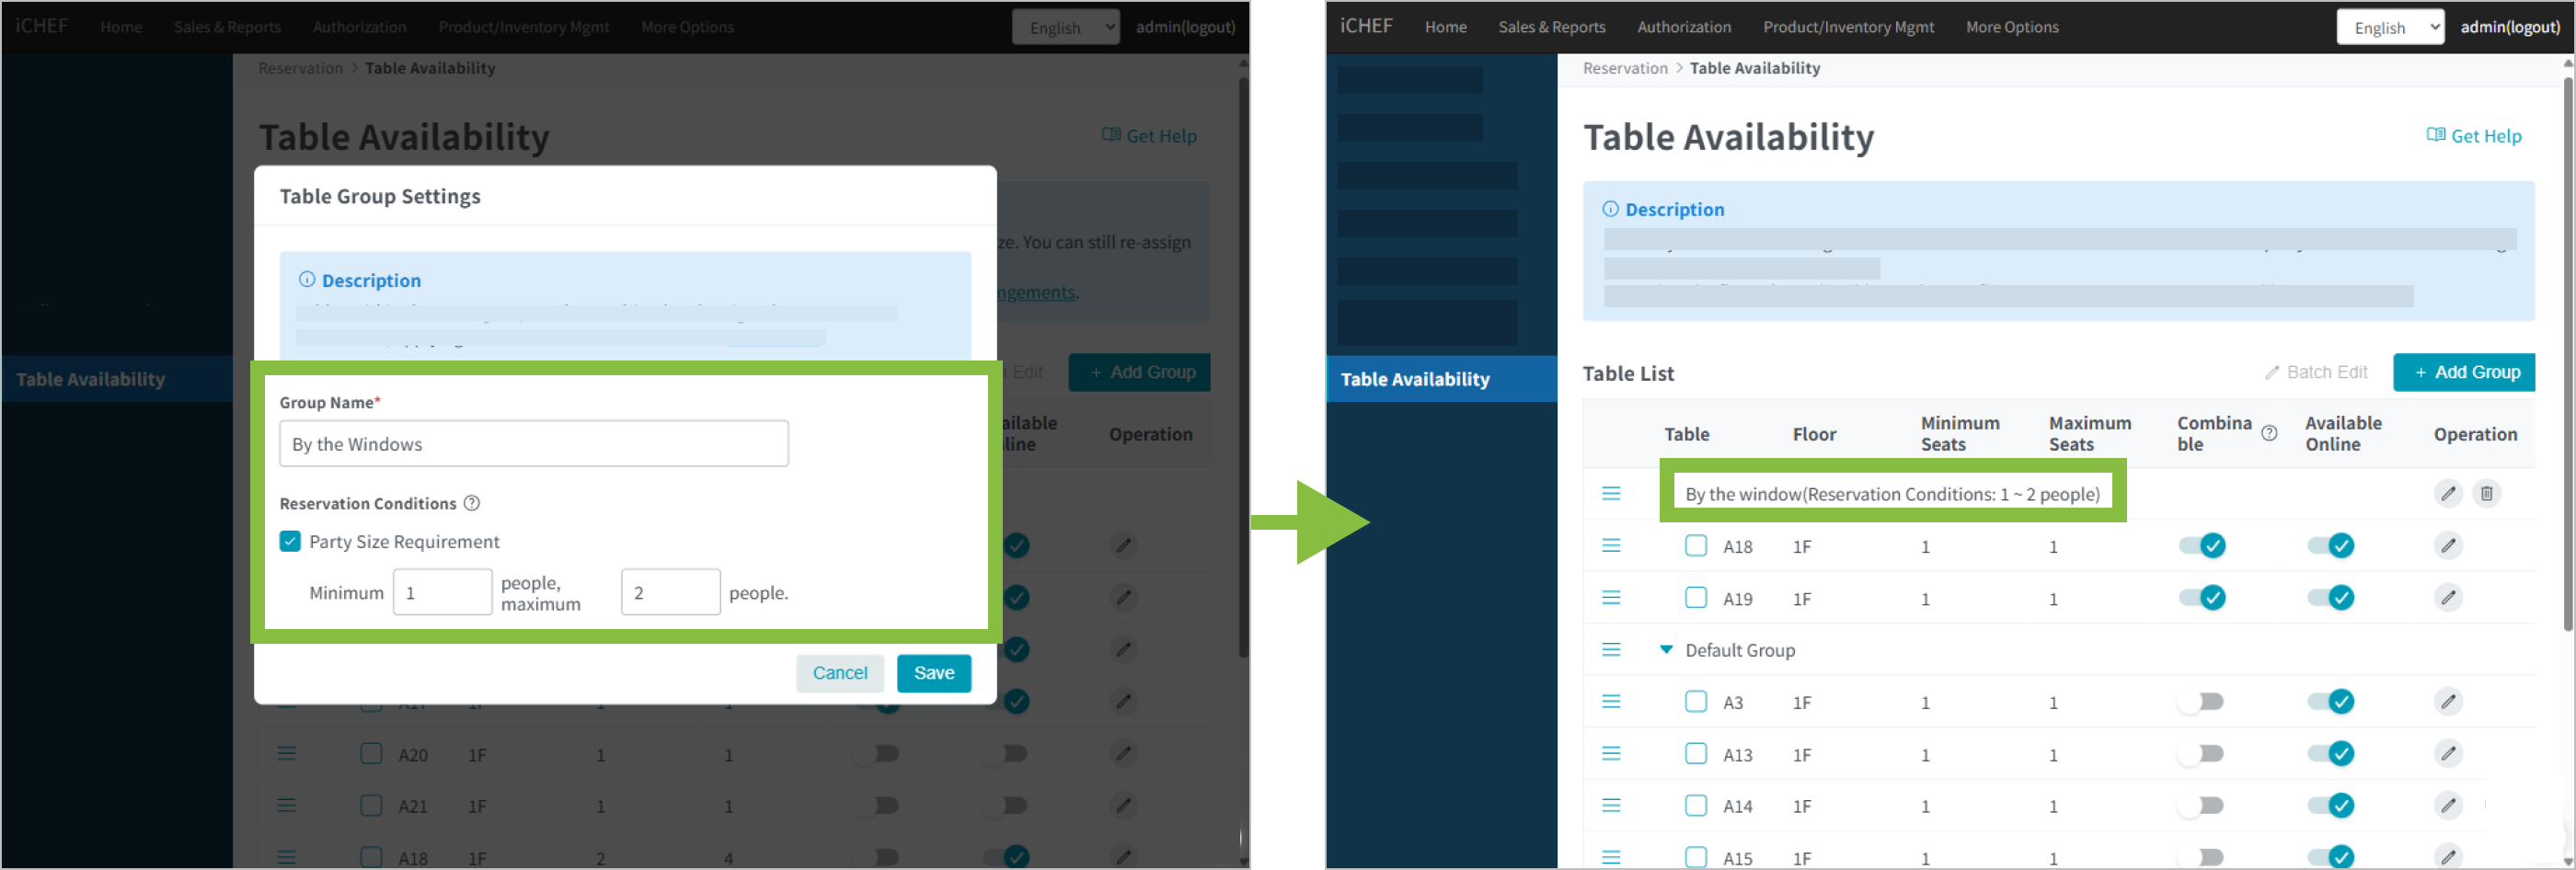
Step 1: Set Group
Tap [+ Add Group] on the right, set the content, and save to complete adding. You can add up to 99 groups.
Manually added groups can be edited independently; only the [Default Group] cannot be edited. Simply tap the [Edit] icon behind the table group to adjust.
- Group Name (Required): Only displayed in the iCHEF POS backend for restaurant’s own reference.
- Reservation Conditions (Optional): Can set conditions for a minimum to maximum guest count range.
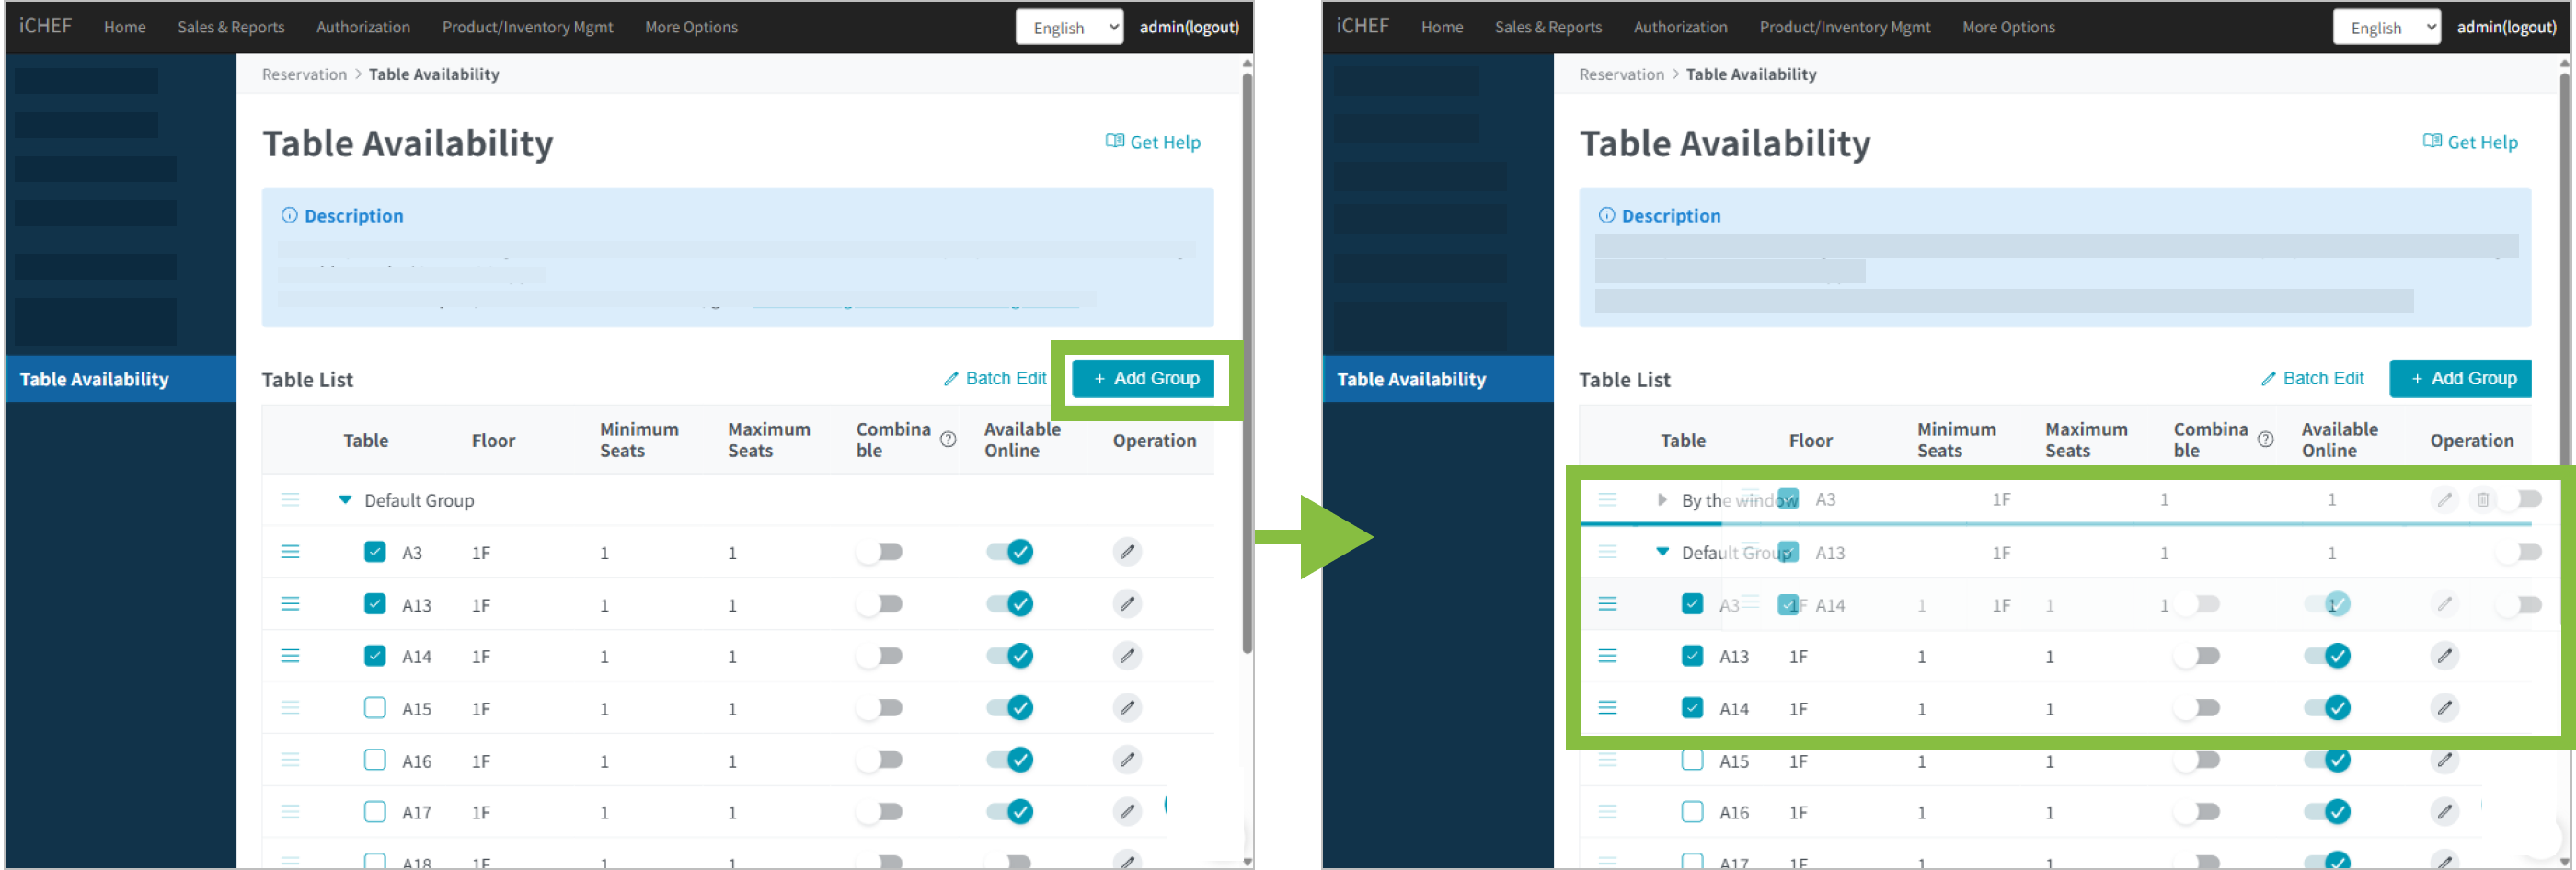
Step 2: Add Tables to Group
Directly drag the [☰] icon to the left of the table number to move a single table, or first check the table numbers then move multiple tables together, into the [Table Group]. Settings will be automatically saved after moving.
Step 3: Adjust Order
When assigning tables, the system will allocate tables from top to bottom based on the backend’s [Default Table Order]. Newly created groups will automatically be sorted to the first position. You can drag the [☰] icon to the left of the table group to change the group order.
Step 4: Enable [Combinable Tables]
Within the same group, based on on-site table status, simply enable [Combinable Tables], and the system will automatically combine tables for you when assigning them.

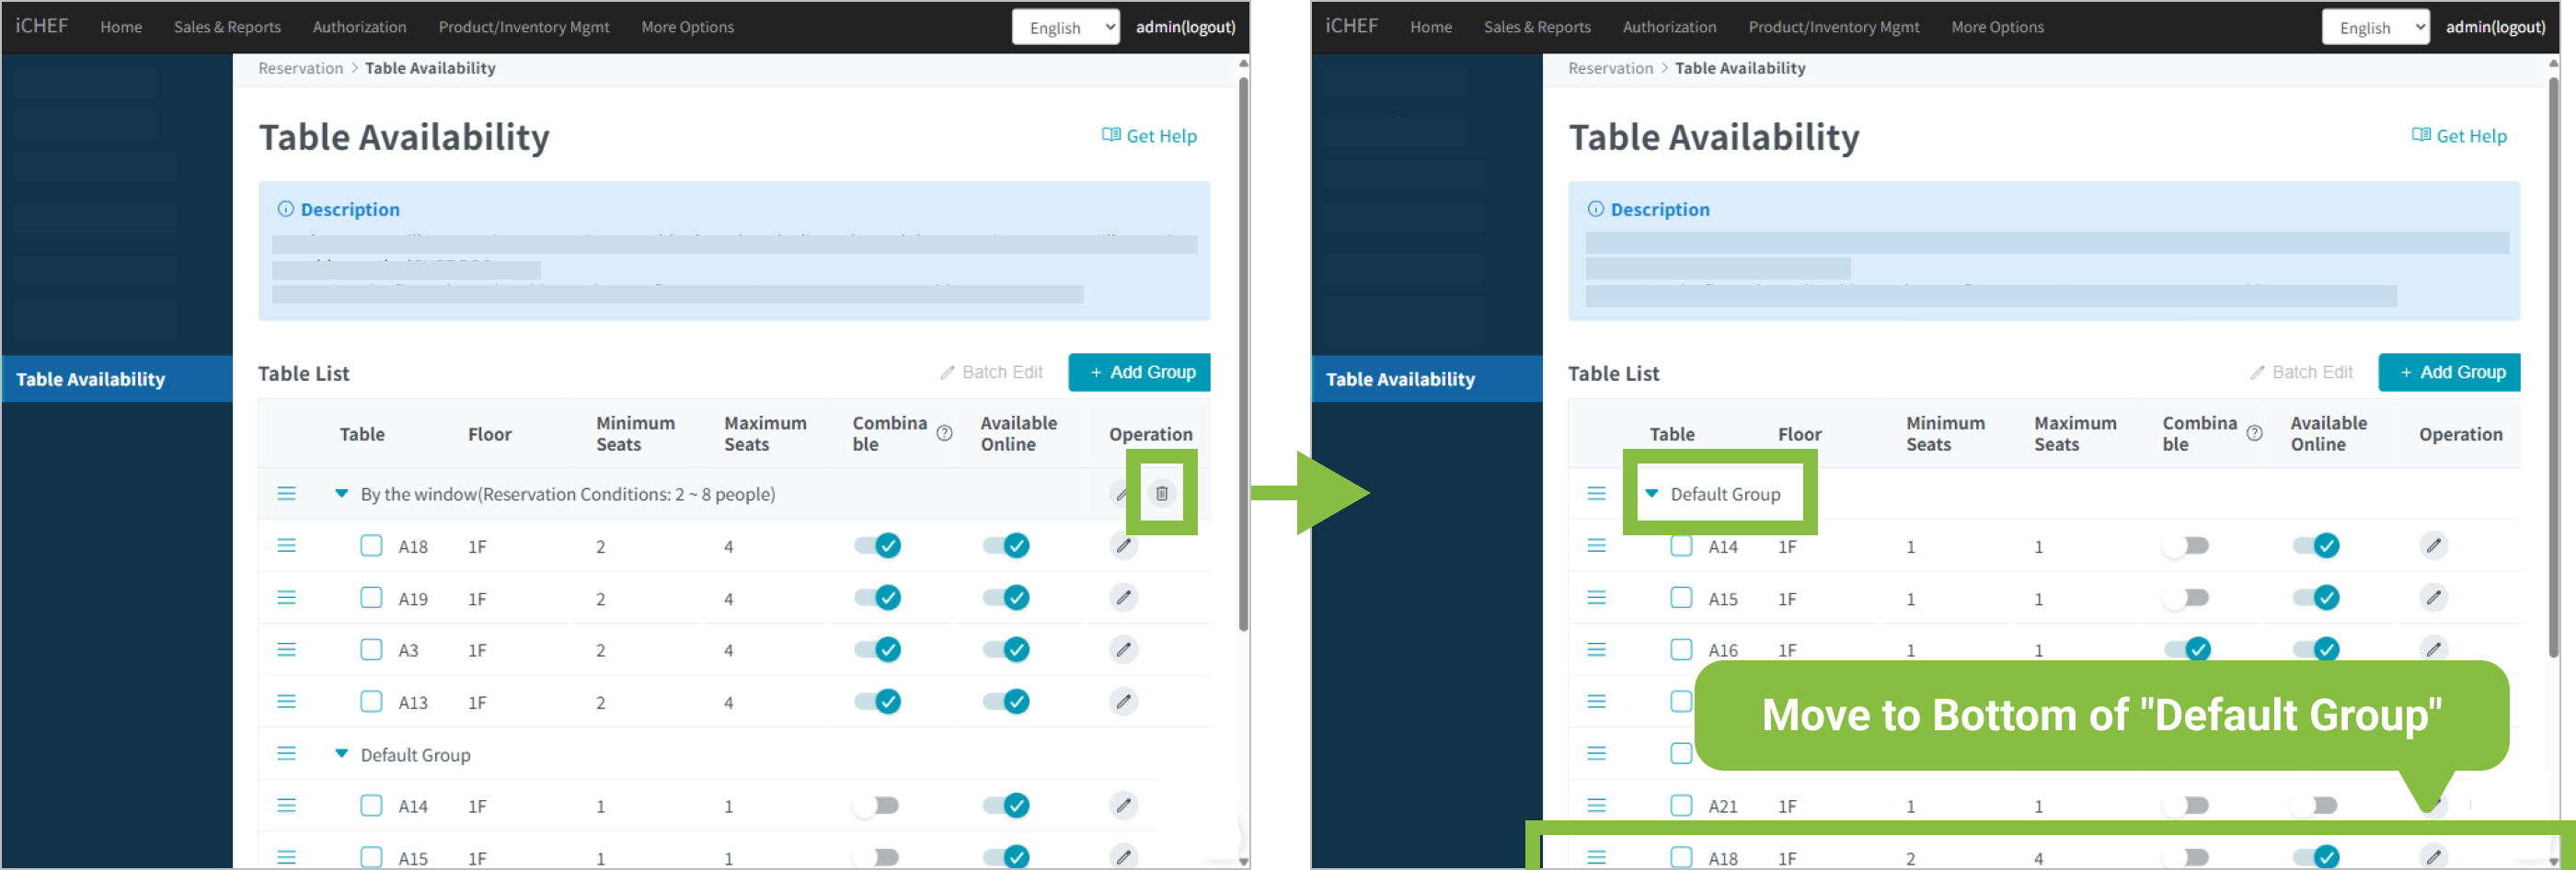
Delete Group
Manually added groups can be deleted independently; only the [Default Group] cannot be deleted. Simply tap the [Delete] icon behind the table group, and confirm to delete.
When deleting a group, tables within the group will not be simultaneously deleted. Tables in the group will automatically be moved to the bottom of the [Default Group] after the group is deleted, and the [Combinable Tables] feature for that table will be disabled, to prevent automatic assignment to unsuitable reservation needs.
Confirmation After Deletion
If the group still contains tables before deletion, please be sure to reconfirm in the [Default Group] whether you need to individually delete that table, or reassign it to another group.