
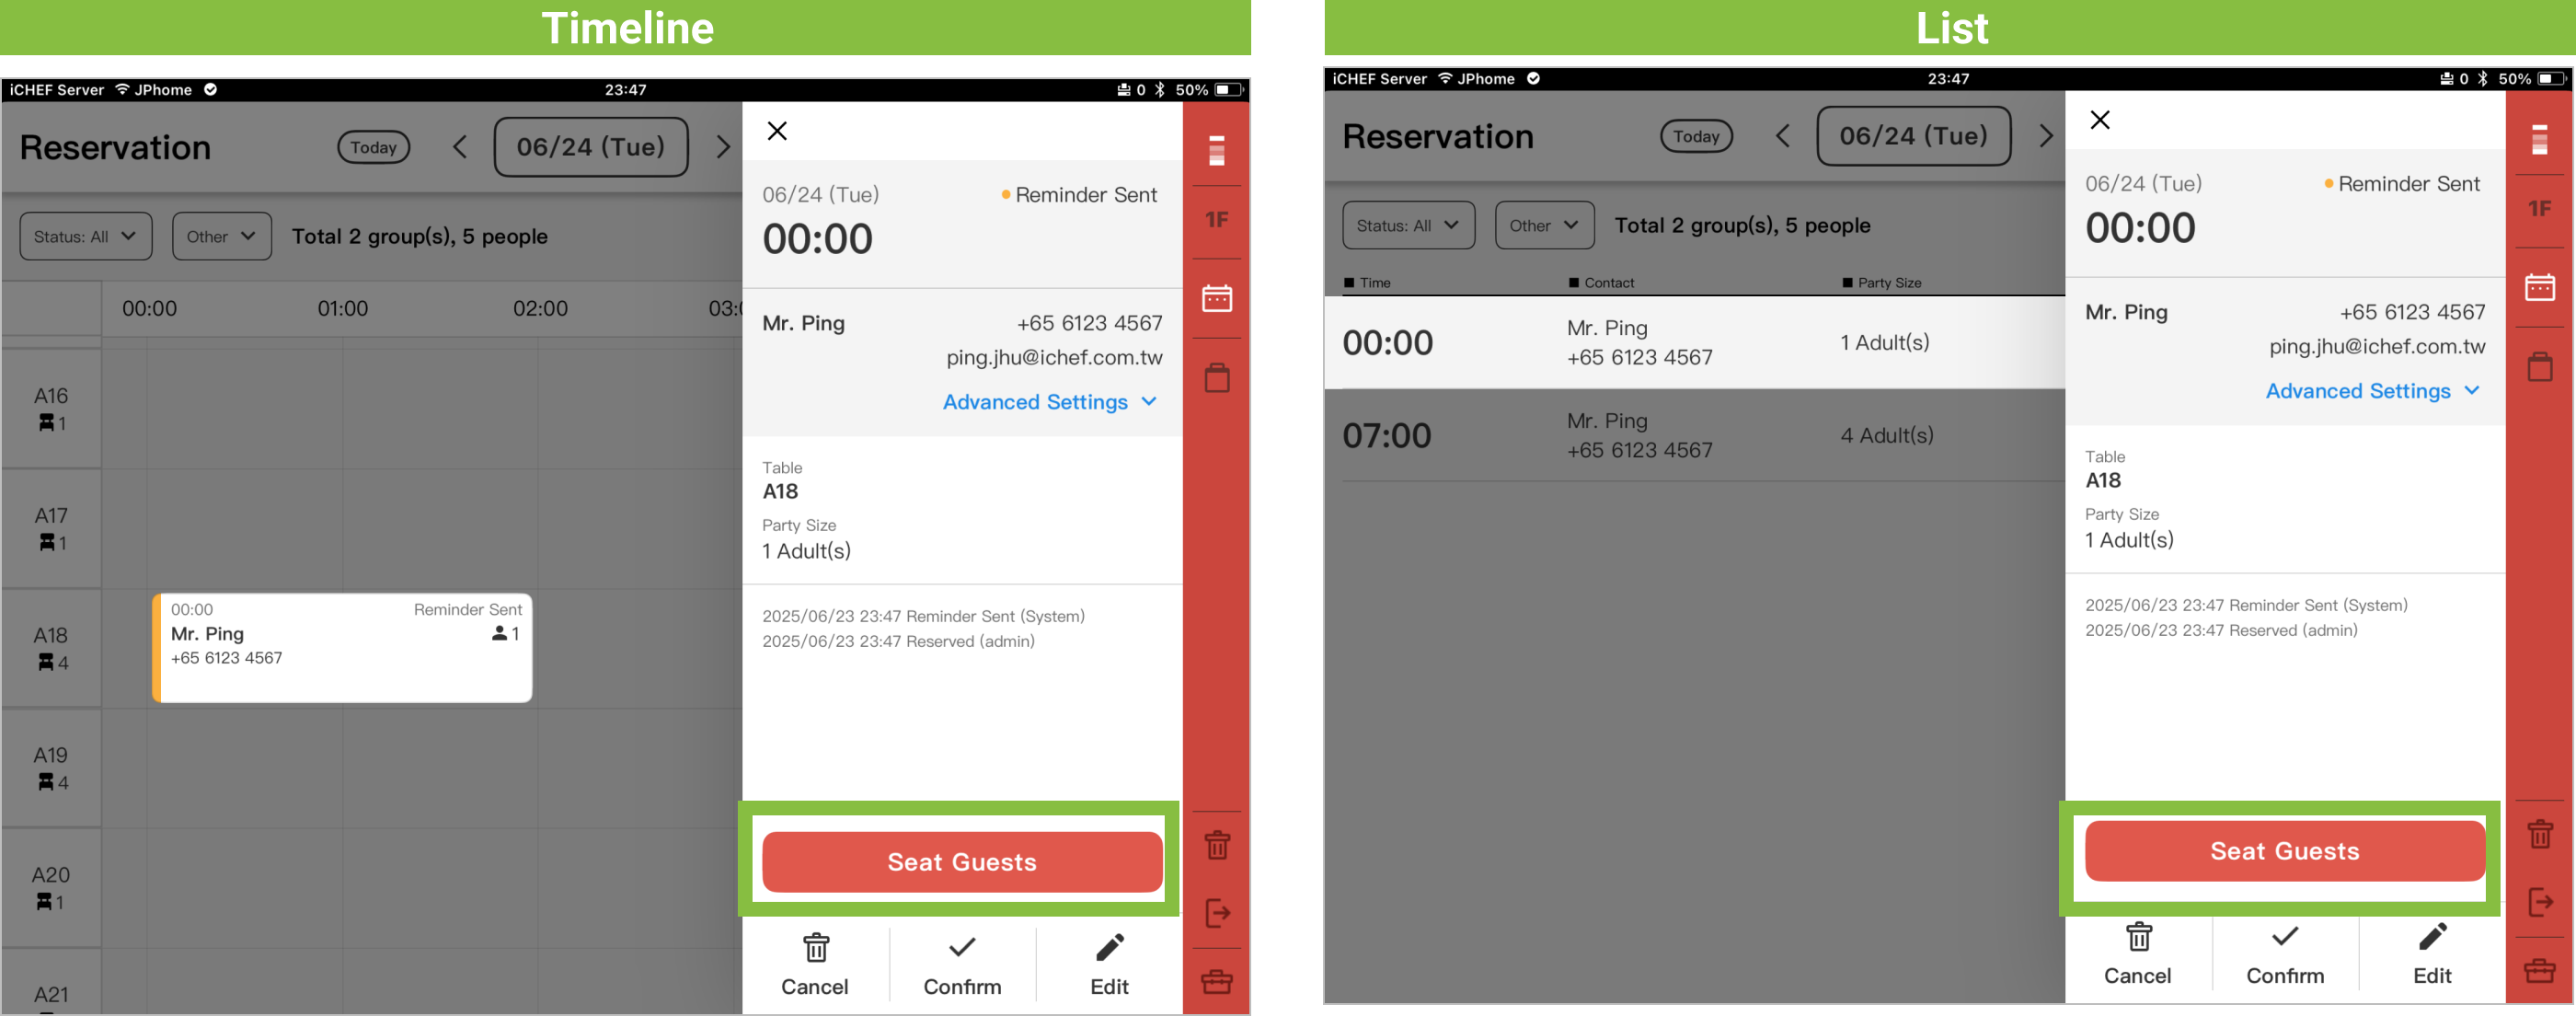
Starting from 2 hours before the reservation time, tapping on a reservation slip will reveal the [Seat Guests] button. After staff tap this button, the system will automatically create an order at the reserved table, and integrate reservation information with member data.
The steps for Seat Guests
- Step 1: On the reservation page, select a reservation slip, then tap [Seat Guests] to complete! Reservation slip time information will be updated simultaneously:
- Order Creation Time: Will be simultaneously recorded on the reservation slip.
- Order Time: The order time will start from the [Seat Guests] time, until the end of the table usage duration, allowing your table to be used earlier! If the order is closed and guests leave before the table usage duration ends, the table can also be released earlier.

- Step 2: Return to the Table Status page to access the customer order and start ordering.
- When reserving one table: The customer order will be directly created at that table.
- When reserving more than one table: The customer order will be created at the first table, and simultaneously, the second and subsequent tables will be automatically reserved based on their [Table Usage Duration] to avoid overbooking guests.

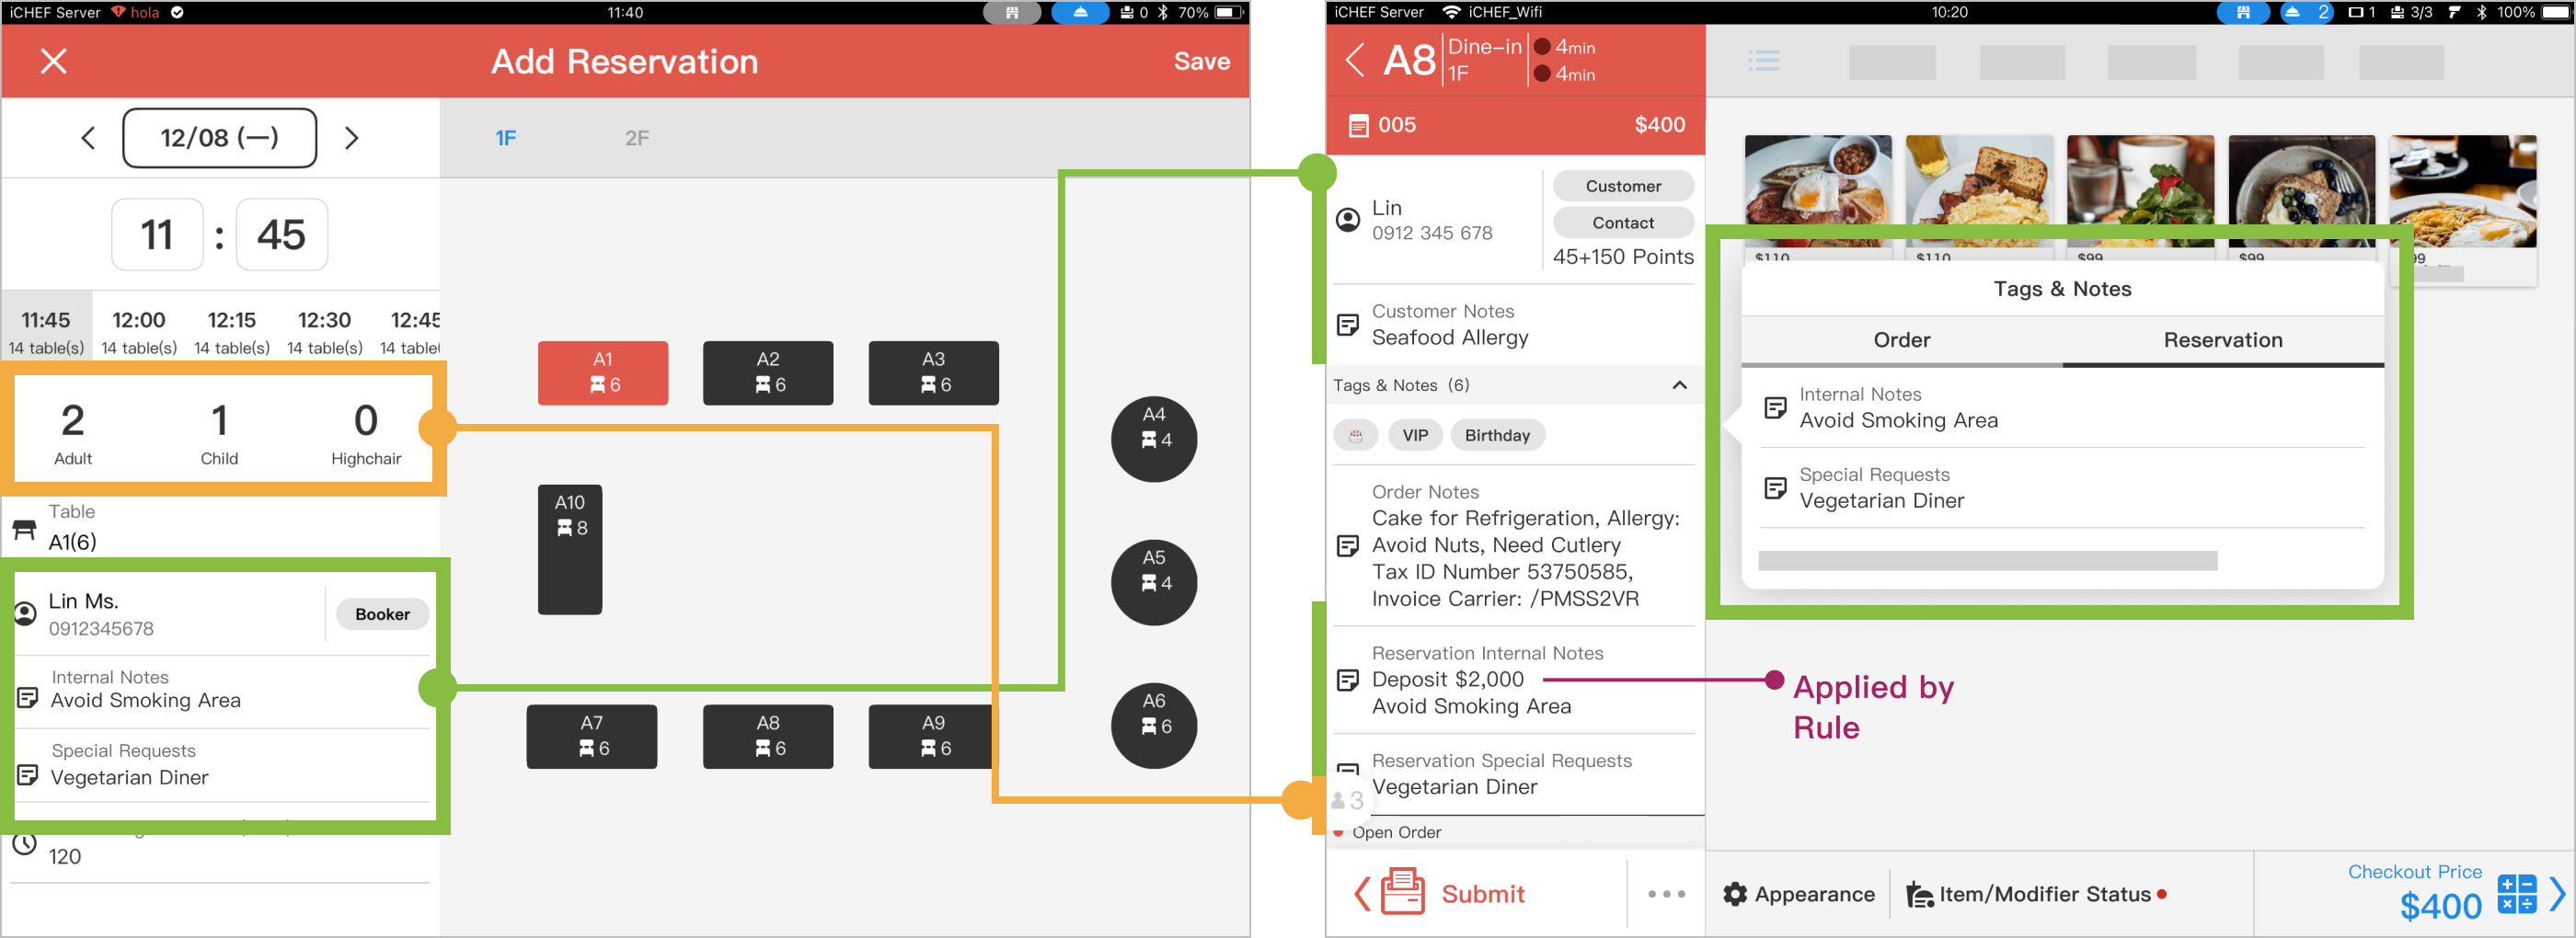
Reservation Information Import
Through customer orders created via [Seat Guests], the following reservation information will be automatically imported, so staff do not need to manually input it.
- Name
- Phone Number
- Reservation Notes (Internal Notes & Special Requests)
- Guest Count
- Reservant Tags
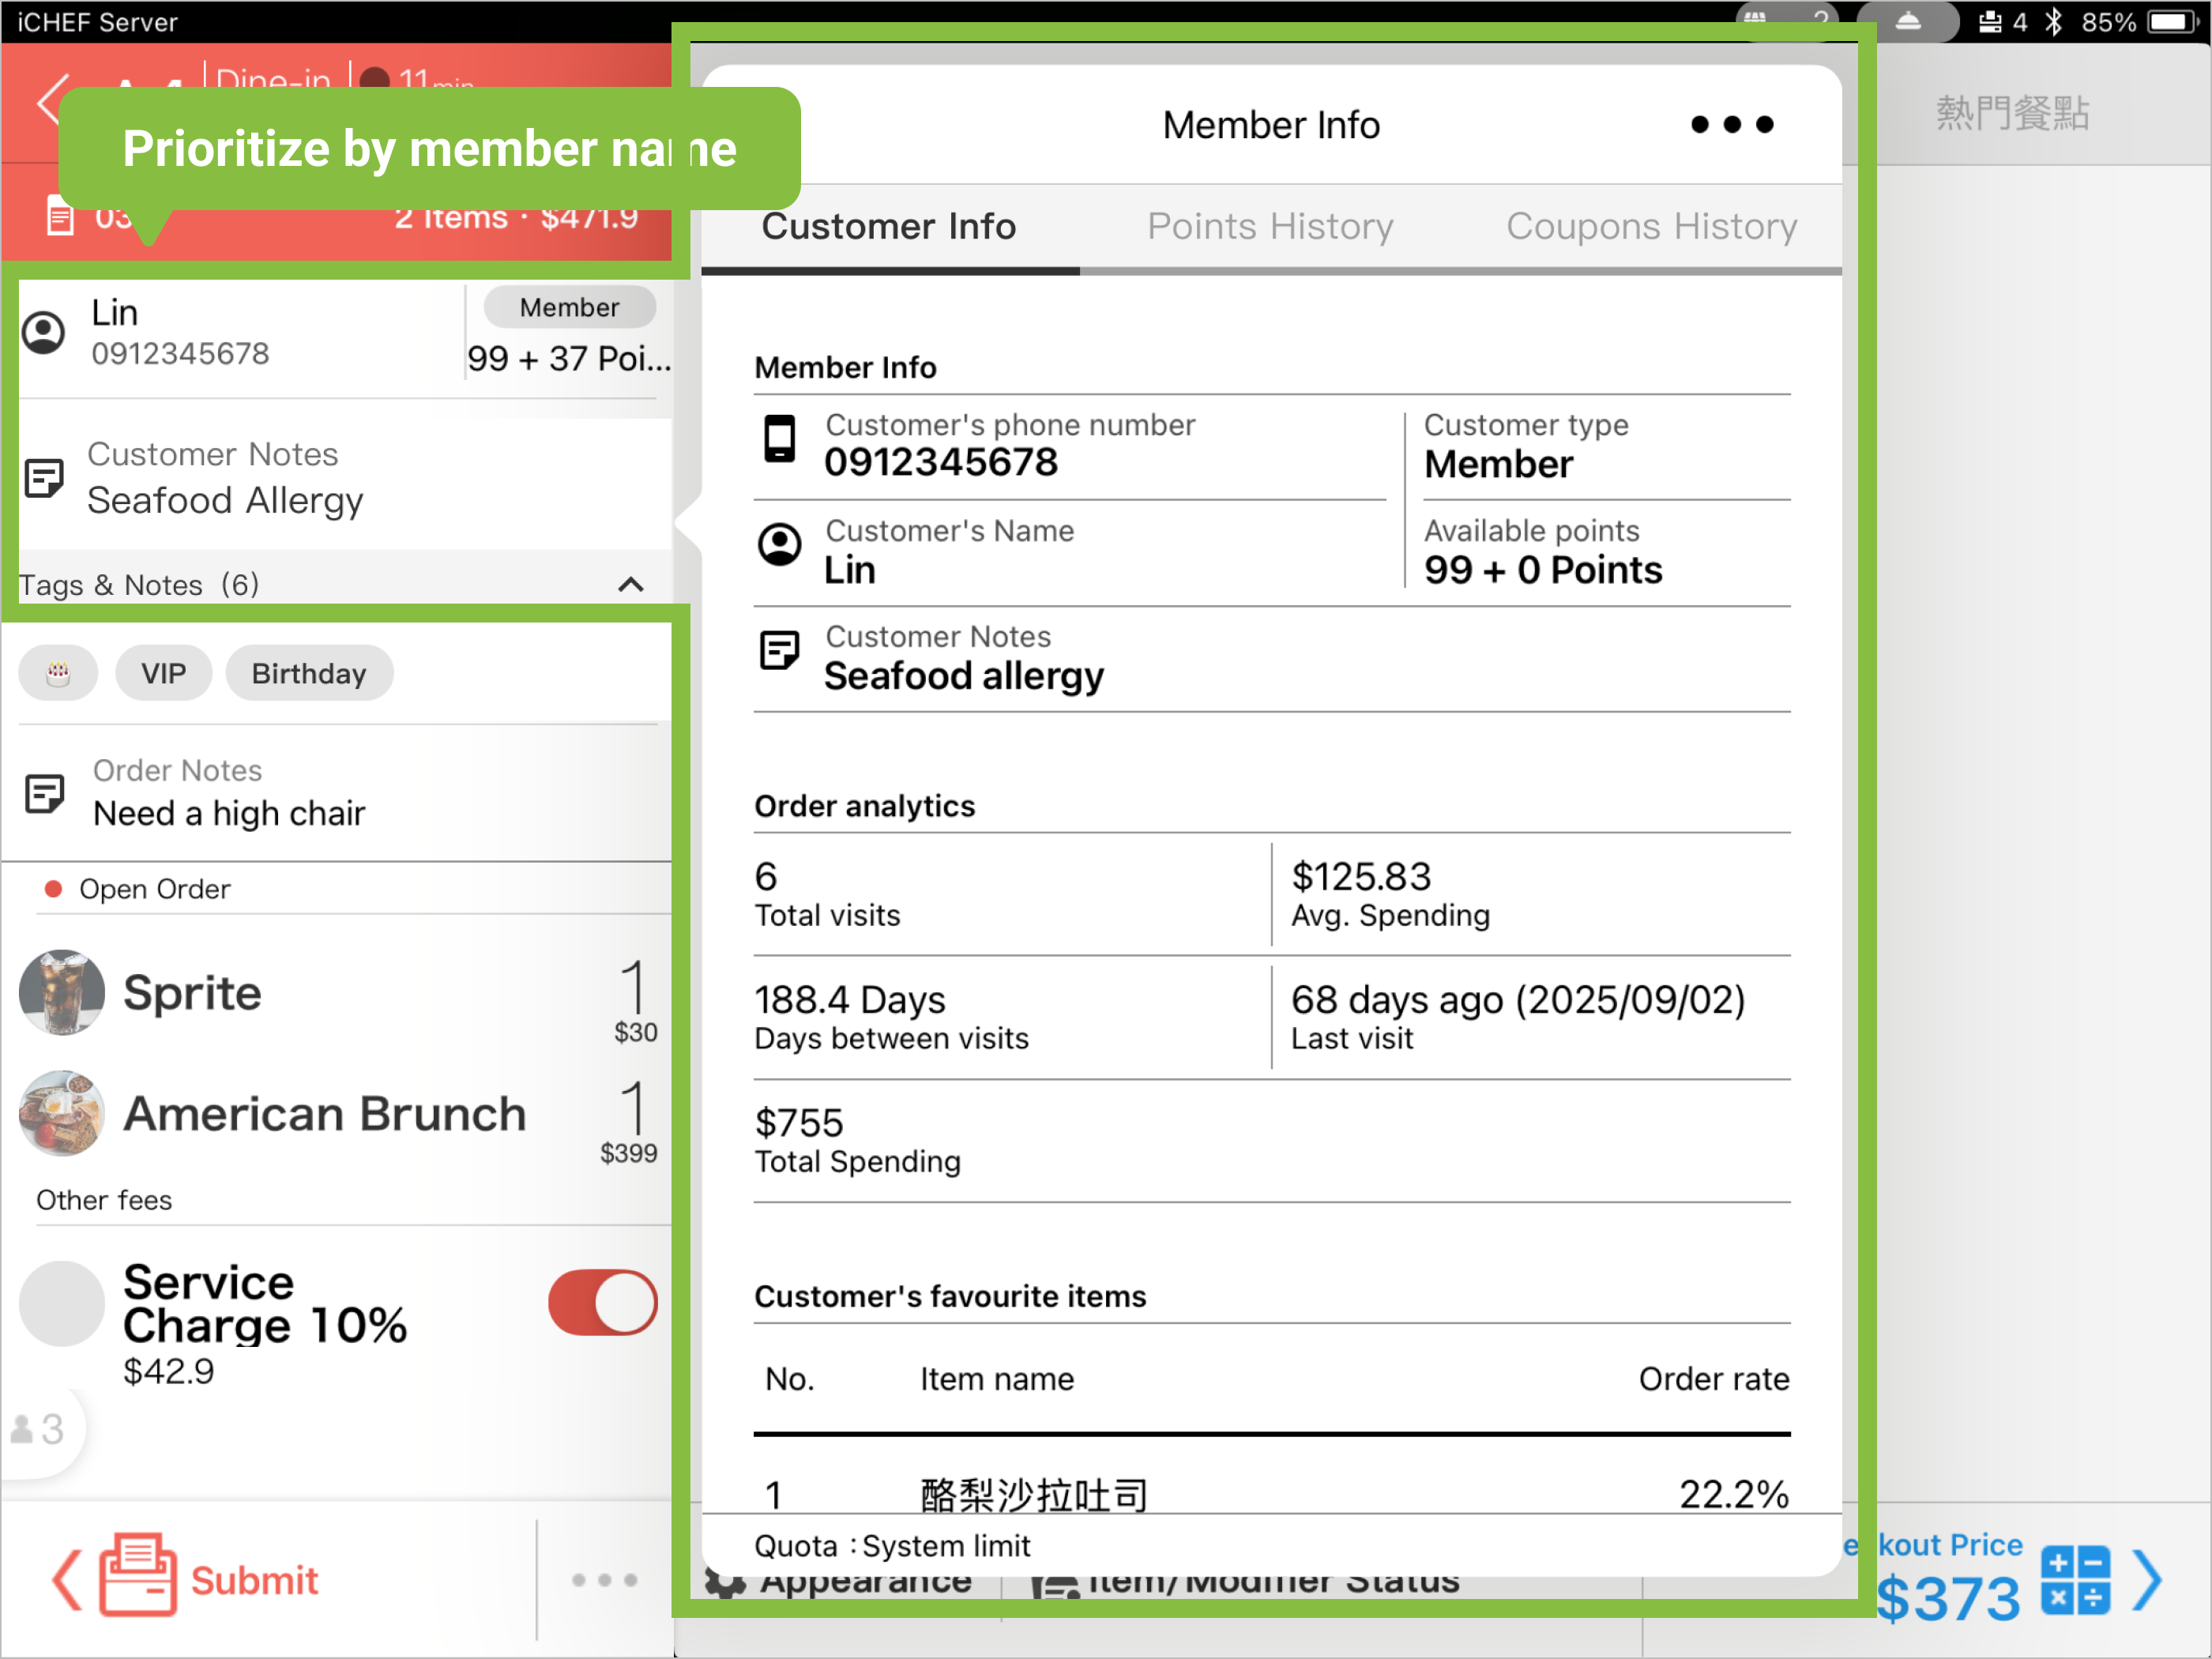
Member Data Integration
When creating an order, the system will automatically match the reservant’s phone number to existing customer data.
- Existing Customer Data: A [Member] or [General Customer] tag will be displayed. The system will integrate and display existing member data.
- Name: Based on the member’s data.
- Phone Number: Must be the same phone number for this member data to be integrated.
- Customer Notes: Will summarize all the customer notes for that member.
- Guest Count: The guest count for this visit, does not affect member data.
- Reservant Tags: The visit’s tag, does not affect member data.
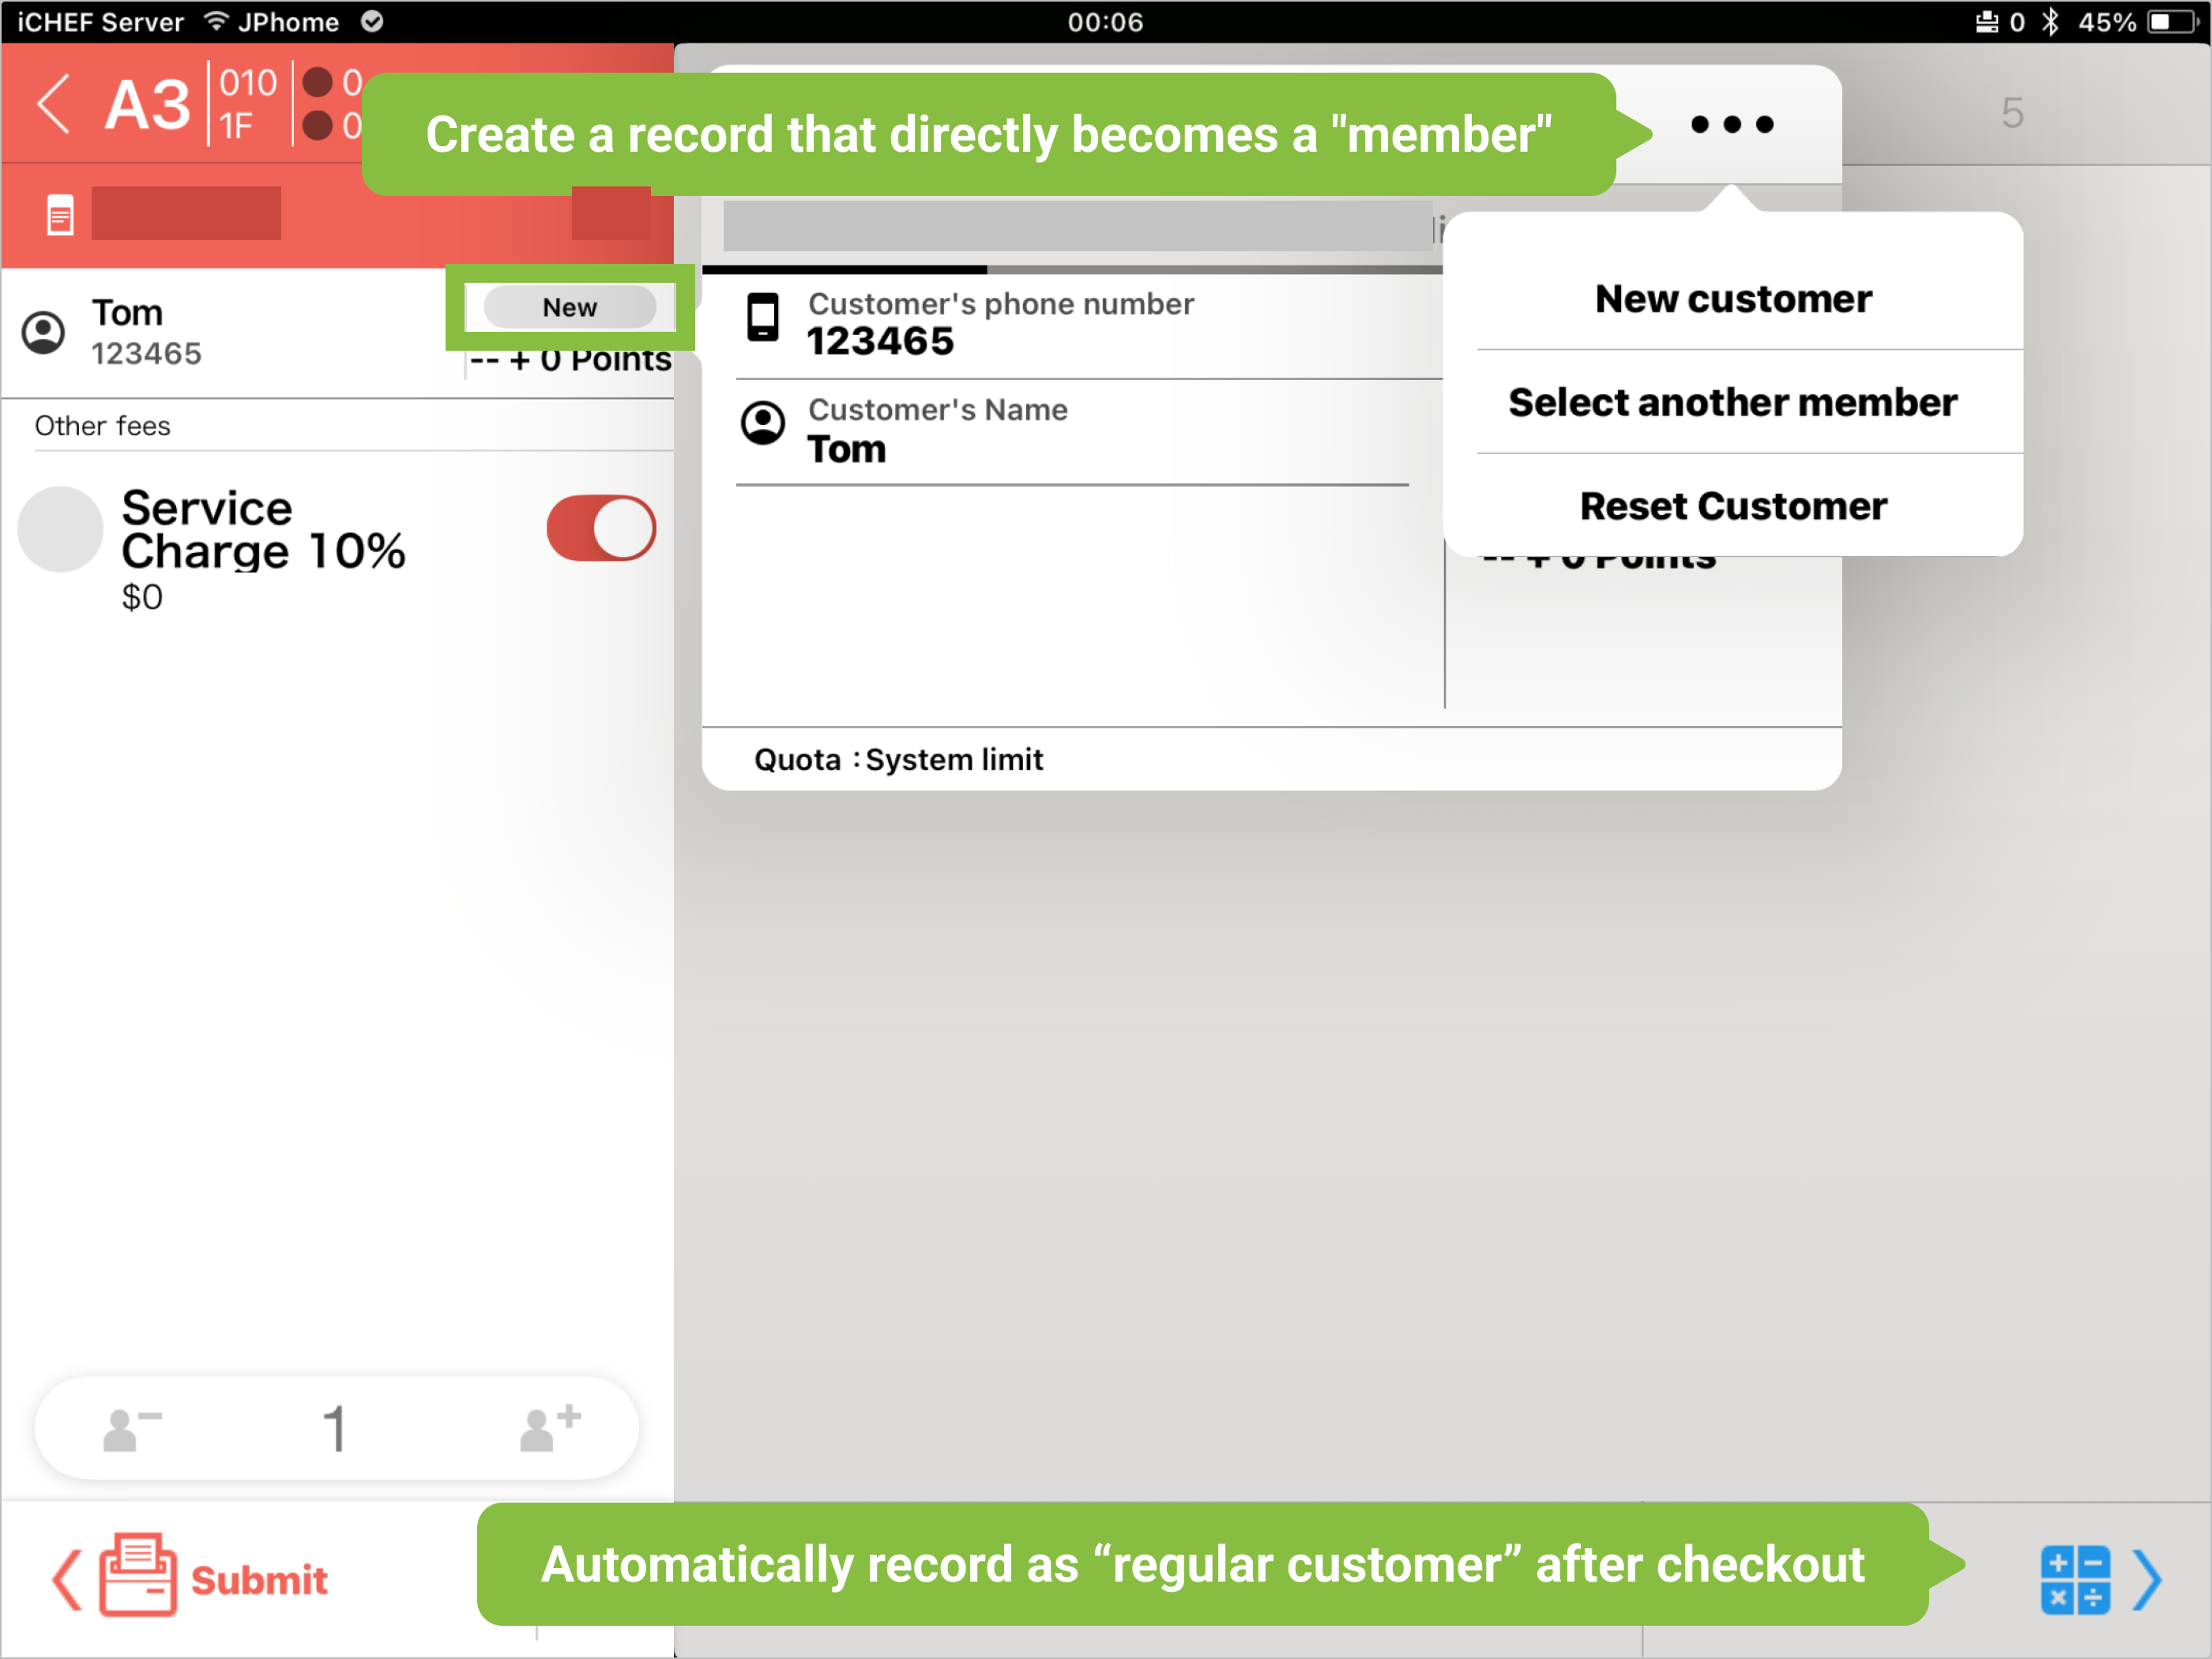
- No Customer Data: A [New Customer] tag will be displayed. Staff can tap [Add Customer Information] before checkout to create data and make this customer a [Member] directly; or after checkout, let the system automatically record them as a [General Customer], discoverable on their next visit.
Customer Using QR Code Ordering
If your store also uses [Mobile Ordering (Dine-in)], the usage method for reserved guests after scanning will vary depending on the QR Code type you use.
- Static QR Code: After scanning, reservation information will be displayed, and by entering the last 3 digits of the reservation phone number, you can access the dedicated order menu.
- Dynamic QR Code: The printed QR Code slip is the dedicated order; therefore, you can directly start ordering after scanning.

