
After the customers place order from the website, iCHEF POS App will notify you through push notification and sound reminder. Accepting orders on iPad, you can then have them sent to the kitchen and enjoy seamless order processing for your restaurant!

New Order Notifications
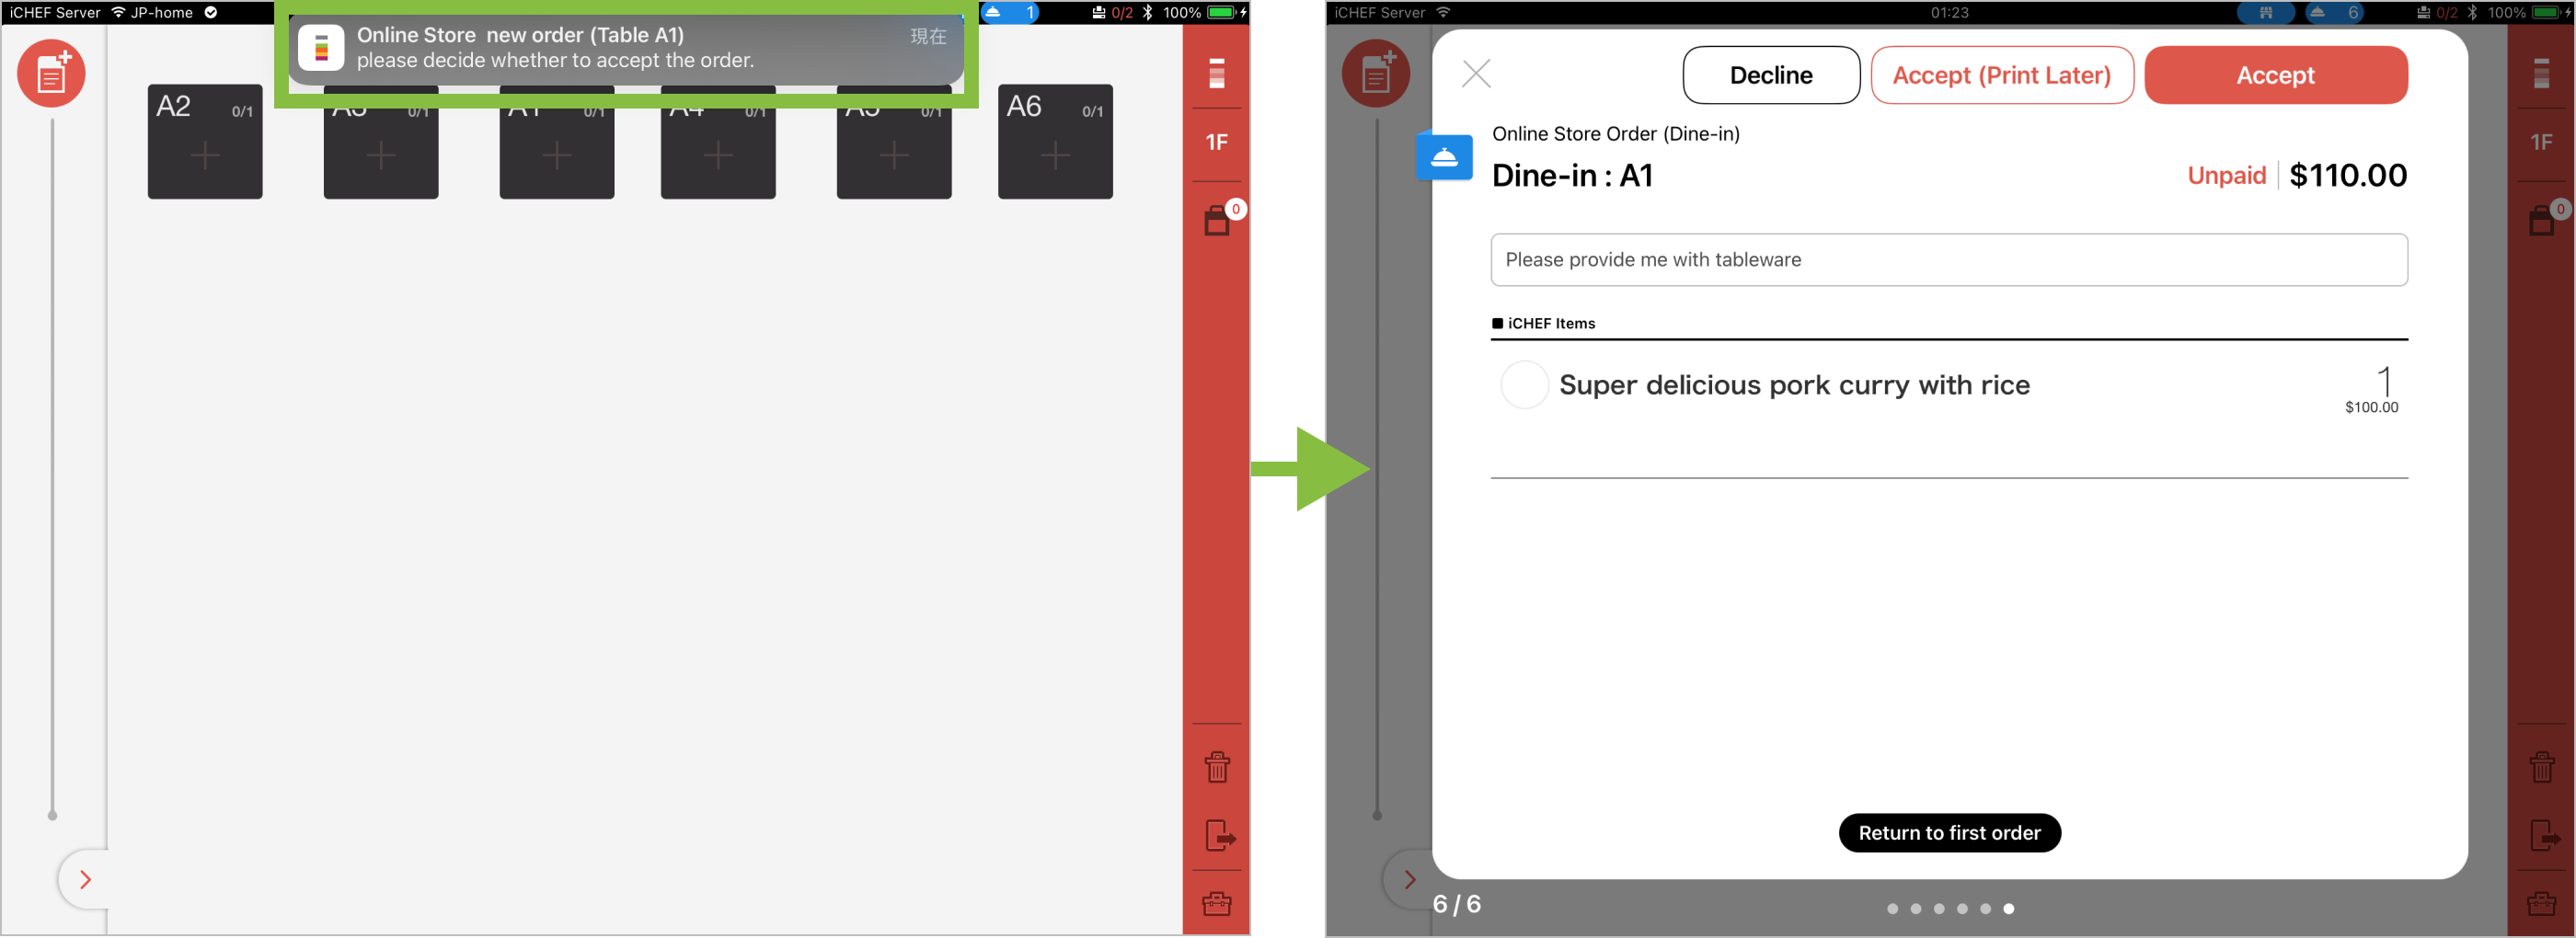
When customers place an online order through the [Online Store], iCHEF POS will notify you in two ways. Tapping the notification or icon will take you to the order acceptance window.
- Push Notifications for Specific iPads: On each iPad, in [Toolbox > Mobile Ordering Management], you can set [Select Tables for Notification] and the alert sound. When an order is received, a push notification will pop up at the top.
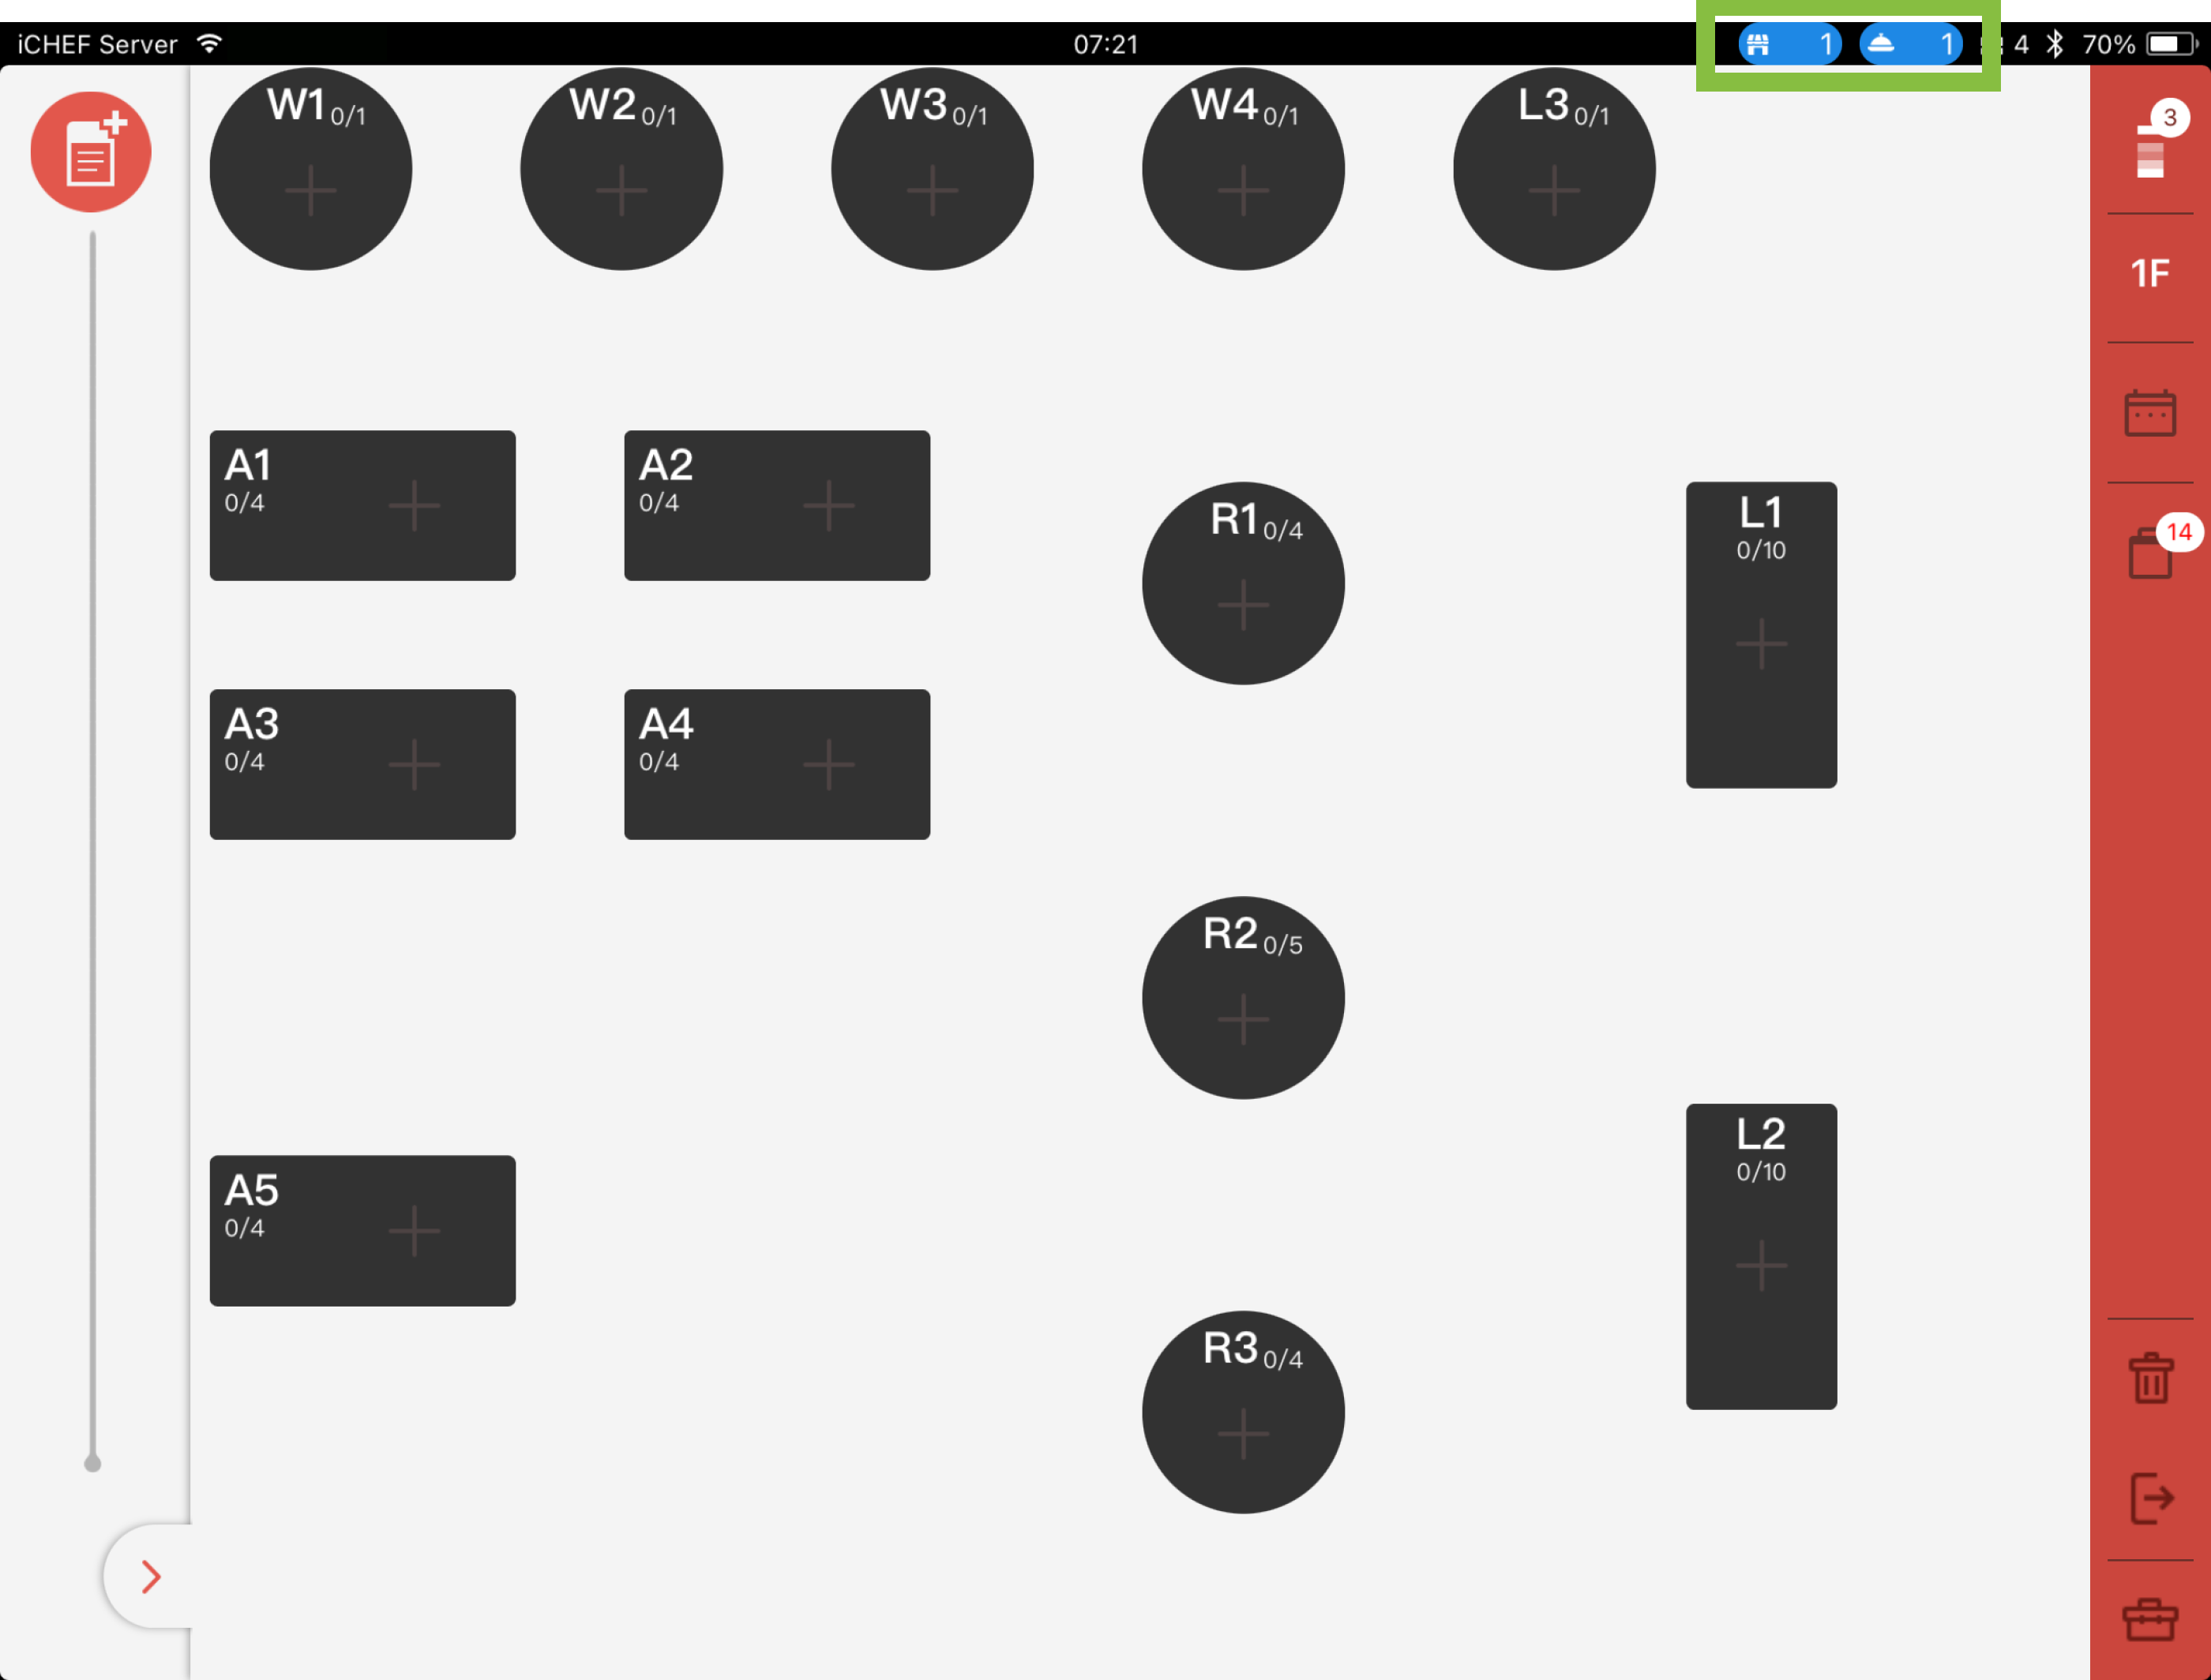
- View in Fixed Status Bar: Regardless of whether order notifications are turned on, all iPads in the store can view the current order acceptance status and the number of pending orders from the system status bar at the top of the iCHEF POS App.
- Blue: Mobile Ordering enabled.
- Gray: Mobile Ordering disabled.
- Number: The number of orders which are to be processed.

Accepting Orders
Orders from Dine-in QR Code Ordering can be configured based on store needs to use [Auto-Accept] to skip the acceptance screen and directly Print Order, speeding up the preparation process; or orders can be manually accepted via the [Order Confirming Window] and printed after confirming the meal items or checking out.

Adjusting Order Acceptance Mode
Configure [Auto-Accept] and the [Accept (Print Later)] option on the acceptance screen via the iCHEF POS App and the Backend. Settings will sync automatically:
➤ POS: Toolbox > Mobile Ordering Management > Dine-in
➤ Backend:Online Store > Mobile Ordering (Dine-in) > Feature Status

When using [Postpay] if the auto-accept option is set to [Paid Orders Only] manual acceptance is still required, as all orders are Outstanding (unpaid).
Orders that are not processed via Auto-Accept will enter the Order Confirming Window. Please manually confirm whether to accept the order.
Manually Accepting Orders
The Order Confirming Window will sort orders by the time they were placed by the customer. Accepted orders will be automatically added to the corresponding dine-in table. The selected status will also be synced to the website for the customer to view.
If you select [Accept (Print Later)] you can send the order to the kitchen via the ordering page later when you confirm that meal preparation should begin.

If you are unable to accept orders, please follow the instructions shown on the screen or refer to more detailed solutions.
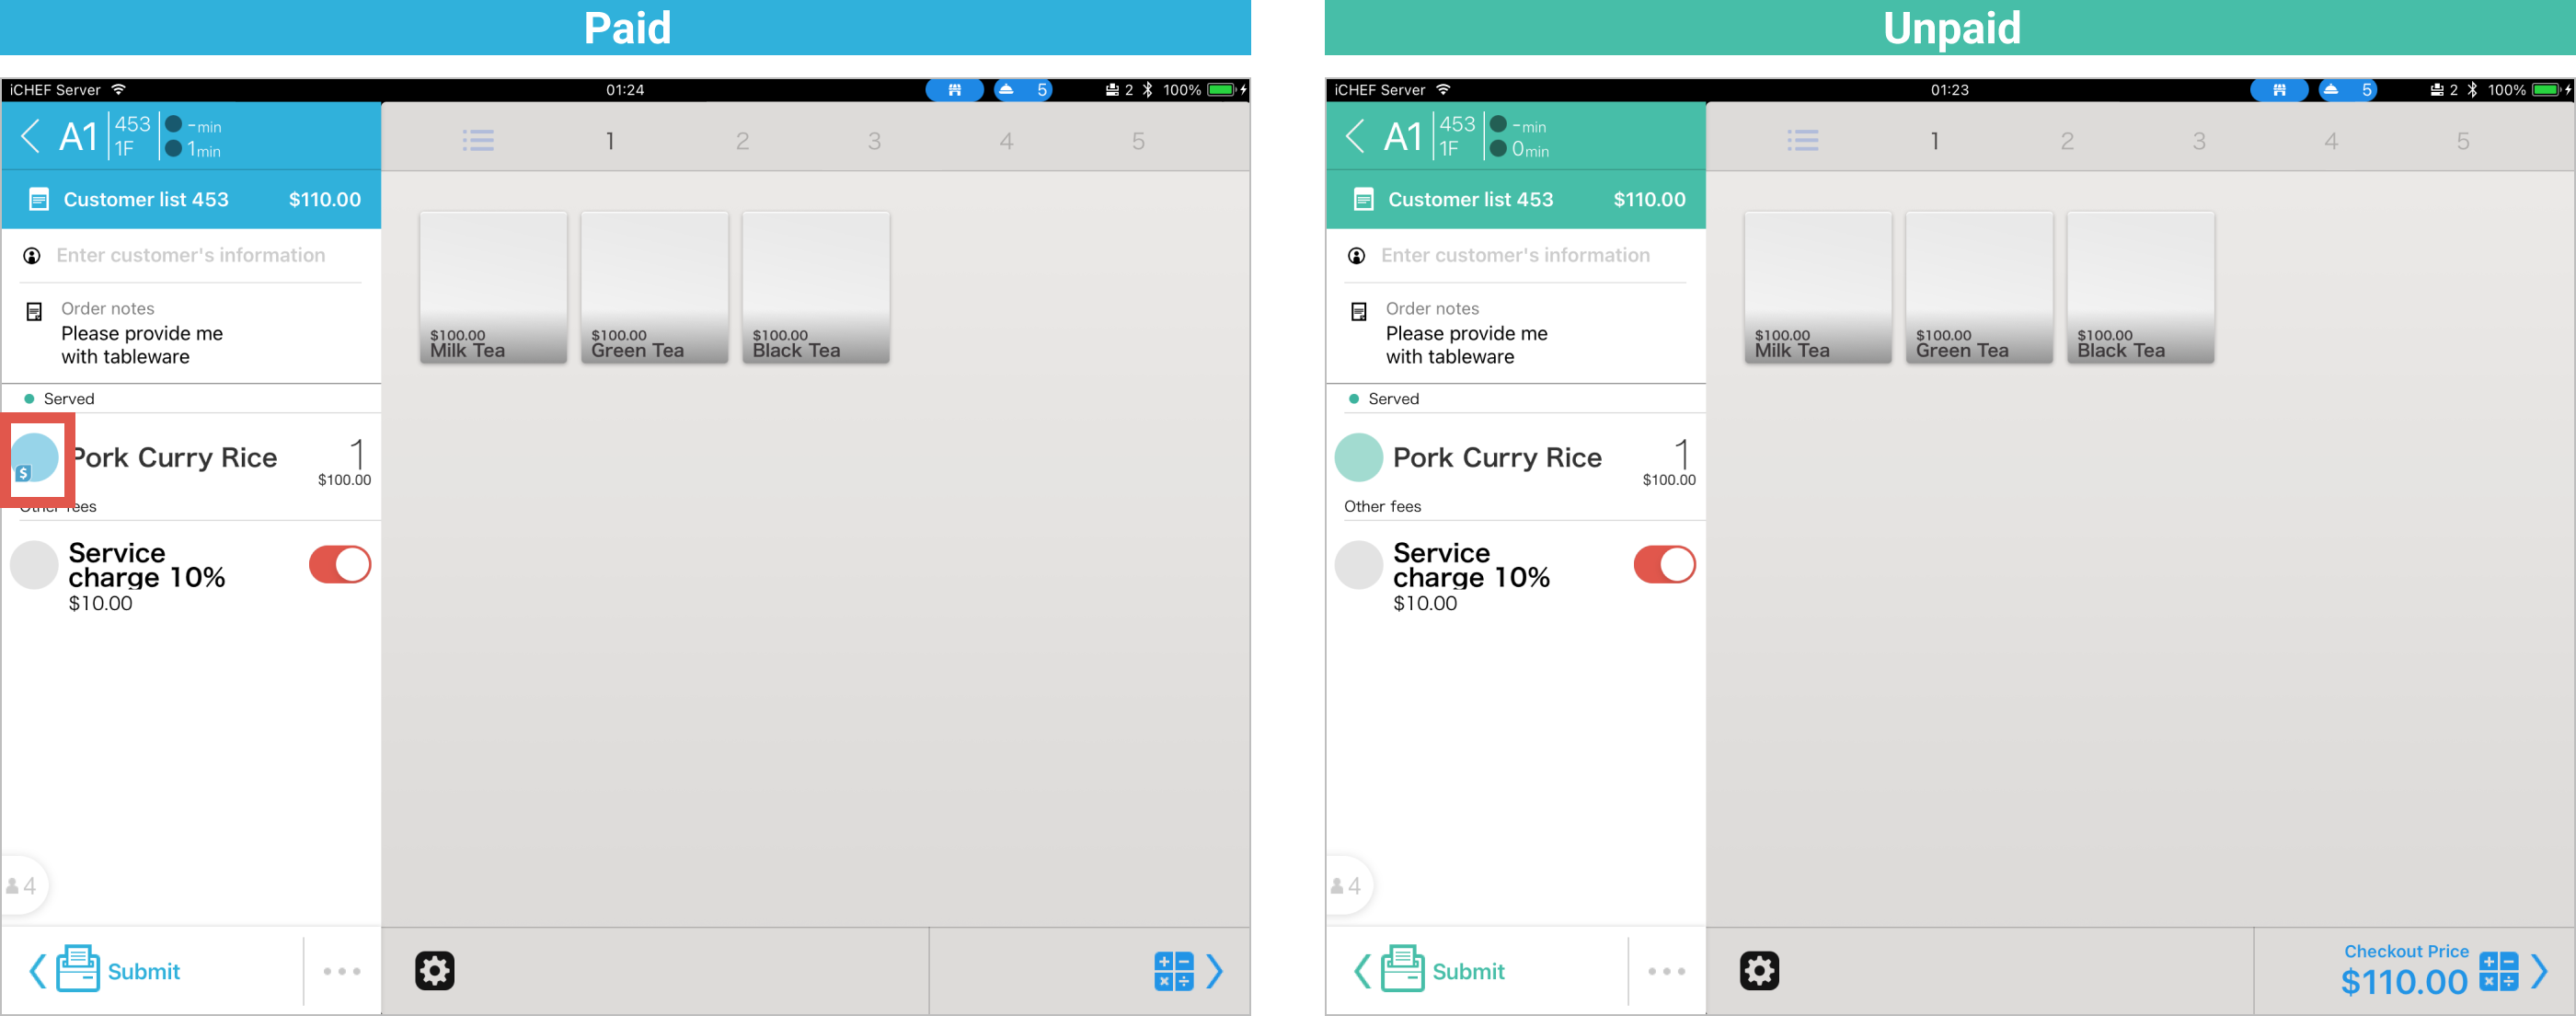
If you have enabled the function of online payment, you can identify the payment status according to the color and symbol shown for the order.
- Paid: It shows blue and a coin.
- Unpaid: It shows green, and the customer can check out via one of the payment methods offered on iCHEF POS App.
The way of adding items depends on the form of QR Code applied.
- Static QR Code: Please ask the customer to use the same phone by which he/she placed the first order and scan the same QR Code to add items.
- Dynamic QR Code: Please ask the customer to scan the dynamic QR Code exclusively for him/her to add items.

We suggest that customers place orders with the browsers like Chrome, Safari or Edge instead of the built-in browsers in the apps such as LINE or Facebook to avoid any error.
Customers are free to order additional items through the website before checkout. For the restaurant’s staff, this action can be done by adding items to the order displayed on the POS. The order is displayed as the example below when including additional items:
- Order note: It will be added to the note column on the ordering page of POST in order.

- Ordered items: After accepting an order, the system will display the items by category and send the order to the kitchen automatically.
Swipe down on the column of items to expand the details for each addition. ([Sent 0] indicates the original order, [Sent 1] indicates the first addition, and so forth.)

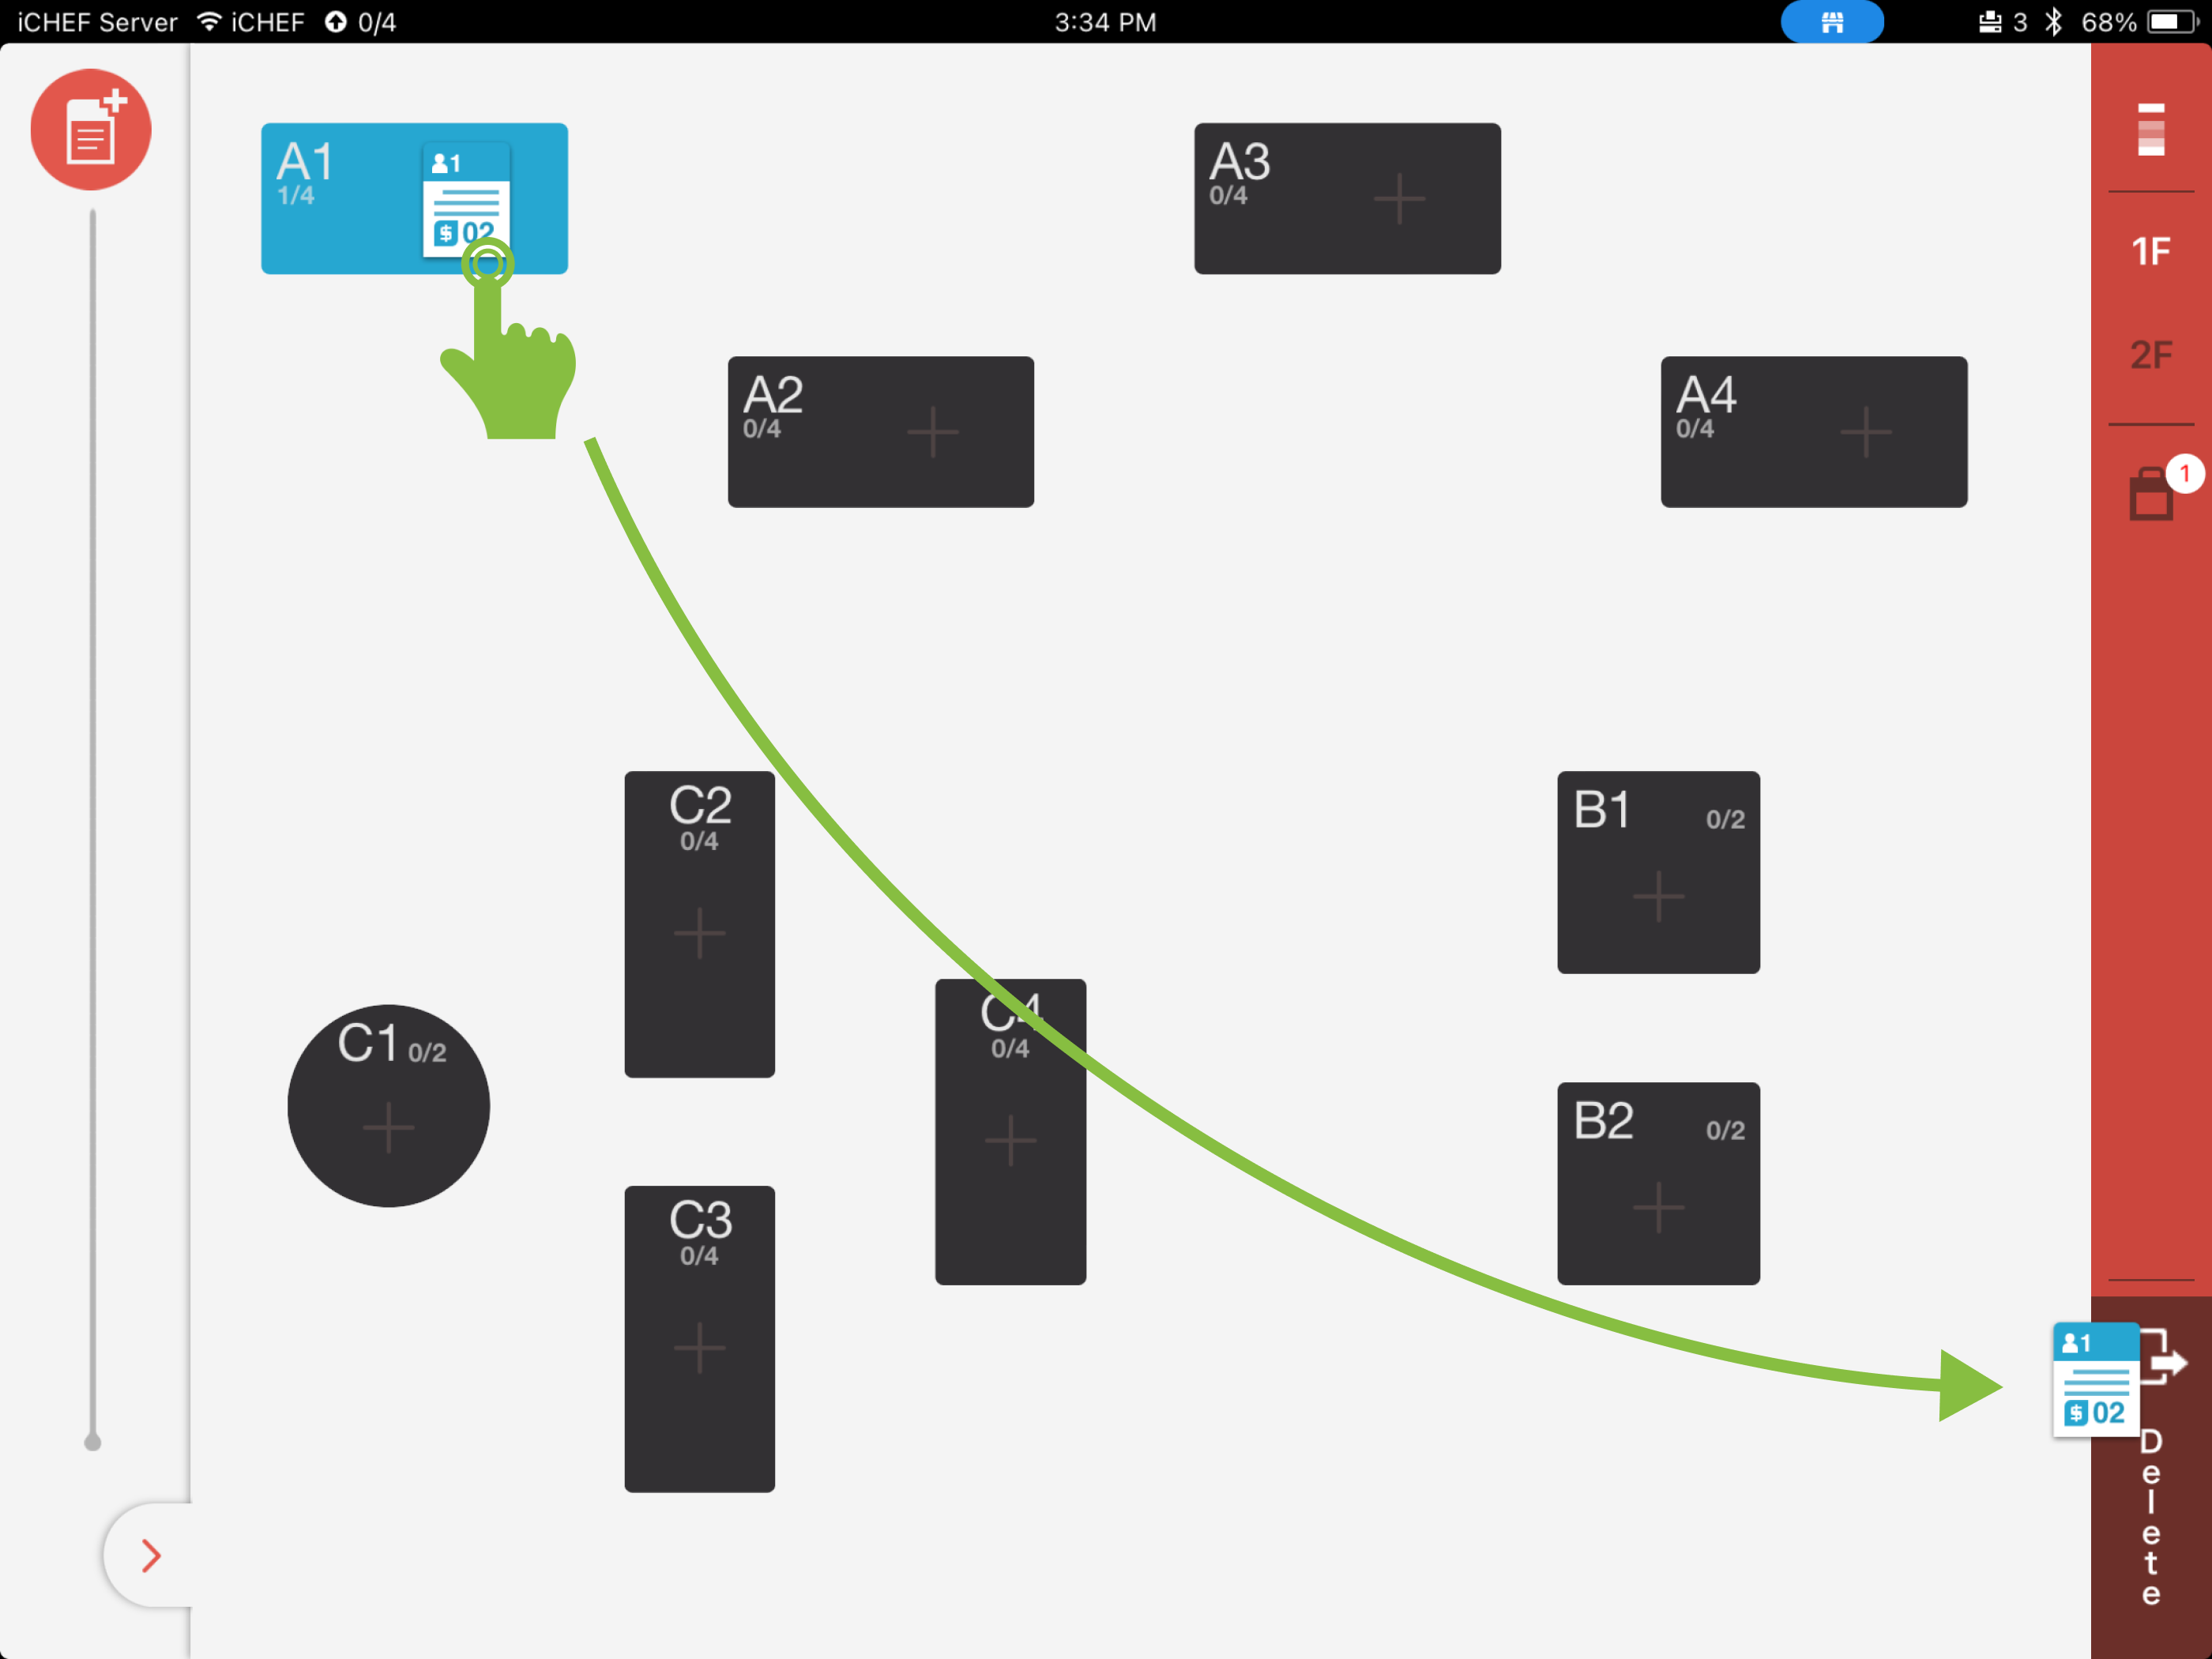
Close Orders
After the customers have finished dining and checked out, you can drag the order to close it.
If you set the [Payment Timing] as [Postpay] for customers to check out after dining, you can go to the backend and find [Shop Management] > [Restaurant Flow Setting], and enable the [Automatic exit] under [Dine In Setting]. In this way, the system will close the orders automatically when the customers complete their checkout to increase the operational efficiency for your restaurant!

The function of automatic exit is not applicable to the “Prepay mode for online store” and the dine-in orders created by POS on-site.